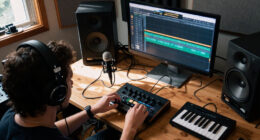
Set up a studio condenser microphone to record vocals or acoustic instruments with an audio interface and recording software. This guide is for beginners who know how to open a recording project but have not connected or adjusted this type of microphone before. Allow about 20-30 minutes for setup and a short test recording.

Get audio and creator gear delivered free with Prime
- Fast, free delivery on millions of items
- Prime Video, Amazon Music and more included
- Member-only deals all year

RØDE NT1 Signature Series Studio Condenser Microphone, Black
- ✔ Connectivity: XLR
- ✔ Capsule: HF6 1-inch true condenser
- ✔ Polar pattern: Cardioid, unidirectional

Audio-Technica AT2020 Cardioid Condenser XLR Studio Microphone
- ✔ Microphone type: Condenser
- ✔ Polar pattern: Cardioid, unidirectional
- ✔ Connectivity: Wired XLR, 3-pin XLRM

Mackie EM-91C Large-Diaphragm Condenser Microphone
- ✔ Connectivity: XLR
- ✔ Capsule type: Large-diaphragm condenser
- ✔ Polar pattern: Cardioid, unidirectional
Difficulty: Beginner | Time: 20-30 minutes
What You’ll Need
Tools & Materials:
- Studio condenser microphone
- Audio interface with a microphone input and phantom power
- XLR microphone cable
- Microphone stand and clip or shock mount
- Headphones
- Computer with recording software
Knowledge:
- Basic computer audio settings
- How to create or open a track in recording software
Check the microphone manual for its power requirements. Most XLR studio condenser microphones need 48-volt phantom power from the interface. Some models use a separate power supply or do not accept phantom power, so follow the model’s instructions. Keep speakers muted while connecting equipment to avoid loud pops.
RØDE NT1 Signature Series Studio Condenser Microphone, Black
The RØDE NT1 Signature Series takes the top spot because its specified 4 dB self-noise gives us a concrete reason to favor it for quiet vocal takes, acoustic instruments, and voice-over work. A low noise floor can make subtle details easier to capture without the microphone’s own noise competing as much with the source. Its HF6 one-inch true condenser capsule and cardioid pattern place it firmly in the familiar large-diaphragm studio role.Compared with the AT2020, the NT1’s standout advantage is its stated noise figure and more complete included setup: the SM6 shock mount has a pop filter, and the box also supplies a six-meter XLR cable and dust cover. The AT2020, by contrast, is described around high-SPL handling and a wide dynamic range. Against the Mackie EM-91C, the NT1 offers more specific capsule and noise information, making it easier to judge for delicate recording. The tradeoff is the usual XLR condenser requirement: we need compatible equipment, and the mic itself does not simplify a setup without an interface or mixer.
Pros:
- Very low stated 4 dB self-noise for quiet recording sources.
- HF6 one-inch true condenser capsule and cardioid pickup.
- Includes shock mount with pop filter, six-meter XLR cable, and dust cover.
- Handles high sound pressure levels, according to the supplied product details.
Cons:
- Requires compatible XLR equipment and phantom power from the recording setup.
- XLR connection is less convenient than direct USB for simple computer recording.
Best for: Home-studio vocalists, voice-over artists, and instrumentalists prioritizing low stated self-noise and a ready-to-mount accessory bundle.
Not ideal for: Buyers without XLR equipment or those who need a USB microphone for direct computer connection.
Bottom line: We recommend the NT1 as the strongest all-around studio choice here for buyers who value low self-noise and a complete accessory bundle.
“We recommend the NT1 as the strongest all-around studio choice here for buyers who value low self-noise and a complete accessory bundle.”
Audio-Technica AT2020 Cardioid Condenser XLR Studio Microphone
The Audio-Technica AT2020 is the practical pick for a project studio that records more than one kind of source. Its low-mass diaphragm is designed for extended frequency and transient response, while the supplied description also calls out wide dynamic range and high-SPL handling. That combination makes it a plausible fit for voices and louder instruments when we want one wired condenser to cover varied sessions.It does not match the NT1’s stated 4 dB self-noise, and its listed package is more basic: we get a stand mount, threaded adapter, and pouch, rather than the NT1’s shock mount and pop filter. Compared with the Mackie EM-91C, the AT2020 has more supplied performance context, including its diaphragm design and high-SPL positioning. Still, its XLR-only connection and phantom-power requirement mean it is best for an existing interface or mixer, not a plug-and-play computer setup. We would choose it for flexibility across sources, while buyers focused on the quietest stated operation should lean toward RØDE.
Pros:
- Designed for extended frequency and transient response with a low-mass diaphragm.
- High-SPL handling and wide dynamic range suit varied recording sources.
- Includes stand mount, threaded adapter, and protective pouch.
- Metal enclosure and standard three-pin XLRM output.
Cons:
- Requires phantom power from compatible recording equipment.
- The listed bundle does not include a shock mount, pop filter, or XLR cable.
Best for: Home and project-studio owners who need a cardioid condenser for voice and instruments and already have phantom-powered XLR inputs.
Not ideal for: Beginners seeking an all-in-one recording kit with shock isolation and a pop filter, or anyone without phantom power.
Bottom line: We’d choose the AT2020 for a flexible project-studio workhorse when the interface is already in place and source variety matters.
“We’d choose the AT2020 for a flexible project-studio workhorse when the interface is already in place and source variety matters.”
Mackie EM-91C Large-Diaphragm Condenser Microphone
The Mackie EM-91C earns its place as a bundled alternative for buyers who want a large-diaphragm condenser without sourcing a shock mount and XLR cable separately. Its cardioid pattern is intended to reduce ambient pickup, which can help keep attention on a close vocal or instrument in a home setup. The stainless-steel enclosure is another practical point for a mic that may move between recording spaces.Compared with the NT1, the Mackie package is simpler: it lists a shock mount and cable, but not the NT1’s pop filter or dust cover, and it provides no comparable 4 dB self-noise specification. The AT2020 is described with more detail about diaphragm response and high-SPL handling, so we have less evidence here for judging the EM-91C across louder or more demanding sources. There is also an inconsistency in the supplied power details, which list both one AAA battery and corded electric power. We should verify the manual and required connection before buying; its XLR connection still calls for compatible studio equipment.
Pros:
- Large-diaphragm condenser format for studio vocals and instruments.
- Cardioid pickup is intended to reduce ambient sound.
- Shock mount and XLR cable are included.
- Stainless-steel enclosure.
Cons:
- Supplied product information does not specify self-noise or detailed frequency response.
- Power information is inconsistent, listing both an AAA battery and corded electric power.
- The listed bundle does not include a pop filter.
Best for: Newer home-studio owners who want a large-diaphragm cardioid mic with a shock mount and XLR cable included.
Not ideal for: Buyers who need clearly specified self-noise performance, a pop filter in the box, or unambiguous power requirements.
Bottom line: We see the EM-91C as a convenient bundled entry point, provided buyers confirm its power requirements and accept thinner performance documentation.
“We see the EM-91C as a convenient bundled entry point, provided buyers confirm its power requirements and accept thinner performance documentation.”
As an Amazon Associate we earn from qualifying purchases.
Before You Start
Choose a quiet room and switch off nearby fans or noisy appliances if practical. Place the microphone away from speakers to reduce feedback. Turn the interface gain down and switch phantom power off before connecting or disconnecting the microphone. If you are using a ribbon microphone or other gear with specific power restrictions, check its instructions before enabling phantom power.
Step-by-Step Instructions
Step 1: Mount the microphone
Attach the microphone clip or shock mount to a stable stand, then secure the microphone in it. Point the microphone’s front toward the sound source; on most side-address models, the front is marked with a logo or indicator. Attach a pop filter if you are recording speech or vocals.
Tip: Do not hold the microphone by its grille or let the cable pull on the connector.
Check: The microphone sits securely, faces the intended source, and does not wobble when you lightly adjust the stand.
Step 2: Connect the microphone to the interface
With phantom power off and the input gain low, connect one end of the XLR cable to the microphone and the other to the interface’s microphone input. Connect headphones to the interface for monitoring.
Tip: Use the XLR microphone input, not an instrument input or headphone jack.
Check: Both cable ends are firmly seated, and the interface is connected to the computer.
Step 3: Select the interface in your recording software
Open your recording software and select the audio interface as the input and output device in its audio settings. Create a mono audio track and choose the interface input that matches the socket you used. Arm the track for recording.
Tip: If the interface does not appear, connect it directly to the computer and check whether its driver or system audio setup is required.
Check: The track is set to the correct mono input and shows an input meter when you speak or make a sound near the microphone.
Step 4: Enable the required microphone power
Confirm the microphone’s power requirements, then switch on 48-volt phantom power on the interface if the microphone requires it. Wait a few seconds for the microphone to power up before raising the gain.
Tip: Phantom power is often labeled “48V.” Turn it off before unplugging the XLR cable.
Check: The microphone responds on the track meter when you speak or play, with no unexpected crackling or loud pops.
Step 5: Position the microphone
Place the microphone about 15-30 cm (6-12 inches) from the sound source to start. Aim the front toward the source, and place the pop filter a few centimeters in front of the microphone when recording vocals. Adjust the distance to balance direct sound with room sound.
Tip: Move closer for a more direct sound, but listen for extra bass or plosive bursts. Move farther away if the recording sounds boomy or captures too much room.
Check: You can hear the source clearly in the headphones, with little distracting room noise.
Step 6: Set a safe input level
Ask the performer to sing or play at the loudest level expected during the take. Raise the interface gain gradually while watching the recording meter. Aim for peaks around -12 to -6 dBFS, and keep the meter below 0 dBFS.
Tip: If the meter clips, lower the interface gain. Lowering the track fader after recording does not repair a clipped input.
Check: The meter moves clearly during the loudest parts and does not reach the clipping indicator.
Step 7: Record and review a test
Record 10-20 seconds of typical material. Listen back through headphones for clipping, hum, hiss, plosive bursts, and room reflections. If you hear a problem, change one thing at a time, such as microphone position, gain, or room noise, then record another test.
Tip: Keep the test at the same performance volume as the planned recording so the level check is useful.
Check: The playback is clear and undistorted, and the recorded level is strong without clipping.
Common Mistakes to Avoid
- Placing the microphone too far away in a reflective room. — Start 15-30 cm away and listen for room echo; move closer or choose a quieter, softer room.
Troubleshooting
Problem: The track meter shows no signal.
Solution: Check that the XLR cable is fully seated, the correct interface input is selected, the track is armed, and the interface is selected in the software. If the microphone requires phantom power, confirm that it is on.
Problem: The recording sounds distorted or the meter clips.
Solution: Lower the interface’s input gain and record another test at the loudest expected performance level. Check for a pad switch on the microphone or interface if the source is especially loud.
Problem: The recording has a low hum or buzz.
Solution: Move the microphone cable away from power adapters and other electrical cables. Check the cable connections, try another XLR cable if available, and mute nearby equipment one device at a time to locate the noise.
Problem: Vocals have sharp bursts of air or too much room echo.
Solution: For bursts, use a pop filter and angle the microphone slightly off the direct airflow. For echo, move closer to the microphone and reduce reflections with soft furnishings or a different recording position.
What Success Looks Like
The microphone is securely mounted and connected to the correct interface input. The recording software receives a mono signal, the loudest test peaks stay below 0 dBFS, and playback sounds clear without obvious clipping, hum, or distracting room echo.
Next Steps
Save the project and keep the tested microphone position and gain setting for the session. Turn phantom power off and lower the gain before disconnecting the microphone. If you change the room, source, or performance volume, record a new test and set the input level again.
Frequently Asked Questions
Does every studio condenser microphone need 48-volt phantom power?
No. Many XLR condenser microphones require 48-volt phantom power, while some use a dedicated power supply or another power method. Check the microphone manual before switching it on.
Can I connect a condenser microphone directly to my computer?
Most XLR studio microphones need an audio interface or a compatible preamp to provide a microphone input and the required power. A USB condenser microphone connects directly by USB and follows its own setup instructions.
How far should I stand from the microphone?
Start about 15-30 cm (6-12 inches) away. The best distance depends on the voice or instrument, room sound, and microphone. Record a short test and adjust while listening.
What recording level should I aim for?
Set gain so the loudest expected peaks land around -12 to -6 dBFS, staying below 0 dBFS. This leaves room for performance changes and avoids digital clipping.