TL;DR
Listen free for 30 days with Audible
Thousands of audiobooks and originals — cancel anytime.
Start your free trialAs an affiliate, we earn on qualifying purchases.
Camera-top lights are great for speed and close-up shots, but they often flatten faces by removing shadows that define contours. Use them as fill, move them off-axis, and control spill to get better results. They’re less helpful when depth and texture matter more than convenience.
If you’ve ever shot a quick interview or a solo vlog, you know the feeling. You want fast, reliable light that keeps up with your shoot. But that tiny light perched right above your lens? It can be a hero or a villain.
Camera-top lights are a staple for creators working on tight schedules, packed locations, or mobile shoots. They rescue faces in dark corners, add catchlights, and keep things simple. But they also have a sneaky downside: they flatten faces, strip away texture, and make your shots look less alive.
In this guide, you’ll learn exactly when camera-top lights shine and when they sink your image into a flat, dull look. Plus, practical tips to get the most out of these handy tools without falling into common traps.
Use camera-top lights mainly as fill, not the main source, to avoid flattening faces.
Position the light slightly off-axis and above eye level for natural modeling.
Control spill and aim for a larger apparent source to soften shadows.
Monitor exposure carefully—distance and brightness change fast due to the inverse-square law.
Test for flicker and spectral mismatches before shooting in critical scenes.
Camera-Top Lights: When They Help and When They Flatten
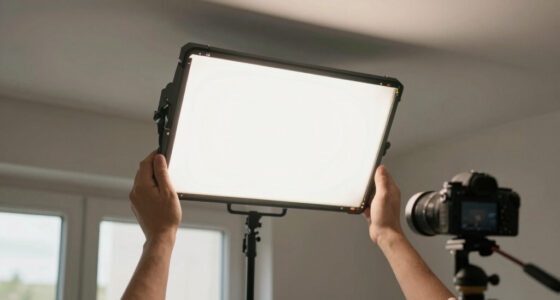
A tiny light above the lens can rescue a face, add a catchlight, and keep a fast-moving shoot alive. Push it too hard, however, and the same near-axis beam erases the shadows that reveal contour, texture, and atmosphere.
Fast light for imperfect conditions
Camera-top fixtures excel when usable footage, mobility, and reaction time matter more than carefully sculpted illumination.
Events and breaking action
Cover weddings, news, documentaries, and backstage moments without stands or a static lighting setup.
Interviews and vox pops
A modest lift makes faces readable while keeping the location’s existing atmosphere visible.
Bright backgrounds
Frontal fill balances faces against windows, sunsets, stages, and other high-contrast backgrounds.
Faces, hands, and details
Compact output is most effective nearby, where a small fixture can deliver meaningful exposure.
Follow shots
The beam travels with the camera, keeping direction predictable as the operator follows the subject.
Catchlights and focus
Low output brings life to the eyes and can assist autofocus or monitoring in very dark spaces.
Shadow is shape information
When light arrives from almost the same direction as the lens, the camera cannot see many side shadows. Cheekbones, pores, jawlines, and surface relief become less distinct.
Light and lens share the angle
Frontal illumination fills the shadows visible to the camera. The result can feel smooth, direct, and two-dimensional.
A small shift restores contour
Move the source above and to one side. The camera now sees gradual shadow transitions that describe facial structure.
Choose the look the story needs
Near-axis light is not inherently wrong. Beauty work may welcome reduced texture; dramatic portraiture usually needs stronger direction and separation.
| Lighting choice | Speed | Facial depth | Texture | Spill control | Best use |
|---|---|---|---|---|---|
| Direct on-camera key | ✓ Excellent | ✗ Low | ✗ Suppressed | ~ Limited | Emergency coverage |
| Low-output on-camera fill | ✓ Excellent | ✓ Preserved | ✓ Natural | ~ Moderate | Mobile interviews |
| Light on a short side arm | ✓ Fast | ✓ Improved | ✓ Visible | ~ Moderate | Run-and-gun portraits |
| Bounced or enlarged source | ~ Slower | ✓ Gentle | ✓ Refined | ~ Location-dependent | Indoor close-ups |
| Separate off-camera key | ✗ Setup needed | ✓ Strong | ✓ Defined | ✓ Precise | Controlled portraiture |
Five moves that keep depth alive
Make each adjustment in order. The goal is not maximum brightness—it is enough detail with believable direction.
Read the ambient
Identify the existing key direction, color, and mood.
Set minimal fill
Raise facial detail without announcing the added light.
Shift the angle
Move slightly above and beside the lens when practical.
Shape the beam
Diffuse, feather, bounce, grid, or flag the output.
Verify the image
Check skin, glasses, waveform, color, and flicker.
Distance changes exposure faster than instinct suggests
Double the light-to-subject distance and illuminance falls to about one quarter. During close follow shots, a small step can turn clean fill into a hotspot—or make it disappear.
Keep distance consistent, use manual output, and watch zebras or a waveform monitor. Automatic exposure may visibly hunt as the subject moves.
Convenience on one end, dimensionality on the other
Move toward direct light when speed is critical. Move toward controlled, off-axis light when facial structure, surface texture, or atmosphere carries the image.
If the light is obvious, reduce it before adding more.
Start with fill, move off-axis, raise it slightly, enlarge the apparent source, feather the beam, and control spill. Then test for flicker and color mismatch before the critical take.
When camera-top lights save your shoot
Camera-top lights are your best friend when speed, portability, and getting usable footage matter more than perfect lighting. They’re perfect for quick runs, tight spaces, and unpredictable environments.
For example, during a wedding reception, you might not have time to set up a full lighting rig. A small, mounted light can fill in shadows on a bride’s face, add sparkle to her eyes, and keep her from blending into the background. Or in a documentary, a fast-moving interview in a dim room can be lit just enough to make faces clear—without drawing attention.
Other scenarios include:
- Run-and-gun coverage of news, events, or behind-the-scenes work.
- Low-light interviews or vox pops in street settings where you need quick, consistent results.
- Backlit scenes where a frontal fill lifts the face against bright backgrounds like sunsets or stage lights.
- Close-range work where the light only needs to reach nearby faces or hands.
- Follow shots where the light moves with the subject, maintaining consistent exposure.
- Adding catchlights to eyes, giving life and depth with minimal effort.
- Assisting autofocus or focusing in dark environments with a dim, adjustable glow.
In all these cases, the camera-top light acts as a dependable, portable helper. It can rescue shots that would otherwise be unusable or require complicated setups.
As an affiliate, we earn on qualifying purchases.
Why camera-top lights can make faces look flat and lifeless
The downside is that these lights often create a flat, dull look—especially when used as the main or only source. Because they sit directly in front of the face, they illuminate from nearly the same angle as the camera. This reduces the shadows that give faces depth and texture.
For example, imagine a YouTuber filming a close-up. The tiny, frontal light makes her skin appear smooth but also flattens her cheekbones and jawline. The natural shadows that normally define her features vanish, leaving her looking like a wax figure.
Flattening becomes obvious when:
- The light is the only thing illuminating the face.
- The fixture is small and aimed directly at the subject.
- The subject is close to a wall or background that stays dark.
- Skin is oily or reflective, causing glare or hotspots.
- People wear glasses, creating distracting reflections.
- The scene relies on directional or practical lighting for mood or atmosphere.
- The subject is very close to the camera, exaggerating the flatness.
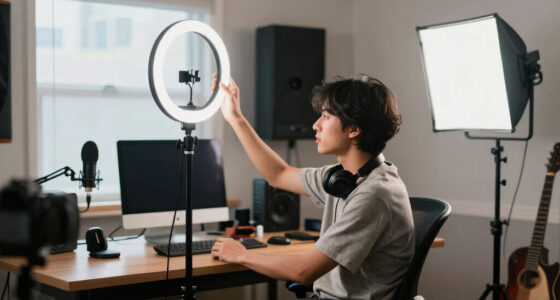
While frontal lighting can be flattering in beauty shots or glamour photography—like ring lights that reduce wrinkles—this effect isn’t always desired. It can make even engaging subjects look dull and two-dimensional.
As an affiliate, we earn on qualifying purchases.
How to make camera-top lights work without killing depth
Want to avoid the flat, dead look? Here’s how to use camera-top lights effectively—without sacrificing texture or dimension.
- Use it as a fill, not the main light. Keep the brightness low enough to reveal details, but not overpower ambient or directional light. Think of it as a finishing touch, not the star.
- Move it off-axis when possible. Use a short arm or flexible mount to place the light slightly above and to one side of the lens. Even a small shift creates more natural modeling and shadow play.
- Raise it above eye level. Light from just above the face feels more natural. Avoid aiming it upward too sharply, which can cast deep shadows under the eyes or chin.
- Make it larger or diffuse the source. Use a bigger diffusion panel or bounce it off a ceiling or wall. This softens shadows and increases apparent source size, reducing the flat look.
- Bounce or diffuse the light. Aim the fixture at a ceiling or wall to create a larger, softer source. Be mindful of wall color—warm tones can add a pleasing glow, while dark or colored surfaces may tint skin.
- Feather the beam. Aim slightly off-center so only the soft edge hits the face, balancing illumination without flattening.
- Control spill with flags or grids. Keep light off backgrounds and nearby objects to prevent unnatural hotspots or spill onto walls and curtains.
- Match the environment’s color temperature. Adjust the light to blend seamlessly with ambient daylight, tungsten, or mixed lighting for more natural results.
These techniques help maintain some shadow and contour, avoiding the dreaded “deer in headlights” effect. Think of it like seasoning: a little goes a long way, and positioning is everything.
As an affiliate, we earn on qualifying purchases.
The physics of exposure: why distance and brightness matter
Camera-top lights follow the inverse-square law: when you double the distance from the subject, the light’s intensity drops to about a quarter. This means small adjustments in distance drastically change how bright a face appears.
For example, leaning in closer for a dramatic headshot makes the face much brighter, potentially overexposing, while stepping back can make it underexposed. This quick falloff can cause exposure inconsistencies, especially if you’re moving around or switching angles.
Automatic exposure systems often struggle with this. As the light hits the face at different angles or distances, they may overcompensate or underperform, leading to flickering or inconsistent brightness. Manual control, zebras, and waveform monitors help keep faces evenly lit.
Remember, the closer the light, the more intense the illumination—so balance your setup with a light meter or camera exposure tools. Otherwise, you risk washing out skin or leaving background details in shadow.
In practice, placing the light at a consistent distance—say, 12-18 inches—helps maintain stable exposure. Adjust the output or add diffusion if needed to fine-tune the look.
camera lighting accessories for portraits
As an affiliate, we earn on qualifying purchases.
As an affiliate, we earn on qualifying purchases.
Understanding the differences: hardness, softness, and direction
When choosing or modifying a camera-top light, it’s vital to understand three key qualities: hardness, softness, and direction. Each impacts how your subject looks.
Direction tells you where the light is coming from. Frontal lights flatten faces, side lights create shadows, and backlights add depth.
Hardness or softness relates to shadow edges. Small, direct sources produce sharp shadows and a hard look. Larger, diffused sources create gentle, blurred shadows, adding depth and texture.
Intensity is about how bright the light is. Too bright, and it can cause glare; too dim, and details disappear.
Beam spread determines how wide the light covers the scene. Narrow beams focus on faces, while wide spreads illuminate backgrounds or multiple people.
Balancing these properties is key. For example, a small, hard light from the front can make a face look flat, but a softer, side-placed light adds dimension.
Color and flicker: making sure your light plays nice with the camera
Color quality and flicker are often overlooked but vital. An LED light might look steady to your eye but flicker in slow-motion or high shutter speeds. This can ruin otherwise great shots.
Modern metrics like TLCI, TM-30, and SSI help predict how well a light renders skin tones and matches other fixtures. A high CRI score isn’t enough—look for TLCI above 90 and good spectral control.
Adjusting color temperature helps blend the light with existing sources. However, many fixtures also allow green–magenta tint correction, which is useful in mixed-lit locations like offices or homes with LED bulbs.
Test your lights at the camera’s shutter speed and frame rate. Flicker-free claims are helpful but not foolproof. Sometimes, a flickering LED can produce banding or shimmer, especially at slower shutter speeds.
In practice, keep a small test shot in slow motion to see if flicker appears. It’s a quick step that saves hours of post-production headaches.
Power, heat, and practical considerations for on-camera lights
Camera-top lights aren’t just about light—they also affect your rig’s weight, heat, and noise. High-output LEDs can get hot, especially if you run them at full power for long periods. Fans may be noisy, distracting your audio.
Batteries add weight and can drain quickly. Using rechargeable USB-C packs or built-in batteries simplifies travel but limits runtime. Keep an eye on battery levels, especially during long shoots.
Secure mounting is critical. A loose cold-shoe adapter or shaky rig can cause noise or even fall, risking damage to your camera or gear. Use sturdy mounts, tighten everything, and think about balance when stacking gear.
Recent advances include smaller, more efficient LEDs that produce less heat and longer-lasting batteries. Some fixtures now feature wireless control, making adjustments easier mid-shoot.
Remember: a tiny, hot, noisy light can distract your subject or ruin your sound. Balance output, heat, and ergonomics for a smoother shoot.
Latest tech and what it means for your camera-top lighting
New tech is transforming camera-top lights—smaller, brighter, smarter. Bi-color and RGBWW models let you dial in color temperature or saturated hues on the fly. They also tend to be more energy-efficient, giving longer run times.
Wireless ecosystems let you group multiple lights, control them remotely, and sync their color or brightness. Magnetic modifiers and quick-change diffusers speed up setup while maintaining quality.
Compact COB fixtures with mini softboxes now offer more control over shape and softness—though they’re often bulkier than a tiny LED panel.
Most importantly, spectral improvements mean better skin-tone reproduction and less color contamination. This makes on-camera lighting more natural and versatile, even in mixed environments.
Modern fixtures won’t fix bad positioning, but they do make nuanced adjustments easier. The result is smarter, more adaptable lighting—without breaking the bank.
Avoid common pitfalls and get the best results
Even the best camera-top lights can cause trouble if misused. Here are common mistakes to watch out for:
- Running the fixture at full blast unnecessarily.
- Using diffusion without increasing the apparent source size.
- Overlooking the falloff and distance effects, which cause exposure inconsistencies.
- Mixing color temperatures without testing skin tones first.
- Placing subjects directly against walls or reflective surfaces that bounce unwanted light.
- Relying solely on the rear display instead of exposure tools and monitors.
- Using a narrow, hard beam on wide lenses, creating bright centers and dark edges.
- Ignoring battery life, fan noise, or mounting security during the shoot.
Being aware of these pitfalls helps you make smarter choices, saving time and improving your final look. Think of your light as an instrument—know its quirks, and it’ll perform better.
Frequently Asked Questions
Are camera-top lights inherently bad?
No, they’re practical tools for fast, mobile shooting. The flat look comes from overuse, too much power, or ignoring positioning—like any light, they’re only as good as how you use them.
Why does an on-camera light make faces look flat?
Because it shines from nearly the same angle as the camera, removing shadows that define facial features. This reduces depth and can make subjects look two-dimensional.
Is a ring light the same as a camera-top light?
Both produce near-axis illumination, but a ring light surrounds the lens, creating a distinctive catchlight and even, flattering light. They share similarity but serve slightly different visual effects.
Does adding diffusion fix flatness?
Diffusion softens shadows, but only larger sources create genuinely softer shadows. Without increasing the apparent source size, it won’t significantly reduce flatness.
How bright should a camera-top light be?
Start low and increase until facial details are visible without washing out the background or causing glare. Use exposure tools and monitor carefully to avoid overexposure.
Conclusion
Camera-top lights are a quick fix that can rescue your shots or save your day. But they’re a double-edged sword—easy to use badly, easy to flatten your subject’s face. Thoughtful positioning, moderation, and understanding their limits turn them into powerful allies rather than flatters.
Next time you mount that tiny fixture, ask yourself: am I illuminating or just flattening? Remember, a little light goes a long way—use it wisely and your shots will stand out, not lie flat.
NFL season / tailgating Picks
team gear
As an affiliate, we earn on qualifying purchases.