TL;DR
Open a free Amazon Business account
Business pricing, bulk buying and tax-exempt orders.
Create a free accountAs an affiliate, we earn on qualifying purchases.
Green screen spill is caused by reflected green/magenta light hitting your subject. Controlling distance, lighting carefully, and fixing edges in post drastically improves key quality and reduces cleanup time.
If you’ve ever set up a green screen and ended up with a fuzzy, green-tinted halo around your hair or shoulders, you know how frustrating spill can be. It’s like trying to paint a picture in fog—green light bounces everywhere and ruins the clean cutout you want.
In this guide, you’ll learn how to tame spill using simple, actionable steps: adjusting how far you stand from the screen, lighting it properly, and fixing leftovers in post. Even on a tight budget, you can get a much crisper, more professional-looking key. Ready to make your chroma key look flawless? Let’s dive in.
Keep at least 6–10 feet between subject and backdrop; more space equals less spill.
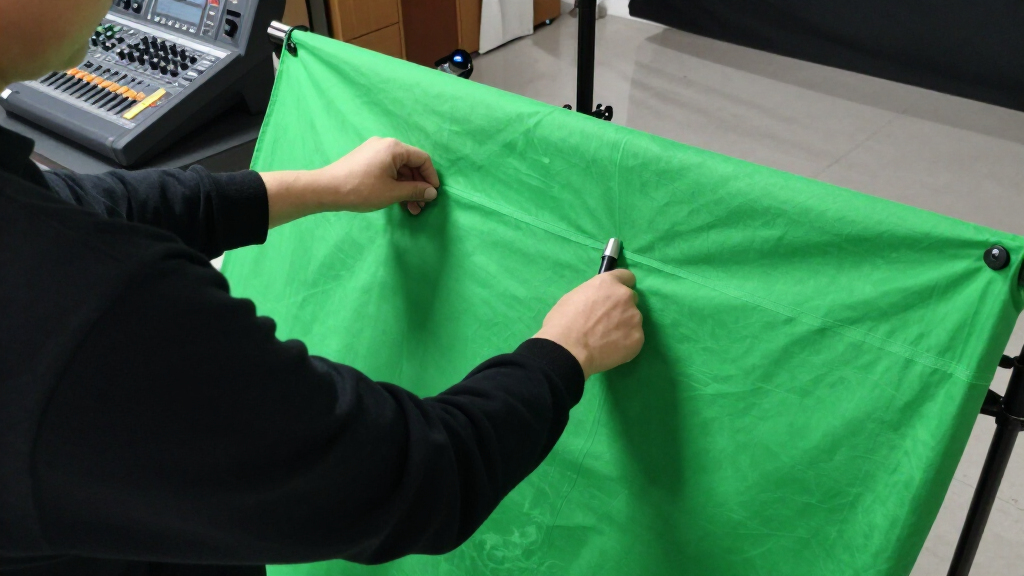
Light the green screen evenly at about 40–50 IRE, and use flags to prevent spill from bouncing onto your subject.
Use rim/back lights and flags to physically separate your subject from the green spill before post-production.
Leverage post-production tools like hue-based despill, edge masks, and light wraps to clean up remaining fringes.
Shooting in higher-quality codecs (10-bit 4:2:2 or RAW) drastically reduces chroma blockiness and improves edge detail.
Green Screen Spill: Distance, Lighting and Edge Fixes
Green spill is reflected color—not a mysterious software failure. Create physical separation, light the screen with restraint, and treat only the compromised edges in post for a crisp, natural composite.
Keep roughly 2–3 meters between subject and backdrop whenever the room allows.
Bright enough to key cleanly, restrained enough to avoid excess color bounce.
More chroma information means smoother hair, motion blur, and translucent edges.
Approximate spill-intensity reduction from inverse-square falloff.
A practical target measured with waveform or false color.
Common starting point relative to the subject’s key exposure.
Distance first, lighting second, edge repair last.
Move the subject before moving sliders
The screen behaves like a giant green bounce card. Every extra foot weakens the reflected color, reduces backdrop shadows, and makes separate lighting easier.
Relative spill intensity
Illustrative inverse-square falloff. Doubling the subject-to-screen distance quarters the remaining spill.
Space is the cheapest despill tool
Distance solves the problem before it reaches the sensor, preserving real hair color and reflective detail.
after 2× distance
Target: begin at 6–10 feet and increase separation if framing permits.
Small room: gain every available foot, then compensate with flags and rim light.
Lens choice: a longer focal length can simplify framing and soften screen detail.
Build two lighting systems, not one
Expose the backdrop for a stable key and the subject for the finished image. Separation between those systems is what prevents green light from contaminating skin, hair, clothing, and reflective surfaces.
Use dedicated soft sources from the sides or above for uniform coverage.
Hold the screen near 40–50 IRE and within roughly ±½ stop.
Use grids, barn doors, solids, and negative fill to intercept stray green.
Place a neutral, warm, or subtle magenta rim behind the subject.
Keep the backdrop boring
Hotspots and shadows create different shades of green, forcing the keyer to accept a wider range. Aim for consistent luminance, not maximum brightness.
Send reflections away
Use steep side or top angles so specular reflection travels away from the subject. Avoid firing screen lights directly from the camera axis.
Outline the subject
A controlled rim or backlight reduces visible green at shoulders and hair while creating a believable edge for the replacement environment.
Practical screen target: 40–50 IRE · avoid clipping and overexposure
Repair the edge without bleaching it
Residual spill is usually concentrated around hair, motion blur, glass, jewelry, and semi-transparent materials. Isolate those regions before suppressing color.
A professional edge pipeline
Remove stands, unused backdrop, floor edges, and obvious off-screen distractions.
Protect the opaque interior while giving fine detail a softer, more selective treatment.
Use small erode or choke adjustments; aggressive settings visibly shrink the subject.
Limit green-channel dominance only where contamination exists, preserving natural skin color.
Match edge color to the new environment, then introduce a restrained background wrap.
Despill is a balance, not an eraser
Excessive green suppression can produce gray or magenta hair, lifeless skin, and an obvious digital outline.
Best practice: view the composite at 100%, toggle suppression on and off, and watch neutral fabric, teeth, highlights, and skin.
| Capture format | Edge behavior | Keying suitability | Typical result |
|---|---|---|---|
| 8-bit 4:2:0 | Reduced chroma resolution | ✗ Challenging | Blocky fringes and fragile motion blur |
| 10-bit 4:2:0 | Smoother tonal precision | ~ Usable | Better gradients, limited chroma detail |
| 10-bit 4:2:2 | More horizontal chroma detail | ✓ Preferred | Cleaner hair and more stable edges |
| RAW / 4:4:4 | Maximum color information | ✓ Best latitude | Strongest recovery for complex edges |
Follow the spill from source to solution
A clean composite is the result of connected decisions. Fixing the earliest weak link produces the largest improvement downstream.
Keep 6–10 feet between subject and screen; more separation is better.
Target 40–50 IRE and keep backdrop variance near ±½ stop.
Use steep angles, flags, grids, negative fill, and a controlled rim.
Despill selectively, refine mattes, color-match, and add light wrap.
Choose 10-bit 4:2:2, RAW, or 4:4:4 when edge quality matters.
Green spill troubleshooting
Start with the physical setup. Software works best when it is refining a good capture rather than rebuilding a damaged edge.
How far should the subject stand from the screen?
Aim for 6–10 feet. Even a smaller increase helps because reflected intensity falls rapidly with distance.
What works in a tight room?
Maximize every available foot, angle screen lights sharply, add flags or negative fill, and use a strong controlled rim.
Can spill be fixed entirely in post?
Often, but with more compromise. Hue-based despill, edge masks, and light wraps help; damaged chroma detail cannot always be restored.
Green or blue screen?
Green usually keys efficiently on digital cameras, while blue may be preferable when green wardrobe, props, or visible green reflection create conflicts.
Which accessible tools handle spill suppression?
DaVinci Resolve’s Delta Keyer includes capable despill controls, while OBS provides practical spill adjustments for live setups. Keylight, Primatte, and Nuke offer deeper edge control for compositing workflows.
How Distance Between You and the Screen Slashes Spill
Green screen spill is a physics problem rooted in the behavior of light and reflection. When you’re close to the backdrop, green light reflected from the screen hits your edges more intensely, creating a green halo or fringes that can be difficult to key out cleanly. Increasing the distance reduces the amount of reflected light reaching you because the intensity diminishes with distance. The practical implication? Standing at least 6–10 feet away significantly cuts down spill, but this isn’t just about space—it’s about understanding how light behaves. The inverse-square law tells us that doubling the distance reduces the reflected light by about 75%, which can dramatically improve key quality. The tradeoff? More space requires a larger shooting area and may demand longer focal lengths to keep your subject framed correctly, which can introduce depth-of-field challenges. Therefore, balancing distance with lens choice and scene setup is key for optimal results.
For example, in small rooms, even a few extra feet can make a big difference. Using a longer lens (like 50mm instead of 24mm) compresses the scene, making the background appear closer and reducing the need for excessive distance while still helping with spill control. When space is limited, strategic use of flags and backlighting can help mitigate spill, but nothing replaces the fundamental advantage of increasing physical distance.
As an affiliate, we earn on qualifying purchases.
Lighting Your Screen and Subject Like a Pro
Proper lighting is the second pillar of spill control. When your green screen is evenly lit at around 40–50 IRE, it creates a consistent chroma key that’s easier to remove digitally. Uneven lighting causes hotspots and shadows, which lead to inconsistent spill and make post-production more challenging. The goal is to light the background evenly so that no bright spots or dark areas exist, but also to ensure your subject is lit separately, with minimal green spill on their edges. Using dedicated lights for the backdrop—like softboxes or LED panels—helps maintain uniformity. Position your key lights at steep angles from the sides or above to prevent reflected light from bouncing onto your subject. Flags, barn doors, and gobos are essential tools to control stray light. Overexposing the screen creates a bright, uneven background that can lead to spill and artifacts, so aim for a balanced exposure—bright enough for clean keying but not so bright that it reflects onto your subject. Properly controlled lighting reduces the chances of green light bouncing onto your subject’s edges, leading to cleaner keys and less cleanup in post. The tradeoff? Over-lighting can cause hotspots and wash out your subject if not carefully managed, so fine-tuning your setup is essential for optimal results.
Remember, lighting is not just about brightness; it’s about control and direction. The more precise your light placement and intensity, the less green spill you’ll have, making your digital keying much smoother and more natural-looking.
As an affiliate, we earn on qualifying purchases.
Post-Production Fixes That Make Edges Clean and Natural
Even with perfect setup, some spill sneaks through, especially around fine details like hair or semi-transparent objects. Post-production tools are designed to target these residual fringes with high precision. Most keyers—like Keylight in After Effects, Resolve’s Delta Keyer, or Nuke—offer spill suppression controls that allow you to specifically target the green hues without affecting your subject’s skin tones or clothing. Adjusting the ‘Despill Bias’ or similar parameters helps to remove green fringes around hair and edges, but it’s a balancing act. Overcorrecting can lead to unnatural grayish or magenta-tinted edges, which look worse than the original spill. To refine the matte further, use edge masks, choke, or erode functions to tighten the matte around your subject. Feathering or light wrap techniques can help blend the edges seamlessly into the background, making the transition look natural. Advanced AI-driven tools, like semantic segmentation or machine learning-based rotoscoping, can automatically identify and separate complex details such as fine hair or transparent objects, greatly reducing manual work. These methods analyze scene context, not just color, enabling more accurate spill removal and edge refinement. The tradeoff? These advanced tools may require more processing power and learning curve, but they significantly improve quality in challenging scenarios, saving time and producing professional results.
Understanding the strengths and limitations of each method allows you to choose the best approach for your project—balancing effort, quality, and available software. Proper post-processing is the final step to achieving a polished, natural-looking composite, especially when on-set conditions weren’t perfect.
As an affiliate, we earn on qualifying purchases.
Frequently Asked Questions
How far should I stand from the green screen?
Aim for at least 6–10 feet between you and the backdrop. More space reduces spill dramatically—think of it like stepping away from a reflective surface to keep the glare down.
How do I reduce green spill in tight spaces?
Use a combination of flags, steep-angle lighting, and a strong rim light. Tight rooms mean you need to be creative—angle your lights sharply and increase the distance as much as possible.
Can I fix spill in post if I can’t move away?
Yes, but it’s harder. Use hue-based despill tools, edge masks, and light wraps to clean up fringes. Lighting and flags on set still make post easier and better.
What’s better—green or blue screen?
Green is more common because digital sensors have twice as many green pixels, making it easier to key. But green spills more visibly on skin, so choose based on your scene and setup.
What software gives the best spill suppression for free?
DaVinci Resolve’s free version includes Delta Keyer, which handles despill well. In live setups, OBS offers spill sliders. For quick fixes, these tools work surprisingly well.
green screen spill suppression tools
As an affiliate, we earn on qualifying purchases.
As an affiliate, we earn on qualifying purchases.
Conclusion
Controlling green screen spill isn’t magic—it’s about space, light, and smart fixes. When you set your scene with enough distance, dedicated lighting, and cleanup in post, you’ll get a key that looks professional and clean.
Remember: even small adjustments can make a big difference. So, measure your space, light with intent, and don’t be afraid to fix stubborn edges in post. That’s how real studios get that polished look—on a budget.
Flea & tick season Picks
flea and tick prevention
As an affiliate, we earn on qualifying purchases.