
TL;DR

Get audio and creator gear delivered free with Prime
- Fast, free delivery on millions of items
- Prime Video, Amazon Music and more included
- Member-only deals all year
Background separation makes your subject pop by creating contrast and depth. Rim lights highlight edges, and practical lamps add motivation and atmosphere—both work best when controlled carefully and used together strategically.
Background separation isn’t just about adding lights; moving your subject or adjusting exposure can often do more.
A well-placed rim light traces the edge, creating natural depth—control brightness and softness to match your scene’s mood.
Practical lamps add atmosphere and can motivate rim lights, but control exposure and color carefully to avoid glare or flicker.
Layer practicals with hidden fixtures for realistic, flexible background separation—match their direction and color for believability.
Modern LED tech and wireless controls make background separation more precise, versatile, and budget-friendly.
Background Separation: Rim Lights and Practical Lamps
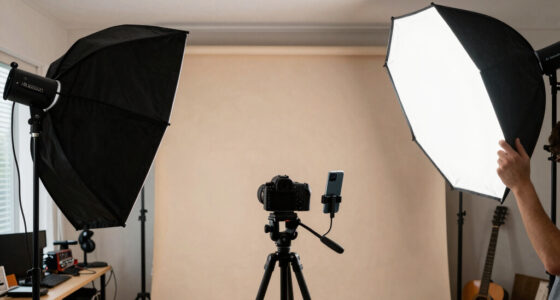
Great separation isn’t about more lights or brighter backgrounds—it’s about shaping the space around your subject. Rim lights trace the edges; practical lamps motivate the glow. Together, they carve your subject out of the background and give your scenes real, dimensional depth.
Properly balanced rim lights and practicals can increase perceived depth in a scene by up to 30%, according to lighting studies—making subjects stand out naturally without artificial-looking effects.
Why Background Separation Matters More Than You Think
When subject and background share similar brightness, color, or texture, viewers get lost. Separation comes from contrast—achieved through six complementary methods, not just extra lights.
Brightness Contrast
A light subject against a dark background—or vice versa—creates instant visual pop.
Color Contrast
Warm skin tones read beautifully against a cooler background palette.
Focus Separation
A tack-sharp subject against a soft background draws the eye automatically.
Composition
Clear space around the subject’s outline keeps the silhouette readable.
Lighting Itself
An edge highlight, illuminated background, or visible practical lamp does the work directly.
Atmosphere & Texture
Haze, patterned light, and controlled reflections reveal depth between layers.
How Rim Lights Turn Flat Subjects into 3D Characters
A rim light is a narrow, bright highlight tracing your subject’s edge—placed behind or to the rear side. Follow this setup sequence to build a clean, controlled edge.
-
1
Position Behind & Above
Place it behind the subject, usually above head height, aimed at the back or side.
-
2
Angle to the Outline
Catch the hair, shoulder, cheek, or clothing—without spilling heavily onto the face.
-
3
Control the Beam
Flags, barn doors, grids, snoots, and cutters keep light off the lens and background.
-
4
Match Brightness to the Subject
Dark hair and clothing need more output than pale skin or shiny fabrics.
-
5
Check the Full Performance Area
A rim that works in one position may vanish—or flare—when the subject moves.
A hard source produces a crisp, glossy edge—perfect for stylized looks. A larger source gives a broader, softer wrap that flatters natural scenes. The goal: a subtle edge that enhances depth without becoming the first thing viewers notice.
Common Rim-Light Problems—And How to Fix Them
Rim lights are powerful but tricky. Subtlety is your friend; a gentle edge highlight beats a stark, glowing halo every time.
| Problem | Symptom | Fix |
|---|---|---|
| Lens flare / low contrast | Shot looks washed out; the rim bleeds into the lens and reduces contrast. | ✓ Reposition, flag it, use a lens hood, or shift the camera angle. |
| Hotspot on nose or cheek | A bright, distracting spot pulls attention away from the eyes. | ✓ Move the source farther behind; narrow the beam. |
| Spill on walls | The background lights up, killing the very separation you built. | ✓ Add control—flags or grids—or widen subject-to-background distance. |
| Uneven hair highlights | Highlights shift or disappear as the subject moves through the scene. | ✓ Enlarge or reposition the source to cover the movement path. |
| Unnatural “halo” | Edge clips to pure white; the rim is the first thing viewers notice. | ✓ Reduce intensity, soften the source, or motivate it with a visible lamp. |
Practicals: More Than Just Visible Light Sources
A practical is any light source visible in the frame—table lamp, sconce, candle, neon sign, screen. It establishes place, motivates off-camera lighting, and breaks up dark backgrounds with layered brightness.
Set Mood & Place
A cozy reading nook with a warm lamp beside a character’s face creates depth. The glow breaks up a dark background and hints at distance.
Motivate the Rim
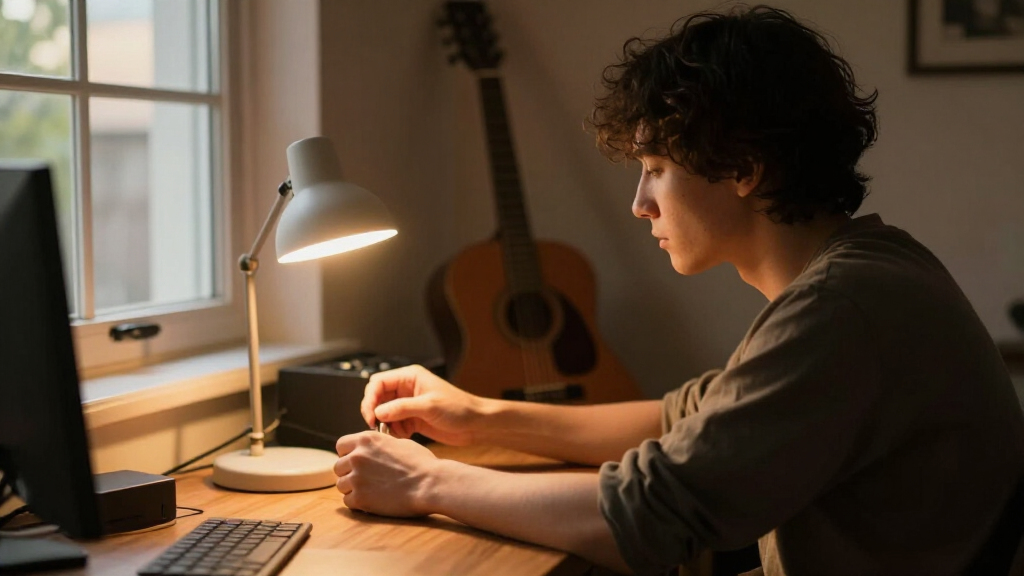
A desk lamp beside the shoulder can justify a rim highlight. Dimmed just enough to be visible, it ties the scene’s lighting logic together.
Dim, Diffuse, or Distance
Overly bright practicals cause glare and flatten the scene; dim ones do nothing. Balance their contribution through dimming, diffusion, or distance.
Match Color & Direction
When practicals pair with hidden fixtures, matching color temperature and placement is critical—so both sources reinforce a single believable world.
Strategic Layering: Practicals + Hidden Fixtures
Relying solely on practicals limits control over precise highlights and shadows. The pro workflow layers visible sources with hidden, more powerful lights.
📍 Place the Practical
Position the visible lamp where it makes narrative sense—beside the subject, in the background layer.
💡 Add the Hidden Fixture
Supplement with an off-camera light that echoes the practical’s color and direction.
🎚️ Balance & Match
Match color temperature and placement so both sources read as one believable light.
🎬 Separation Achieved
Believable depth, controlled contrast, and a subject that pops—without looking artificial.
Five Takeaways
Separation isn’t just about lights—moving your subject or adjusting exposure often does more.
A well-placed rim light traces the edge for natural depth; control brightness and softness for the mood.
Practical lamps add atmosphere and motivate rims—but manage glare, flicker, and exposure carefully.
Layer practicals with hidden fixtures, matching direction and color for believable separation.
Modern LED tech and wireless control make precise background separation budget-friendly.
Why Background Separation Matters More Than You Think
Background separation isn’t just a fancy lighting trick; it’s the secret sauce that guides your viewer’s eye. When your subject blends into the background, it’s easy for the viewer to get lost or distracted. But when they pop—thanks to contrast in brightness, color, focus, or simply how the light hits them—your message becomes clear. Think about the last time you watched a scene where everything looked flat—chances are, the subject and background had similar brightness or color, making it harder to focus. Good separation creates a sense of depth, making your scene feel more real. It draws attention, directs the eye, and makes the image easier to read at a glance.
Simple tricks like moving your subject away from the background or adjusting exposure can do more than adding extra lights. But when those aren’t enough, rim lights and practicals step in to add that extra punch. That’s why understanding how to use these tools is a game-changer—especially on a real-world budget.
As an affiliate, we earn on qualifying purchases.
How Rim Lights Turn Flat Subjects into 3D Characters
A rim light is a tiny, bright highlight that traces the edge of your subject—like a glow around their silhouette. It’s placed behind or just to the side, aimed at the outline. When you do it right, it creates a clean separation from the background. Imagine a portrait where the hair and shoulders are softly glowing—suddenly, your subject feels more solid, more real. Rim lights can be crisp and sharp for a glossy look or broad and soft for a gentle glow. The key is matching the brightness and softness to your scene’s mood and the texture of what you’re lighting.
Why does this matter? Because the edge glow provided by a rim light enhances the perception of depth by emphasizing the three-dimensional form of your subject. When a subject is lit solely from the front or side, it can appear flat—like a cutout. Adding a rim light creates a visual boundary that separates them from the background, making the scene feel layered. This separation is especially crucial in scenes with similar background and subject tones, where contrast alone might not be enough. The tradeoff? If overdone, rim lights can look unnatural or cause distracting flare. The art is in balancing brightness and softness to subtly define the silhouette without overwhelming the scene’s realism.
practical LED lamps for video scenes
As an affiliate, we earn on qualifying purchases.
As an affiliate, we earn on qualifying purchases.
Common Pitfalls with Rim Lights—and How to Fix Them
Rim lights are powerful but tricky. One common mistake? Overdoing it. When the edge clip clips into pure white or creates a harsh halo, it pulls viewers out of the scene. To fix this, dial down the brightness or soften the light’s edges with larger modifiers like a softbox or diffusion. Another issue? Lens flare. Bright rim lights can flare into the lens, reducing contrast and making your shot look washed out. Use flags, barn doors, or a lens hood to block unwanted spill.
Spill onto walls is another problem. Keep the rim light aimed precisely, or add flags to prevent light from hitting the background. Movement complicates things—what looked perfect standing still can become uneven when the subject shifts. Regularly check your shot during movement, and adjust the angle or intensity accordingly. Remember: subtlety is your friend. A gentle edge highlight often looks more natural and convincing than a stark, glowing outline.
Understanding these pitfalls and how to correct them is essential because improper rim lighting can inadvertently flatten your scene or introduce distracting artifacts. The key is to use a soft, controlled beam that enhances the subject’s shape without overpowering the scene’s natural look. Tradeoffs include risking a less dramatic effect if you go too subtle, or creating unnatural halos if you push the brightness too far. The goal is to find a sweet spot where the rim light subtly enhances depth without compromising realism.
background separation lighting kit
As an affiliate, we earn on qualifying purchases.
As an affiliate, we earn on qualifying purchases.
Practical Lamps: More Than Just Visible Light Sources
Practical lamps—like table lamps, wall sconces, or neon signs—are actual objects within the scene that happen to emit light. They add atmosphere, context, and a sense of place. But they also help with background separation, especially when placed thoughtfully. For example, a cozy reading nook with a warm lamp beside a character’s face creates depth. The lamp’s glow can break up a dark background, adding a warm edge or glow that hints at distance.
Why is this effective? Because practical lamps serve multiple roles—they act as motivated light sources that naturally fit into the scene, making the lighting feel more authentic. Their placement can create a layered lighting effect, where the scene’s mood is set by the practical’s color and intensity, and the background is subtly illuminated to add depth. The tradeoff? Overly bright practicals can cause glare or flatten the scene, while dim ones might be too subtle to impact the separation. The key is to control their exposure through dimming, diffusion, or distance, balancing their contribution without overpowering the scene’s overall look.
As an affiliate, we earn on qualifying purchases.
Using Practical Lamps to Motivate & Enhance Background Separation
Practical lamps work best when they’re motivated—meaning, they make sense in the scene. A visible lamp can suggest a source for the rim light or background glow, tying the scene together visually. For example, a desk lamp placed beside a subject’s shoulder can naturally create a subtle rim highlight, especially if you dim it just enough to be visible but not overpowering.
Why does this matter? Because motivated practicals add a layer of believability to your scene. When a practical lamp is placed intentionally, it guides the viewer’s eye and creates a natural context for the lighting. Pairing practicals with hidden, more powerful lights allows you to control the scene’s depth and contrast without making the practical the sole source of illumination. This layered approach results in a scene that feels more real, with believable depth and separation. The tradeoff? Relying solely on practicals can limit your control over the precise highlights and shadows—so combining them with hidden fixtures often yields the best results. Matching their color temperature and placement is critical to ensure they complement each other and reinforce the scene’s mood.
Step-by-Step: How to Combine Rim & Practical Lighting for Perfect Background Separation
- Plan your scene: move the subject away from the background if possible. Use composition to create space.
- Set your key light and decide how much contrast you want on the face.
- Adjust background exposure—darker backgrounds help separation.
- Position practical lamps for mood and depth, not just illumination.
- Dim practicals until they add glow without overpowering.
- Add rim lights carefully—aim behind and slightly to the side, then tweak brightness and softness.
- Flag spill and check for lens flare. Use flags or barn doors to control unwanted spill.
- Review the shot for color consistency, highlight clipping, and skin tone.
- Test movement—walk around, record short clips, and watch for flicker or uneven highlights.
Following this workflow helps you build scenes that feel layered, natural, and visually engaging—without wasting time or money.
Recent Tech & Trends Making Background Separation Easier (and Cooler)
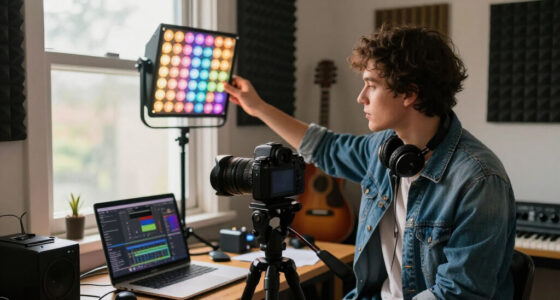
Modern LED technology, wireless controls, and digital color mixing have made background separation more flexible and precise. RGBWW LEDs let you match practicals or rim lights to scene colors instantly—no more fiddling with gels or filters. Wireless control apps allow you to tweak lights during rehearsals or shooting, saving time and reducing mistakes.
Pixel-mapped fixtures and LED strips can create dynamic backgrounds or animated highlights, adding depth and movement without extra effort. Battery-powered lights open doors to small crews or guerrilla shoots, where running cables isn’t practical. Meanwhile, virtual production tools and LED walls give even more options—though they often need additional fixtures for subtle edge lighting. Keeping up with these developments means you can craft more realistic, engaging scenes on smaller budgets.
Frequently Asked Questions
Do I always need a rim light?
No. Sometimes, contrast in brightness, color, or depth of field alone can separate your subject. Rim lights are a tool, not a requirement.
Where should I place a rim light?
Position it behind and slightly above your subject, aiming for the outline. Adjust until it highlights key edges without causing flare or distraction.
How bright should a rim light be?
It depends on your scene. Keep it subtle for natural looks or brighter for dramatic styles. Balance it against your key and background exposure.
Should the rim light be hard or soft?
Hard lights create crisp outlines, while soft lights produce a gentle glow. Match the softness to your scene’s mood and the texture of what you’re lighting.
Can I use practical lamps as rim lights?
Sometimes, especially if they’re bright and well-positioned. But often, a hidden fixture provides more control while the practical adds atmosphere and motivation.
Conclusion
Mastering background separation isn’t about piling on more lights. It’s about understanding how to shape the space around your subject—using rim lights and practicals as subtle tools for depth. When done right, your scenes will feel more three-dimensional, immersive, and real. Remember: often, less is more—trust your eye, control your tools, and watch your scenes come alive.
Now, go light smarter—your viewers will thank you for the extra depth and focus.
Halloween Picks
halloween
As an affiliate, we earn on qualifying purchases.