
TL;DR

Get audio and creator gear delivered free with Prime
- Fast, free delivery on millions of items
- Prime Video, Amazon Music and more included
- Member-only deals all year
Lighting a space that functions as both a studio and bedroom requires adjustable, layered, and zone-specific lighting. Use dimmers, control zones independently, and balance task and ambient light to switch seamlessly between work and rest.
Imagine waking up, rolling out of bed, and instantly switching from a cozy, dim environment to a bright, focused workspace. It’s possible—and it starts with smart lighting. You don’t need a separate room for your studio and bedroom to make both work well. Instead, you need a plan that adapts to your needs, with lighting that shifts from relaxing to energizing at the tap of a button.
This guide walks you through creating a flexible lighting setup that balances your creative energy with your need for rest. Whether you’re shooting videos, editing photos, or just winding down, your lighting can do it all—without turning your room into a cave or a stage.
Segment your room into dedicated zones with separate controls—sleep, work, camera, background—to switch seamlessly between tasks.
Use layered lighting—ambient, task, accent—to create a flexible environment adaptable to your mood and activity.
Adjust color temperature to support alertness during work and relaxation at night—tunable-white fixtures make this straightforward.
Prioritize high-CRI, flicker-free LEDs for accurate color work and smooth video footage.
Incorporate smart controls and presets for easy daily transitions, saving time and maintaining consistency.
Lighting a Studio That Is Also Your Bedroom
One room can support sharp, color-accurate creative work and genuinely restful sleep. The key is adjustable light arranged by zone, layer, temperature, and time—not one fixture trying to do everything.
Treat one room as five small environments
Deep zoning prevents work light from spilling into the sleep area and keeps dim bedroom lighting from compromising focus, color judgment, or camera quality. Give every zone its own control whenever possible.
Low, warm and dim
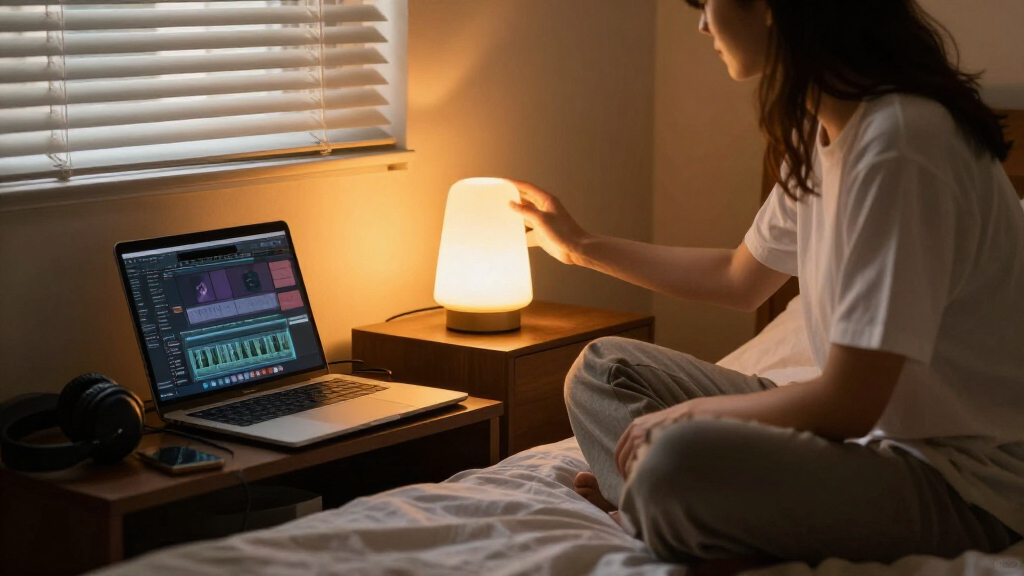
Place a shaded lamp near the bed, below eye level. Keep it soft enough for nighttime use without waking the whole room.
2200–2700KBright and precise
Aim focused illumination at the desk or work surface while keeping the monitor free from reflections.
4000–5000K · CRI 90+Soft and directional
Use a diffused key light slightly above eye level and offset from the camera for flattering facial depth.
30–45° placementDepth without distraction
A small lamp or contained accent light separates the subject from the wall. Keep it weaker than the key light and outside the sleep sightline.
Subtle accent outputSafe movement at night
Use a low-output path light or indirect strip near floor level. It should reveal obstacles without activating a bright ceiling fixture.
Low level · Warm toneThree sources create flexibility
A single powerful ceiling light often creates glare, hard shadows, and a flat camera background. Several dimmable sources give you control over brightness, direction, contrast, and atmosphere.
Ambient
The room-wide foundationCeiling fixtures, wall lights, or bounced LEDs provide general visibility without becoming the brightest object in the room.
Task
The focused workhorseA desk lamp, key light, or adjustable overhead source puts useful brightness exactly where detailed work happens.
Accent
The depth builderSmall lamps, strips, and background lights add visual separation and character without competing with the subject.
Move from alertness to rest
Color temperature shapes the visual mood, but brightness and timing matter too. Use cooler or neutral light while working, then reduce both temperature and intensity as bedtime approaches.
The working-to-wind-down spectrum
Sleep
General use
Focused work
Daylight reference
Raise ambient light gradually, open daylight controls, and activate the desk zone.
Match fixtures, prioritize color accuracy, and control daylight for repeatable footage.
Dim aggressively, switch off overheads, and leave only low-positioned warm sources.
Match each fixture to its job
The best compact setup combines controllability with softness. High-output fixtures are useful only when they can be dimmed, directed, diffused, and switched independently.
| Light source | Work | Video | Wind-down | Primary advantage | Watch for |
|---|---|---|---|---|---|
| Ceiling fixture | Support | Weak | Only dimmed | Fast general illumination | Glare and hard top shadows |
| Tunable desk lamp | Strong | Fill | Useful | Direction and temperature control | Monitor reflections |
| Diffused LED panel | Strong | Excellent | Too bright | Soft, repeatable key light | Spill into the bed area |
| Warm bedside lamp | Limited | Background | Excellent | Low-stimulation nighttime light | Insufficient task brightness |
| Window daylight | Strong | Variable | Unavailable | Free, broad illumination | Changing color and intensity |
Green = well suited · Amber = useful with conditions · Red = poor fit for that mode
Color-quality targets
Before buying an LED
- Look for CRI 90 or higher; choose 95+ for demanding color work.
- Check R9 performance when accurate skin, food, textiles, or artwork matter.
- Prefer published TLCI data for video applications.
- Confirm flicker-free operation and stable color throughout the dimming range.
One sequence, four presets
Smart controls are most useful when they reduce decisions. Save repeatable scenes so the entire room shifts purpose with one command instead of five separate adjustments.
Introduce gentle ambient light.
Activate bright neutral task light.
Add key, fill, and background depth.
Lower brightness and warm the room.
Leave only low, warm bedside light.
Small-room lighting questions
Start with a simple three-light system, then add control and background depth only where the room genuinely needs it.
How many lights should I start with?
Begin with three: general ambient light, a dedicated task or key light, and a warm bedside lamp. Add a fill or background light when space and budget allow.
Can one fixture serve both purposes?
Yes—if it dims smoothly, offers tunable white light, and can be directed or diffused. A separate low-output bedside lamp is still valuable at night.
How do I avoid monitor glare?
Place the desk perpendicular to the window, keep bright sources outside the screen’s reflection angle, and use diffusers, shades, or bounced light.
How do I make video light flattering?
Use a large diffused key light close to the face, positioned 30–45 degrees to one side and slightly above eye level. Add a weaker reflected fill opposite it.
What should I do with daylight?
Use sheer curtains to soften harsh sun, blinds to control direction, and blackout curtains for sleep or repeatable shoots. For consistent production, minimize changing daylight and rely on controlled fixtures.
Make the room easy to change.
Zone first, layer second, automate last. Keep the sleep area dark and warm, the work area bright and accurate, and the camera area soft and controlled. When every source has a clear purpose, a compact room can feel like both a sanctuary and a capable studio.
Divide Your Room Into Zones to Keep Work and Sleep Separate
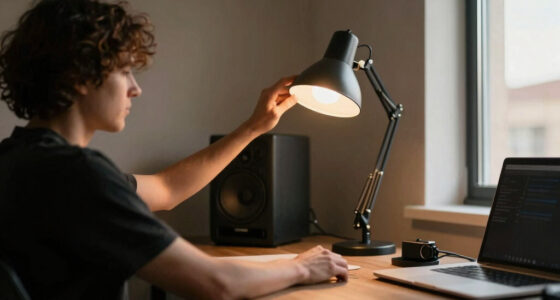
The first step is treating your room as multiple little spaces, not one big illuminated box. Think about it: you want a soft, warm glow near your bed for sleeping, a bright, neutral light at your desk for work, and adjustable lights for your camera or creative tasks.
For example, near your bed, install a low, dimmable lamp with warm light—think 2200–2700K—that creates a cozy environment. At your desk, use a bright, high-CRI task lamp or overhead light with a color temperature around 4000–5000K for clarity and color accuracy. If your setup includes a camera, position a controllable directional light or softbox to highlight your face without harsh shadows.
Separate controls matter. A bedside lamp shouldn’t turn on your entire workspace, and vice versa. Use smart switches or zones with dedicated dimmers to keep each area functional and comfortable.
Deep zoning is crucial because it prevents the overlap of lighting conditions that can cause discomfort or disrupt your circadian rhythm. Without proper separation, bright work lights could spill over into your sleep zone, making it harder to wind down. Conversely, overly warm or dim lighting in your workspace can hinder focus and color judgment. Thoughtful zoning allows you to customize the environment precisely, supporting both productivity and relaxation without compromise.
adjustable multi-zone smart LED lighting
As an affiliate, we earn on qualifying purchases.
As an affiliate, we earn on qualifying purchases.
Layer Your Lighting for Flexibility and Comfort
Layered lighting is the secret sauce. It’s like a good recipe—combine ambient, task, and accent lights to create a versatile environment that adapts to your mood and activity.
Start with ambient lighting—think ceiling fixtures or wall-mounted LEDs—that fills the room softly without glare. Add task lighting—like a desk lamp or adjustable overhead fixture—that hits your workspace precisely. Finally, include accent lights—small LED strips, decorative lamps, or background LEDs—that add depth and personality.
For instance, during editing, turning on overhead lights and a focused desk lamp provides clarity, but when winding down, dimming or switching to warmer, indirect lights creates a calming atmosphere. This layering isn’t just about aesthetics; it’s about functional flexibility. Properly layered lights prevent eye strain during work and create inviting spaces for relaxation. The tradeoff is that more layers require careful control—over-illumination can be as problematic as under-lighting, so balance and dimming options are key.
Deep layering allows you to tailor the lighting to your specific activity and mood, which can enhance focus, reduce fatigue, and improve overall well-being. It also means you can adapt quickly, without needing to switch fixtures or change bulbs—just adjust your controls for instant environment shifts.
dimmable task and ambient lighting for bedroom studio
As an affiliate, we earn on qualifying purchases.
As an affiliate, we earn on qualifying purchases.
Adjust Color Temperature to Match Your Mood and Tasks
Color temperature guides your brain into the right mindset. Bright, daylight-like light (around 5600K) energizes, while warm, candle-like light (2200–2700K) calms and prepares you for sleep.
Use tunable-white bulbs or fixtures that let you switch between cool and warm light easily. For daytime work, set your lights to 4000–5000K for clarity. As evening approaches, dial down to 2200K to signal your body it’s wind-down time.
Understanding the implications of color temperature is vital because it directly affects your circadian rhythm and alertness levels. Cooler lights stimulate alertness and focus, which is great for productivity, but if used late, they can interfere with melatonin production, delaying sleep onset. Warm lights, on the other hand, promote relaxation and help your body prepare for rest, but if used during work, they may reduce your visual acuity and color discrimination. Implementing adjustable fixtures allows you to navigate these tradeoffs effortlessly, tailoring your environment to the time of day and activity. For example, a creator might use a 5000K LED panel during filming or editing, then switch to a warm bedside lamp before bed. This simple shift helps your circadian rhythm stay in sync and reduces disruptions to your sleep cycle.
color temperature tunable LED fixtures
As an affiliate, we earn on qualifying purchases.
As an affiliate, we earn on qualifying purchases.
Frequently Asked Questions
How many lights do I need for a dual-purpose room?
Start with three: a general ceiling or wall light, a dedicated task or key light, and a warm bedside lamp. Add a fill or background light if space allows. Focus on flexibility—each should be controllable to suit the activity.
What is the best color temperature for my workspace?
Use around 4000–5000K for clarity and alertness. For winding down, switch to 2200–2700K. Consistency between fixtures helps your camera white balance and keeps your environment comfortable.
Can one light serve as both a studio and bedroom light?
Yes, if it dims smoothly, offers tunable white light, and can be directed or diffused. However, a dedicated bedside lamp remains handy for nighttime use due to its lower brightness and softer glow.
How do I prevent glare on my monitor and face?
Position lights at 30–45 degrees and slightly above eye level. Use diffusers, bounce light, or reflectors to soften shadows. Keep bright sources out of your monitor’s reflection and avoid placing lights directly behind or in front of your face.
How can I make my tiny room lighting flattering for video?
Use a large, diffused key light close to your face, offset slightly to avoid flatness. Add a reflector or fill light on the opposite side. Keep background lighting subtle to prevent distractions and shadows.
As an affiliate, we earn on qualifying purchases.
Conclusion
Lighting your combined studio and bedroom isn’t about turning your space into a set—it’s about making it feel right for both work and rest. Thoughtfully zoning and layering your lights lets you switch from focus mode to relaxation without chaos or compromise. Remember: the best lighting plan is one you can easily reconfigure every day.
Start simple—add smart controls, diffuse your key lights, and keep your sleep zone dark and calm. Your room can be a sanctuary and a studio, all in one. Brighten your space, and watch how your daily routine transforms.
Halloween Picks
halloween
As an affiliate, we earn on qualifying purchases.