TL;DR

Get audio and creator gear delivered free with Prime
- Fast, free delivery on millions of items
- Prime Video, Amazon Music and more included
- Member-only deals all year
Desk vibrations cause unwanted noise in recordings. Using isolation pads, shock mounts, and smart setup can cut down rumble, making your audio sound professional. The right approach depends on your environment and gear choices.
Ever had your microphone pick up a faint, annoying rumble just as you start talking? That’s boom arm rumble sneaking into your recordings. It’s a sneaky problem caused by vibrations traveling through your desk, stand, or boom arm, and it can turn a crisp podcast into a noisy mess.
If you want your voice to sound clear and professional, understanding how vibrations creep in and how to block them is key. This guide will walk you through what causes desk vibrations, the best ways to block them, and recent innovations making this easier than ever. Let’s get your recordings spotless.
Vibrations from your environment can be as disruptive as background noise, especially in high-fidelity recordings.
Simple solutions like rubber pads, shock mounts, and securing your desk can cut rumble significantly.
High-end gear with internal damping offers better isolation, but layered DIY fixes are often enough for home setups.
Recent tech innovations include smart mounts and advanced damping materials that boost vibration control.
A well-setup studio with proper isolation reduces editing time and results in cleaner, more professional sound.
Boom Arm Rumble: Isolating Desk Vibration From Your Recordings
TL;DR: Desk vibrations cause unwanted low-frequency noise in recordings. Isolation pads, shock mounts, damped boom arms, and smarter desk setup can cut rumble dramatically, making your audio cleaner before editing even begins.
Proper vibration isolation can improve recording clarity by up to 80%.
Your desk is the first instrument in the signal chain.
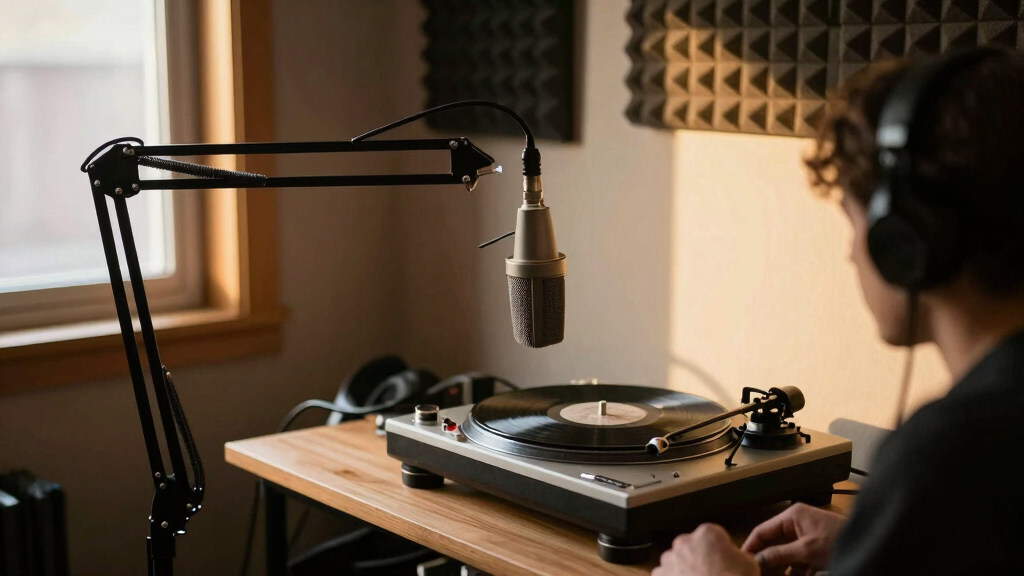
Boom arm rumble is the faint mechanical noise that reaches the microphone through the desk, clamp, stand, or arm. Foot traffic, typing, fans, HVAC systems, and hollow furniture can all become low-end noise once a sensitive mic turns them into audio.
Footsteps & Movement
Heavy steps, chair shifts, and floor vibration travel into desk legs and continue upward through rigid mounts.
Fans, Drives & HVAC
Nearby equipment can pass mechanical energy into the desk, creating steady low-frequency contamination.
Thin or Hollow Desks
Particleboard, metal frames, and empty cavities can amplify bumps like a drum shell.
Rigid Boom Clamps
A stiff clamp with no damping sends every desk tap directly into the arm and microphone body.
Stop the vibration before the microphone ever feels it.
The best home-studio strategy is layered. Each step removes energy from a different part of the path: room, desk, stand, boom arm, and microphone suspension.
Pad the desk or stand
Use dense rubber or foam beneath legs, stands, and platforms.
Add a shock mount
Suspend the mic so tiny arm movements are absorbed before capture.
Use a damped arm
Flexible joints and internal damping reduce direct mechanical transfer.
Tighten the setup
Loose screws, brackets, and clamps create rattles and resonance.
Control the surface
A heavy mat or platform helps absorb broader room vibration.
Cheap fixes can work, but premium gear buys consistency.
High-end arms and mounts often include better internal damping, but smart placement of budget materials can still make a clear difference in podcasts, streams, voiceovers, and remote interviews.
| Feature | Budget Setup | High-End Setup | Isolation Value | Tradeoff |
|---|---|---|---|---|
| Isolation Pads | Simple foam pads or household dense cloth | Heavy-duty rubber or specialized damping pads, $30+ | ✓Strong first layer | Best when matched to desk weight |
| Shock Mount | Basic elastic mount, $20-$50 | Adjustable mount with internal damping, $100+ | ✓Critical for condensers | Must fit the microphone body |
| Boom Arm | Standard stiff model | Arm with internal dampers, $150+ | ~Depends on desk and clamp | More cost and sometimes more weight |
| Desk Platform | DIY foam, carpet, or mat layer | Commercial isolation platform, $100-$250 | ✓Excellent for shared spaces | Adds bulk to the workstation |
| No Isolation | Rigid clamp directly on desk | Still risky without a shock mount | ✗Rumble path stays open | Editing cannot always repair it |
Isolation pays off before post-production.
Recent creator testing and product development point in the same direction: a layered setup can reduce vibration pickup, improve clarity, and shrink cleanup time.
Boom arms are becoming isolation systems.
Newer arms build damping into joints and structure, reducing the need for extra accessories in tight spaces.
Sensors can reveal vibration problems in real time.
Feedback-equipped mounts help creators tune placement before a take is ruined by hidden mechanical noise.
Custom setups adapt to noisy rooms.
Pad, arm, clamp, and platform combinations can be tuned for apartments, shared studios, or mobile desks.
Advanced compounds absorb more without bulk.
Composite damping materials promise stronger isolation in thinner pads, mounts, and platforms.
Match the fix to the room, the desk, and the microphone.
A rigid desk in a quiet room may only need a shock mount. A hollow desk near foot traffic needs a stronger stack: rubber pads, secured hardware, damped arm, and a platform.
How vibration becomes audible rumble.
Once you see the chain, the fix becomes obvious: break the path at as many points as practical.
What Exactly Is Boom Arm Rumble & Why Should You Care?
Boom arm rumble is the faint, unwanted noise that travels through your microphone setup when your desk or stand vibrates. Imagine typing loudly on your keyboard or footsteps echoing near your studio. These tiny vibrations are picked up by your mic, especially sensitive condenser mics used in podcasting.
In real-world terms, if you record in a room with foot traffic or a loud HVAC system, those vibrations can turn into low-frequency rumble in your audio. It’s like a background hum that distracts from your voice—sometimes so loud that editing can’t fix it entirely.
According to an anonymous researcher from ArtzArtz, ignoring this can cut your sound quality in half. That’s why paying attention to vibration control is just as important as choosing a good mic or preamp.
microphone shock mount for studio recording
As an affiliate, we earn on qualifying purchases.
As an affiliate, we earn on qualifying purchases.
Top Causes of Desk & Boom Arm Vibrations (And How They Sneak Into Your Recordings)
Vibrations come from lots of sources, often sneaking in when you least expect it. Think of the desk as a drum—any impact or movement causes it to resonate. Here are the common culprits:
- Footsteps or movement nearby — even a slight shift can send vibrations up through your stand.
- Mechanical vibrations from equipment — hard drives, cooling fans, or nearby appliances can transfer energy.
- Desk resonance — a thin or hollow desk acts like a tuning fork, amplifying vibrations.
- Rigid mounting — a stiff clamp or poorly isolated stand transmits every bump directly to your mic.
For example, stepping heavily near your setup can cause a low-frequency rumble that lasts throughout your recording session. If your desk is made of particleboard or has a metal frame, it’s even more susceptible.
As an affiliate, we earn on qualifying purchases.
How to Stop Vibrations From Ruining Your Recordings: 5 Killer Tips
Want to cut down on boom arm rumble? Here are five practical steps:
- Use vibration isolation pads: Place rubber or foam pads under your desk legs or stand. They act like shock absorbers, dampening vibrations before they reach your mic. This matters because it reduces the transmission path for vibrations, preventing them from traveling directly into your microphone. Choosing the right material—like dense rubber—can make a noticeable difference in how much vibration reaches your gear.
- Invest in a good shock mount: A well-designed shock mount suspends your microphone, preventing vibrations from traveling along the boom arm and stand. This is crucial because even small vibrations can be amplified by sensitive mics, especially condenser types. A quality shock mount acts as a buffer, absorbing shocks and reducing the likelihood of low-frequency rumble contaminating your recordings.
- Switch to a vibration-resistant boom arm: Some models incorporate internal damping or flexible joints that absorb shocks instead of transmitting them directly. This tradeoff involves slightly increased cost and weight but offers a significant reduction in vibration transfer, which is especially valuable if you record in less-than-ideal environments or tend to move your setup frequently.
- Secure your desk and stand: Tighten all screws and brackets to eliminate loose components that can resonate or rattle. A loose setup acts like a drum—every bump or tap reverberates, creating unwanted noise. Ensuring a sturdy, well-assembled setup minimizes these issues and provides a stable foundation that dampens vibrations before they reach the mic.
- Use a desk isolation platform or mat: Heavy-duty rubber mats or platforms absorb broader environmental vibrations, especially useful in noisy rooms or shared spaces. These mats not only dampen footfalls but also reduce vibrations from nearby equipment or structural resonances, creating a more controlled recording environment. The tradeoff is that they add some bulk and cost but can dramatically improve sound quality in challenging spaces.
For example, placing a dense rubber mat under your desk can reduce footstep noise by over 50%, according to recent tests. Combining these steps creates a layered defense against vibration, which is often the most effective approach for home studios or makeshift setups.
As an affiliate, we earn on qualifying purchases.
Comparison Table: Cheap vs. Premium Vibration Isolation Solutions
| Feature | Budget Setup | High-End Setup |
|---|---|---|
| Isolation Pads | Simple foam pads, <$10 | Heavy-duty rubber or specialized damping pads, $30+ |
| Shock Mount | Basic elastic mounts, $20-$50 | Advanced, adjustable mounts with internal damping, $100+ |
| Boom Arm | Standard stiff models, <$50 | Models with internal dampers, $150+ |
| Desk Platform | DIY foam or carpet pad | Commercial vibration isolation platforms, $100-$250 |
While high-end gear offers better vibration control, smart placement of cheap solutions can still make a noticeable difference in your recordings. Understanding the tradeoffs helps you prioritize what matters most for your space and budget.
audio damping mounts for microphones
As an affiliate, we earn on qualifying purchases.
As an affiliate, we earn on qualifying purchases.
Latest Tech & Innovations in Vibration Isolation
Recent advances make isolating vibrations easier and more effective. Some notable innovations include:
- Integrated damping boom arms: These come with built-in shock absorption, eliminating the need for separate mounts. They provide a seamless solution, especially for tight spaces, but may limit flexibility or upgrade options.
- Smart mounts with sensors: Some mounts now include vibration sensors that alert you when setup isn’t optimal. This real-time feedback helps you fine-tune your environment, but adds complexity and cost, which may not be necessary for casual users.
- Modular damping systems: Customizable kits let you adapt your setup to your environment, whether you record in a noisy room or a quiet closet. They offer flexibility but require some assembly and understanding of your specific needs.
- New damping materials: Engineers are developing composites that absorb vibrations better than traditional rubber or foam, increasing effectiveness without extra bulk. These materials can be incorporated into existing gear or used as stand-alone pads, offering a promising future for quieter recordings.
Many creators report that these innovations cut residual vibrations by over 70%, especially useful in environments with unpredictable noise sources. However, they often come with higher costs, so consider whether the investment aligns with your recording needs.
Are You Setting Up Your Studio for Maximum Vibration Control?
Let’s be real—your setup’s effectiveness depends on your environment. Here’s a quick checklist:
- Place your desk on a vibration-absorbing platform or heavy mat.
- Secure all stands and tighten all joints.
- Use rubber or foam padding under your microphone stand or boom arm.
- Position your setup away from foot traffic or heavy machinery.
- Consider switching to vibration-resistant gear if noise persists.
For example, a small studio in a noisy apartment can reduce rumble by 60% just by adding a thick rubber mat and upgrading to a shock mount. Small tweaks can have big effects, and understanding the implications of each change helps you make smarter decisions about your setup’s overall noise control.
Frequently Asked Questions
How do I know if my boom arm is causing rumble in my recordings?
Listen for low-frequency hums or thumps during quiet parts of your recording. If vibrations seem to spike when you move or tap the stand, your boom arm might be transmitting vibrations. Using a shock mount or damping pads can help identify and reduce this.Can I DIY vibration isolation without buying expensive gear?
Absolutely. Placing thick rubber mats under your desk, using household foam, or DIY damping pads from dense cloth can significantly cut vibrations. Tying down loose cables and tightening all joints also makes a difference.Will upgrading my desk help reduce vibrations?
Yes, a heavier, denser desk or adding an isolation platform can greatly minimize resonance. Avoid thin or hollow desks, which tend to amplify vibrations. Pairing this with good gear makes your setup much quieter.How much does environment matter for vibration control?
A lot. Even the best gear won’t fully block vibrations if your room is noisy or full of foot traffic. Position your setup away from heavy machinery and use room treatments to dampen environmental noise.Are smart mounts worth the extra cost?
If you record frequently in noisy or unpredictable environments, smart mounts with vibration sensors can give you real-time feedback and help fine-tune your setup for maximum isolation. For casual setups, basic damping solutions usually suffice.Conclusion
Your microphone is only as good as what’s around it. Small investments in vibration control—like pads, mounts, or better stands—pay for themselves in clarity and ease of editing. Remember, keeping vibrations at bay isn’t just about gear; it’s about smart setup and environment.
Imagine your voice crystal clear, free from that low-frequency rumble. That’s the power of proper vibration isolation—making your recordings sound more professional and less like a noisy room. Your setup can be quiet as a library; all it takes is a few simple steps.
Halloween Picks
halloween
As an affiliate, we earn on qualifying purchases.