TL;DR

Get audio and creator gear delivered free with Prime
- Fast, free delivery on millions of items
- Prime Video, Amazon Music and more included
- Member-only deals all year
Connecting a MIDI keyboard to Ableton Live or Logic Pro is straightforward once you understand the setup steps. Ensuring proper device recognition, configuring MIDI settings, and mapping controls make your workflow smoother. Recent updates and wireless options add flexibility.
Imagine hitting a key on your MIDI keyboard, and instantly hearing a lush synth pad fill your headphones. That’s the power of proper setup. But if your DAW doesn’t recognize the device or the sound doesn’t come through, frustration kicks in fast.
Today, I’ll walk you through exactly how to connect your MIDI keyboard to Ableton Live and Logic Pro. No fluff, just real-world steps to get you jamming, recording, and controlling with confidence.
Always check your MIDI device’s connection and drivers before troubleshooting.
Enable ‘Track’ and ‘Remote’ in Ableton, or ensure your device appears in MIDI settings in Logic.
Create MIDI tracks, assign instruments, and start playing to test your setup.
Use MIDI mapping to turn hardware controls into expressive tools.
Recent updates and wireless solutions make connecting MIDI keyboards faster and more flexible.
How to Set Up a MIDI Keyboard in Ableton Live and Logic
Connect the hardware, confirm device recognition, route the input, load an instrument, and map the controls that matter. Five deliberate checks turn a silent keyboard into an expressive production tool.
From key press to sound
A MIDI keyboard sends performance instructions—not audio. The DAW receives those messages, routes them to a virtual instrument, and sends the resulting sound to your headphones or speakers.
Connection rule: use USB for the fastest plug-and-play route. If the keyboard only has five-pin MIDI DIN ports, connect it through a MIDI interface. Then verify that the computer sees the device before opening deeper DAW settings.
Two routes, one result
Ableton exposes port behavior directly; Logic centers the workflow around device detection and a Software Instrument track. In both cases, finish by loading an instrument and testing MIDI activity.
Preferences → Link/MIDI
Find the keyboard beneath MIDI Ports.
Enable Track to receive and record notes.
Enable Remote to map knobs, pads, and faders.
Create a MIDI track, choose the input, and load a VST or built-in instrument.
Arm the track and confirm that its MIDI indicator responds.
Preferences → MIDI
Confirm the keyboard appears beneath MIDI Devices.
Create a new Software Instrument track.
Select the keyboard from the track’s MIDI input options.
Choose an AU or built-in instrument and play a few notes.
Watch for MIDI activity, enable monitoring, and begin recording.
Quick setup comparison
The menu names differ, but the operating pattern remains consistent: detect, route, instrument, monitor, record.
| Feature | Ableton Live | Logic Pro | Ready check |
|---|---|---|---|
| Device recognition | Preferences → Link/MIDI | Preferences → MIDI → MIDI Devices | ✓ Device listed |
| Note input | Enable Track | Select keyboard as track input | ✓ Activity flashes |
| Track setup | Create MIDI track and load instrument | Create Software Instrument track | ✓ Notes produce sound |
| Control mapping | MIDI Map Mode: Cmd+M | Controller Assignments window | ~ Map only essentials |
| External interface | Not required for USB MIDI | Not required for USB MIDI | ✓ Built-in output works |
Map for expression, not clutter
Assign the controls you reach for repeatedly. A small, memorable map is faster in practice than a crowded surface full of assignments you cannot recall.
Suggested mapping priority
Relative workflow value for a typical production or live-performance setup.
Mapping method
Touch the software destination, then move the hardware source.
When the keyboard stays silent
Work from the physical connection toward the software instrument. That order isolates the fault quickly and avoids changing several settings at once.
No device detected
Reconnect USB, try another port, confirm external power, and replace suspect cables.
Driver or firmware
Install the manufacturer’s current driver or firmware when the model requires it.
Notes do nothing
Verify Track in Ableton or the device input in Logic, then match the MIDI channel.
Activity, no audio
Load a software instrument, enable monitoring, arm the track, and check audio output.
Wrong track responds
Assign each controller to a specific input or MIDI channel when using multiple devices.
Settings look correct
Restart the DAW. If needed, power-cycle the keyboard and restart the computer.
Setup is becoming more flexible
Recent DAW and hardware generations reduce manual setup through stronger recognition, controller scripts, wireless connections, and higher-resolution MIDI standards.
Faster recognition
Ableton Live 11+ and Logic Pro X-era updates have refined device detection and setup workflows.
Preset mappings
Many controllers ship with dedicated DAW scripts and useful assignments already prepared.
Bluetooth MIDI
Wireless MIDI reduces cable clutter, though latency and compatibility should be tested.
MIDI 2.0
Higher-resolution control and richer device communication promise more expressive interaction.
Common setup questions
Keep these answers close when expanding the studio, changing controllers, or moving between DAWs.
What if the keyboard is missing?
Reconnect it, try another USB port, update required drivers, and restart the DAW or computer.
Can several keyboards connect?
Yes. Enable each device, then route them to separate tracks, instruments, or MIDI channels.
Is an audio interface necessary?
No. MIDI carries control data. Use built-in computer audio or an interface for improved audio output.
How should performances be tightened?
Record in manageable sections, then apply gentle 8th- or 16th-note quantization to suit the groove.
How to Connect Your MIDI Keyboard to Your Computer
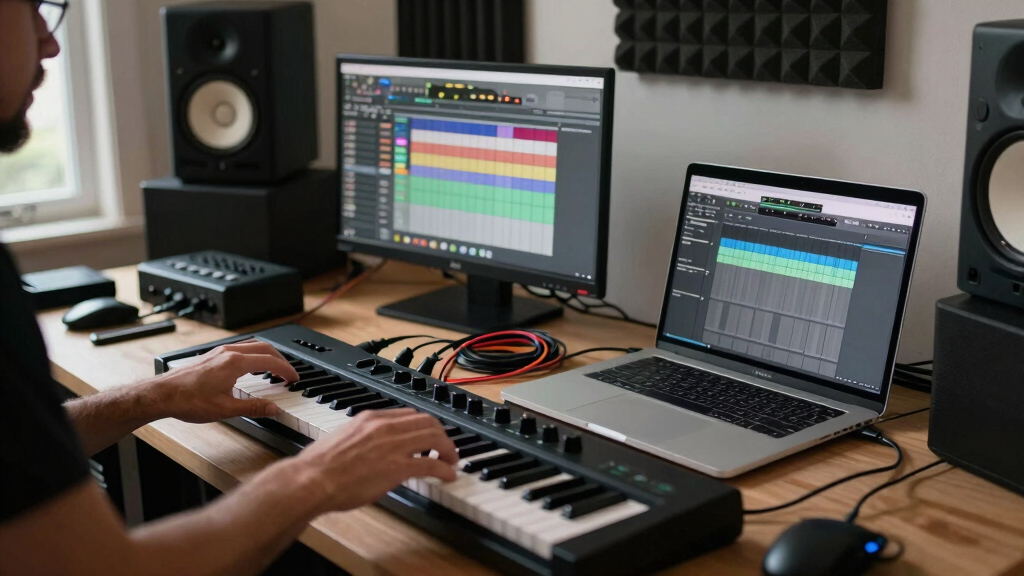
The first step is simple but crucial—get your keyboard physically connected. Use a USB cable if your keyboard has one. It’s quick, reliable, and often the easiest route. If your keyboard relies on MIDI DIN ports, grab a MIDI interface and connect via MIDI cables.
Once connected, power on your keyboard. Some models draw power from USB, others need an external power supply. Make sure everything’s plugged in, and your computer recognizes the device—check your system’s device manager or audio/MIDI settings.
As an affiliate, we earn on qualifying purchases.
Configuring MIDI Settings in Ableton Live
In Ableton Live, go to Preferences > Link/MIDI. You should see your MIDI device listed under MIDI Ports. Enable ‘Track’ and ‘Remote’ for your device—these settings let you record notes and control parameters.
For example, if you connect a Novation Launchkey, turning on these options allows you to play instruments and map controls. Once enabled, create a MIDI track, set its input to your device, and choose your desired instrument.
As an affiliate, we earn on qualifying purchases.
Setting Up MIDI in Logic Pro — Your Quick Start Guide
Open Logic Pro > Preferences > MIDI. Your keyboard should appear under MIDI Devices. If it doesn’t, try reconnecting or restarting Logic.
Next, create a new Software Instrument track. In the track’s input menu, select your MIDI keyboard. Now, when you press keys, you’ll see MIDI activity and hear sounds from your chosen instrument. It’s that simple.
USB MIDI controller with mapping features
As an affiliate, we earn on qualifying purchases.
As an affiliate, we earn on qualifying purchases.
Troubleshooting Common Setup Hurdles
If your MIDI keyboard isn’t recognized, check your USB connection first. Try unplugging and plugging in again. Make sure drivers or firmware are up to date—some keyboards need specific software installed.
In Ableton, verify that ‘Track’ and ‘Remote’ are enabled. In Logic, ensure your device appears under MIDI Devices. Restarting your computer or DAWs can often solve recognition issues.
Remember: the MIDI channel should match your instrument’s settings, especially if you’re using multiple devices. Double-check those channels if nothing’s registering.
As an affiliate, we earn on qualifying purchases.
Mapping Your Hardware Controls for Maximum Expression
Your MIDI keyboard often has knobs, faders, and pads that can control software parameters. To map these in Ableton Live, enter MIDI Map Mode (Cmd+M), click a parameter, then move the control you want to assign. Repeat for other controls.
In Logic, open the Controller Assignments window, click a parameter, then move your hardware control to assign it. This setup turns your keyboard into a real-time performance tool.
Understanding the importance of control mapping is key: it allows you to customize your workflow, making your live performances and recordings more expressive. Proper mapping can reduce the need for manual automation later, saving you time and enabling more spontaneous creativity. However, over-mapping can lead to a cluttered control surface, so prioritize controls that you use frequently and keep your mappings organized for efficiency.
Using Your MIDI Keyboard to Play and Record Instruments
With your MIDI keyboard connected and configured, start playing. In Ableton, arm a MIDI track, select a VST instrument, and jam away. In Logic, select your instrument, press record, and capture your performance.
One tip: record in small sections. After playing, quantize your MIDI data to tighten timing. For example, set quantize to 16th notes for a funky groove or 8th for a laid-back feel.
This step transforms your raw performance into polished parts ready for mixing.
Recent Innovations Making Setup Easier Than Ever
Today’s MIDI gear and DAWs are smarter. New versions of Ableton Live (11+) and Logic Pro (X updates) recognize devices faster, often with just a plug-and-play approach. Some keyboards include preset mappings for Ableton or Logic, saving setup time.
Wireless MIDI is also gaining traction—Bluetooth MIDI solutions let you connect without cables, boosting your setup flexibility. Plus, MIDI 2.0 promises richer control, higher resolution, and better responsiveness.
Quick Comparison: Setting Up in Ableton vs. Logic
| Feature | Ableton Live | Logic Pro |
|---|---|---|
| Device Recognition | Preferences > Link/MIDI, enable Track & Remote | Preferences > MIDI, select device in MIDI Devices |
| Track Setup | Create MIDI track, set input, load instrument | Create Software Instrument track, assign input, choose instrument |
| Control Mapping | Enter MIDI Map Mode (Cmd+M), assign controls | Controller Assignments window, assign hardware controls |
Frequently Asked Questions
What should I do if my MIDI keyboard isn’t recognized after setup?
Check your USB connection, try reconnecting, and ensure drivers are up to date. Restart your DAW or computer if needed. Sometimes, switching USB ports helps too.
Can I connect multiple MIDI keyboards at once?
Yes. Most systems recognize multiple devices. Just enable each in your DAW’s MIDI settings and assign them separately to different tracks or instruments.
How do I map hardware controls like knobs or pads?
In Ableton, enter MIDI Map Mode (Cmd+M); click a parameter, then move your control. In Logic, use Controller Assignments. Map as many controls as you need for maximum expressiveness.
Do I need an external audio interface to use my MIDI keyboard?
No. MIDI keyboards transmit data, not audio. As long as your keyboard connects via USB, you can work without an external interface. For audio output, use your computer’s built-in sound or an audio interface if recording audio.
How do I update my MIDI keyboard’s firmware or drivers?
Visit the manufacturer’s website, download the latest firmware or driver files, and follow their instructions. Regular updates can improve compatibility and performance.
Conclusion
Getting your MIDI keyboard set up in Ableton Live or Logic Pro isn’t rocket science—it’s about knowing where to click and what to check. Once it’s working, your creativity flows without hiccups.
Think of your MIDI keyboard as a bridge between your ideas and sound. When set up right, it’s the most expressive instrument in your studio. So, go ahead—plug in, configure, and start making magic happen.
Halloween Picks
halloween
As an affiliate, we earn on qualifying purchases.