TL;DR
Listen free for 30 days with Audible
Thousands of audiobooks and originals — cancel anytime.
Start your free trialAs an affiliate, we earn on qualifying purchases.
Timecode sync aligns multiple cameras by labeling each frame with a precise timestamp, streamlining editing. It’s essential for complex shoots, especially when audio or multiple angles are involved. Proper setup and understanding prevent drift and save editing time.
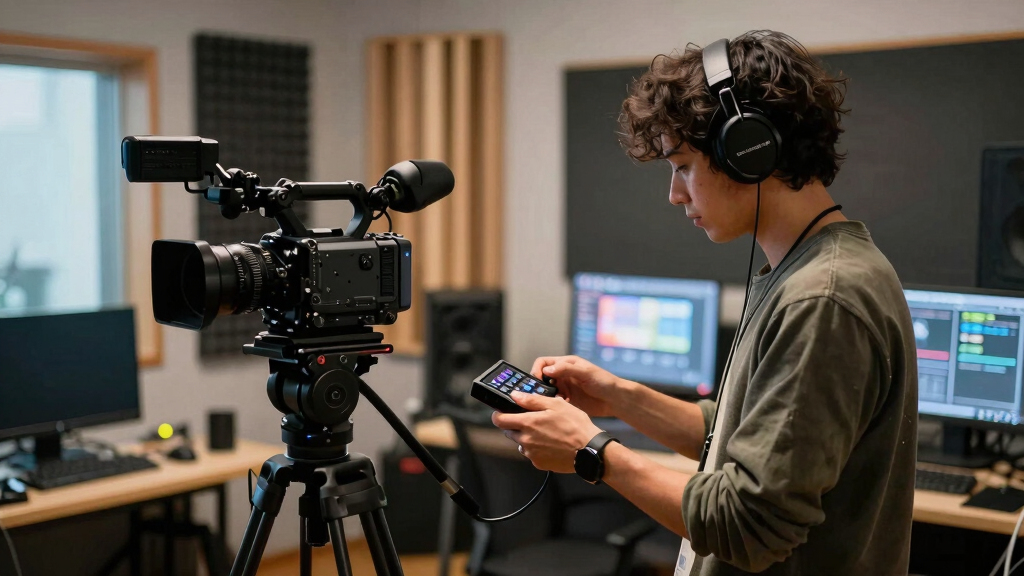
Imagine filming a concert with three cameras and a separate audio recorder. Without a common clock, aligning all those clips later feels like solving a puzzle blindfolded. Timecode sync isn’t just about nifty tech; it’s your secret weapon for quick, clean edits.
If you’ve ever spent hours lining up clips by eye—only to find they’re off by half a second—you’ll appreciate how a shared timecode can change the game. This guide unpacks the nuts and bolts of timecode, showing you how to make multi-camera shoots smoother, faster, and more reliable.
Use a dedicated timecode generator or a camera with TC out as your master clock for best accuracy.
Re-jam devices regularly—every 1-2 hours for prosumer gear, once a day for TCXO boxes—to prevent drift.
Always match your frame rate and timebase settings across all devices—mismatch causes drift and sync issues.
Recording LTC onto an audio track provides a reliable backup, especially with cameras lacking TC in/out.
In post, use your editing software’s multicam tools to sync clips automatically by timecode for a fast workflow.
What is Timecode and Why Does It Matter?
Timecode is a digital clock burned into every frame of your video or audio, stamped with an HH:MM:SS:FF format. When multiple devices share the same timecode, your editing software can instantly line up clips—saving hours of manual syncing.
For example, during a wedding shoot, a videographer might have a camera on the ceremony, another on the vows, and an audio recorder capturing the vows separately. If all three share the same timecode, you can load the clips into your editing timeline and have them perfectly aligned—no guesswork, no manual nudging.
It’s like giving each clip a GPS coordinate, so your editing tools know exactly where each shot fits. That’s why professional productions rely on it, especially when working with several cameras or long takes.

Saramonic Timecode Generator with 2.4GHz & Bluetooth App Wireless Control and Synchronization | Compatible with ARRI, RED, Canon, Sony, USB-C Devices & More (TC-NEO)
- Accurate SMPTE Timecode Sync: Eliminates post-production synchronization issues
- Multiple Syncing Modes: Supports Master Run, Auto Jam, Jam Once, Lock
- Broad Frame Rate Support: Compatible with 23.98 to 60FPS standards
As an affiliate, we earn on qualifying purchases.
As an affiliate, we earn on qualifying purchases.
How Timecode Actually Gets Shared Between Devices
Most cameras and recorders get their timecode from a master clock, which could be a dedicated box, a camera with built-in TC, or a smartphone app. The master clock sends a signal—either LTC (Linear Timecode) as an audio tone or VITC embedded in the video file—that all devices listen to and copy.
Think of it like a conductor leading an orchestra. The master keeps everyone on beat. Devices are either ‘jammed’ at the start of the shoot or re-jammed periodically to stay in sync. If they drift apart, your clips won’t line up perfectly, especially with cheaper gear or long recordings.
For instance, a sound mixer might set the master TC, and cameras with LTC inputs will record that tone on an audio channel. Later, in post, you decode the LTC to match the video clips to the master clock.
Understanding how the shared timecode is transmitted is crucial because it directly impacts the accuracy and reliability of your sync. Using proper cabling, secure connections, and correct decoding methods ensures your footage stays aligned, especially during longer shoots where even minor drift can accumulate. The decision between LTC, VITC, or wireless options depends on your gear, environment, and the level of precision needed—each has tradeoffs in complexity, cost, and robustness.

TASCAM DR-10L Pro Field Recorder with Lavalier Microphone and 32-bit Float Recording for Audio for Video — Supports 512GB microSDXC and LTC Jam Sync for Seamless Timecode Synchronization
- Firmware Update V2.0: Supports LTC Jam Sync for timecode
- Effortless Sound Recording: 32-bit float recording for high fidelity
- Large Storage Capacity: Supports microSDXC cards up to 512GB
As an affiliate, we earn on qualifying purchases.
As an affiliate, we earn on qualifying purchases.
The Biggest Mistake Beginners Make: Forgetting About Drift
Timecode isn’t magic—clocks drift, especially cheap ones. Over a long day, even a tiny difference of 0.2 parts per million (ppm) can cause your clips to fall out of sync by a full second after 5 hours.
Imagine recording a 4-hour documentary with multiple cameras. Without a TCXO (temperature-compensated oscillator), your cameras might drift by a frame or more every hour, making perfect sync a nightmare. This drift can lead to scenes that appear out of sync, requiring extensive manual correction, which defeats the purpose of using timecode in the first place.
Pro gear uses temperature-stabilized clocks, keeping drift under one frame for hours. That’s why investing in a good sync box or TCXO device pays off—less re-jamming, less frustration, and more reliable synchronization over long periods. Recognizing and accounting for drift is essential because even small discrepancies can compound, leading to significant misalignment that hampers editing efficiency. The tradeoff is that higher-quality gear and proper setup cost more but save time and frustration during post-production.
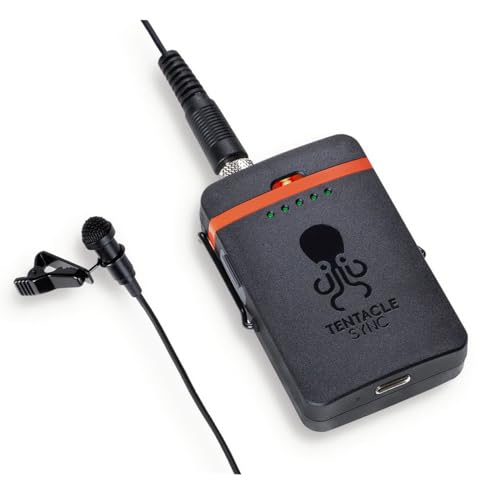
Tentacle Sync Track E Pocket Audio Recorder
As an affiliate, we earn on qualifying purchases.
As an affiliate, we earn on qualifying purchases.
Setting Up Your Multi-Camera Timecode Workflow — Step-by-Step
- Choose a master clock: a dedicated LTC generator or a camera with TC out.
- Connect all cameras and recorders to the master clock via cables or wireless sync boxes.
- Jam all devices at the start of the shoot—check the timecode displays match.
- Re-jam periodically—every 1-2 hours or when batteries swap—to keep everything aligned.
- Record LTC onto an audio track if your camera doesn’t have TC in/out, so you can decode it later.
- Use a slate or clapper at the start to get a visual and audio sync point for extra backup.
For example, during a music video shoot, you might jam all devices at the start, then re-jam when changing locations or after long takes. A simple clap at the beginning helps verify sync in post.
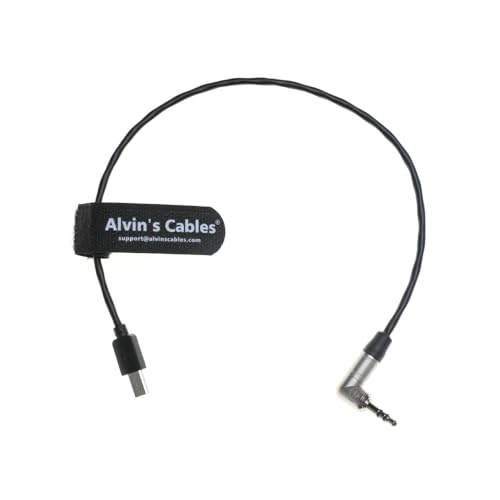
Alvin’s Cables Tentacle Timecode Cable for Sony FX3| FX30| A7S3| A1 Camera 3.5mm TRS to Micro USB Timecode Cable for Tentacle SYNC E Timecode Generator 35cm| 13.8in
- Timecode Compatibility: Supports Tentacle Sync E and more
- Durable Liquid Silicone Cable: Soft, flexible, withstands 25000+ bends
- Right Angle 3.5mm TRS Plug: For easy connection to cameras
As an affiliate, we earn on qualifying purchases.
As an affiliate, we earn on qualifying purchases.
Comparing Common Timecode Options — Which One Fits Your Budget?
| Feature | LTC (Audio) | VITC (Video Metadata) | Wireless Timecode Boxes |
|---|---|---|---|
| Cost | Low to moderate | Moderate to high | Moderate |
| Ease of use | Simple, but needs cables | Built into some cameras, or needs a recorder | Wireless, flexible, but setup needed |
| Accuracy | Excellent, depends on clock quality | Very accurate, depends on camera | High, with TCXO or atomic clocks |
| Best for | Long shoots, multiple cameras | High-end productions, professional editing | On-the-fly setups, quick re-jamming |
Troubleshooting Your Timecode Setup — What Might Go Wrong?
If your clips aren’t lining up, check these common issues:
- Clocks are not properly jammed or re-jammed.
- Devices are running at different frame rates (e.g., 23.976 vs. 24).
- Drift occurred because the clocks are cheap or environmental factors changed temperature.
- LTC cable connections are loose or faulty.
- Timecode was not recorded or decoded correctly in post.
For instance, a DSLR recording at 23.976 fps might drift from a professional camera at 24 fps, causing misalignment after a few minutes. Always match frame rates and re-jam regularly. Recognizing these issues early can save hours of troubleshooting during editing and prevent frustration. Understanding the root causes—whether it’s environmental factors, equipment limitations, or procedural oversights—allows you to refine your workflow and ensure consistent sync accuracy over the course of your shoot. The tradeoff is that meticulous setup and regular checks demand more effort upfront but pay dividends in editing efficiency and footage reliability.
What Post-Production Looks Like When You Use Timecode
In your editing software, matching timecode makes multicam editing almost automatic. Import all clips, select ‘Create Multicam Clip’ or similar, and the software will align everything based on the timecode labels.
For example, Resolve can read LTC directly from audio tracks and automatically sync clips. You’ll see a perfect lineup—no manual nudging needed. It’s a huge time saver, especially with dozens of clips or long takes.
Remember, a good slate or scratch audio helps verify the sync even if your software stumbles. That visual or audio cue can be a lifesaver.
Deeply understanding how your software interprets timecode and ensuring your clips are correctly labeled and decoded prevents subtle misalignments that can be hard to spot. The accuracy of your sync depends on proper setup, consistent recording practices, and choosing the right software tools. Investing time in mastering these post-production techniques ensures your multi-camera projects are seamless, saving you hours during editing and delivering a polished final product.
Frequently Asked Questions
Do I really need timecode, or can I just sync by audio waveform?
If your cameras record clean audio or you shoot short clips, waveform sync works. But in noisy environments, long takes, or when using multiple cameras without good onboard audio, timecode is the faster, more reliable choice.What’s the difference between timecode and genlock?
Timecode labels each frame with a timestamp—think of it as a frame’s ID tag. Genlock actually synchronizes when each sensor starts scanning a frame, which is critical for live switching or virtual production, but less so for post-production editing.How do I sync cameras that lack timecode input?
Use LTC recorded onto an audio track from a sync box or master clock. Later, decode the LTC in post to align your clips perfectly. It’s a common workaround for consumer or older cameras.How often should I re-jam my devices?
If you’re using professional gear with TCXO, once a day is enough. Cheaper gear might need re-jamming every 1-4 hours, especially if batteries or environmental factors cause drift.Can different frame rates work together with timecode?
Not exactly. Different frame rates cause drift over time. To keep everything aligned, match your frame rate across devices or conform clips in post. Otherwise, expect sync issues after a few minutes.Conclusion
Timecode isn’t a magic fix—it’s a tool that labels frames precisely, making multi-camera editing faster and cleaner. When set up right, it’s like giving your footage a shared GPS coordinate, saving you hours of manual syncing.
Remember, a simple re-jam, matching frame rates, and a visual slate keep your workflow smooth. Think of timecode as your secret shortcut—use it, and your editing becomes a breeze instead of a chore.
Fall Picks
fall essentials
As an affiliate, we earn on qualifying purchases.