TL;DR

Get audio and creator gear delivered free with Prime
- Fast, free delivery on millions of items
- Prime Video, Amazon Music and more included
- Member-only deals all year
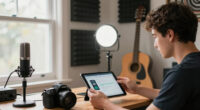
Three-point lighting uses three strategically placed lights to create even, flattering illumination. It reduces shadows, adds depth, and makes your face pop on camera — all achievable with budget-friendly options.
Ever notice how some people look crisp and professional on camera, while others seem washed out or shadowy? That’s often the power of good lighting. You don’t need a Hollywood studio—just a simple, well-placed three-point setup at your desk can make a huge difference.
In this guide, you’ll learn how to create a balanced, natural-looking light environment using affordable gear and smart placement. Whether you’re streaming, working remotely, or recording content, proper lighting can elevate your on-camera game without turning your desk into a mini studio.
Three-point lighting at your desk is achievable with affordable gear and smart placement.
Diffuse your lights to soften shadows and improve skin tones—avoid harsh bulbs or direct beams.
Adjust angles and color temperature for natural, flattering results that reduce eye strain.
Backlighting helps you stand out from the background, adding depth to your video.
Spend five minutes setting up your lights correctly—your videos will look much more professional.
Three Point Lighting for a Desk Setup
Three strategically placed lights create even, flattering illumination without turning your workspace into a film set. Shape the face with a key, tame shadows with a fill, and add depth with a backlight—all with compact, affordable gear.
Shadow reduction is possible when soft, diffuse sources are balanced around the face.
A daylight-balanced starting point for clear, natural-looking skin tones.
Enough time to position, soften, dim, and check all three lights.
Key · fill · back
Off-camera and above
Adjust to output
Three compact sources
Each light has one clear job
The goal is not maximum brightness. It is controlled contrast: enough shape to look dimensional, with enough softness to keep skin flattering and eyes comfortable.
Key light
The brightest source. It establishes facial shape, exposure, and the direction of the scene.
Fill light
A gentler source on the opposite side. It opens shadows without flattening every facial contour.
Back light
A small source aimed at the hair and shoulders. It creates a clean edge between you and the room.
Build around the camera axis
Start with the key, add only enough fill to recover detail, then place the backlight where it stays outside the camera frame.
Fill side
Lower intensity and slightly lower placement. Move it farther away or dim it until shadows remain soft but visible.
Keep the webcam near eye level. The lights sit to either side—not directly in front of glasses.
Key side
Place about two feet away, slightly above the eyes, and angle downward for natural cheek and jaw definition.
Small tools, professional result
Modern LEDs produce less heat, use less energy, and increasingly include dimming and adjustable color temperature—ideal for compact desks.
| Role | Budget option | Core job | Best control | Desk footprint |
|---|---|---|---|---|
| Key light | Clip-on ring light or small softbox | Soft, even facial illumination | ✓Dimming + diffusion | ~Small to medium |
| Fill light | Compact LED panel or flexible desk lamp | Reduce key-side shadows | ✓Angle + lower output | ✓Small |
| Back light | USB LED strip or mini panel | Separate hair and shoulders | ✓Directional placement | ✓Minimal |
| Overhead room light | Existing ceiling fixture | General room visibility | ✗Poor facial shaping | ✓None |
| DIY reflector | White card, paper, or foil board | Bounce key light into shadows | ~Distance + angle | ✓Very small |
Illustrative low-cost setup: $25 clip-on key + $10 flexible-arm fill + $15 USB backlight = approximately $50 total.
Soften first, then balance
Diffusion enlarges the apparent light source, smoothing transitions across the face. Consistent color temperature prevents uneven yellow and blue skin tones.
Balance the three roles
Use the key as your exposure reference. These are practical starting points, not rigid rules.
Choose one visual climate
Match every source where possible. Mixed temperatures are more distracting than choosing either warm or daylight light consistently.
Warm / tungsten
Natural daylight
A fast pre-call routine
Make changes while viewing the actual camera preview. Your eyes adapt to the room; the camera reveals hot spots, deep shadows, and glare.
Place the key
Set it 45° off-camera and slightly above eye level.
Add the fill
Position opposite and keep its intensity noticeably lower.
Edge the subject
Aim the backlight at hair or shoulders from behind.
Diffuse
Soften harsh sources and remove visible facial hot spots.
Preview and trim
Dim, angle, and match color until the image feels balanced.
Overhead light is dominating
Turn it off. Raise the key only slightly above eye level and tilt it gently downward.
Reflection meets the lens
Move both front lights farther to the sides, raise them, and angle them down past the glasses.
Every light is equally bright
Reduce the fill, darken the background slightly, and restore separation with the backlight.
Desk lighting FAQ
Compact setups reward experimentation. Change one variable at a time—angle, distance, output, or softness—so you can see what improved.
Can natural light replace a key light?
Yes, especially when you face a window. Because daylight changes with time and weather, combine it with a dimmable artificial fill for more consistent calls.
How close should the key light be?
About two feet is a useful starting point. Move it closer for softer light, then dim it to prevent hot spots and overexposure.
What works in a very small space?
Use clip-on LEDs, monitor-mounted panels, flexible arms, and a white card as fill. Compact positioning matters more than fixture size.
Is 5600K the only good setting?
No. Use 5600K for daylight neutrality or 3200K for a warmer evening mood. Matching all sources matters more than choosing one exact number.
Good lighting is placement and control—not expensive gear.
A soft key gives the face direction, a restrained fill protects detail, and a small backlight creates professional depth. Spend five minutes adjusting those relationships and your desk becomes a cleaner, clearer camera environment.
What is three-point lighting and why it makes your face look better
Three-point lighting is a classic setup used in film and photography. It involves three lights: a key light, a fill light, and a back (or hair) light. Together, they shape your face, reduce shadows, and add depth.
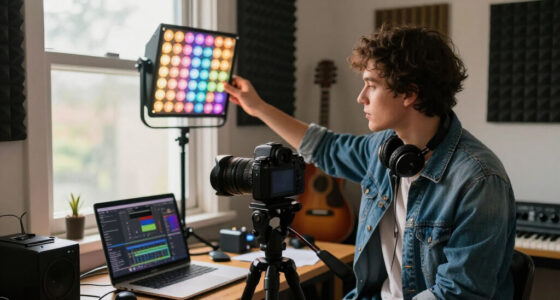
Imagine sitting at your desk. The key light is like the sun—bright and direct, placed at about 45 degrees to your face. The fill light softens shadows on the opposite side, making your features look smooth and natural. The backlight highlights your hair and shoulders, helping you stand out from the background.
This setup isn’t just for Hollywood—it’s perfect for your desk because it’s simple, effective, and adjustable.
As an affiliate, we earn on qualifying purchases.
How to position your lights for a flattering, balanced look
Getting the placement right is key. Start with your key light—place it about 45 degrees to the left or right of your camera, slightly above eye level. It should be bright but soft, so consider a softbox or a ring light with a diffuser.
The fill light goes on the opposite side, at a lower intensity—think of it as a gentle whisper of light to tame shadows. Use a smaller soft light or even a reflector if you’re on a tight budget.
The backlight should be behind you, aimed at the back of your head or shoulders, to create separation from your background. A small LED panel or even a desk lamp can do the trick.
For example, I set my key light on a adjustable stand about 2 feet from my face, with my fill light on the other side, slightly lower, and my backlight clipped onto my monitor arm pointing at my hair. The difference in my videos? Night and day.
As an affiliate, we earn on qualifying purchases.
The best budget-friendly gear for three-point lighting at your desk
| Type of Light | Recommended Budget Options | Features |
|---|---|---|
| Key Light | Ring lights, small softboxes | Soft, even illumination; adjustable brightness |
| Fill Light | LED panels, compact desk lamps | Lower intensity; adjustable angles |
| Back Light | USB-powered LED strips, small panels | Creates separation; easy to position |
For example, I use a $25 clip-on ring light as my key, a $15 USB LED strip behind my monitor as a backlight, and a $10 desk lamp on a flexible arm for fill. These simple gear choices produce much more polished videos than relying on overhead room lights alone.
As an affiliate, we earn on qualifying purchases.
How to tweak your lighting for perfect skin tones and minimal glare
Adjusting your lights for natural, flattering skin tones is easier than you think. Use soft, diffuse light sources—avoid harsh bulbs or bare bulbs that create unflattering shadows. A softbox or a ring light is ideal.
Set your color temperature around 5600K, which mimics daylight and makes your skin look natural. If your lights are too warm (yellow) or too cool (blue), tweak the settings or add a color correction gel.
To avoid glare or reflections on glasses, angle your lights slightly above and to the sides of your face. For example, I tilt my key light downward and position my fill light just off to the side, avoiding direct reflection on my glasses while still brightening my face evenly.
As an affiliate, we earn on qualifying purchases.
Common mistakes and how to fix them before your next shoot
Many people end up with shadows under their eyes or a flat, dull face because of poor lighting. Here are common pitfalls:
- Using only overhead room lights—causes unflattering shadows.
- Lights too close or too harsh—creates hot spots and glare.
- Ignoring background lighting—makes your face blend into the background.
Fix these by balancing your lights, adding diffusion, and paying attention to background illumination. For example, I once used only my desk lamp as a key—my face looked flat and tired. Adding a soft fill light transformed my look instantly.
Quick setup checklist for perfect desk lighting in 5 minutes
- Position your key light at 45° angle, slightly above eye level.
- Place your fill light opposite, at a lower intensity.
- Add a backlight behind you for separation.
- Diffuse all lights with softboxes or diffusers.
- Adjust brightness and angles until your face is evenly lit and shadows are minimized.
For example, I set up my lights in under 5 minutes and instantly looked more professional on my Zoom calls. It’s quick, cheap, and makes a real difference.
Frequently Asked Questions
Can I use natural light instead of artificial lights?
Yes, natural light works well, especially during the day. However, it’s inconsistent—changing with weather and time. Combining natural light with a small artificial light can give you a steady, flattering look that’s perfect for video calls or recording.
How close should my lights be to my face?
Keep your key light about 2 feet away, but adjust based on the light’s strength. Too close creates hot spots; too far, it can look flat. Use dimmers or adjustable stands to find the sweet spot for your space.
What if I don’t have space for a big setup?
Go compact. Use small LED panels, clip-on ring lights, or even DIY reflectors with white paper or aluminum foil. Position them close to your face, and use diffusers to soften the light—effective results don’t require a big footprint.
Is 5600K the only good color temperature?
5600K mimics natural daylight and is a safe bet for most scenarios. But if you want a warmer tone—say, cozy evening vibes—try 3200K. Consistency is key, so pick one and stick with it for uniform skin tones.
Conclusion
Good lighting isn’t about fancy gear — it’s about smart placement and control. With a few simple tweaks, you can turn your cluttered desk into a professional-looking studio.
Next time you join a video call or stream, remember: lighting is your secret weapon. A little effort goes a long way in making you look sharper, more confident, and more in control.
Halloween Picks
halloween
As an affiliate, we earn on qualifying purchases.