TL;DR

Get audio and creator gear delivered free with Prime
- Fast, free delivery on millions of items
- Prime Video, Amazon Music and more included
- Member-only deals all year
Setting up a drawing tablet in Photoshop and Krita involves installing drivers, customizing settings, and calibrating for accuracy. Recent updates improve pressure sensitivity and wireless options, making setup smoother than ever.
Ever tried drawing on a tablet and felt like your lines are off or your pressure isn’t responding? That’s frustrating — but it’s often just a matter of proper setup. Setting up a drawing tablet isn’t complicated, but it’s a step many skip or do poorly. When done right, it transforms your digital workflow, making drawing feel natural and precise.
This guide walks you through how to connect, configure, and optimize your tablet for Photoshop and Krita. Whether you’re working with a budget-friendly Huion or a high-end Wacom, these tips will help you get the most out of your setup. Ready to draw without headaches? Let’s dive in.
Always install the latest drivers and calibrate your tablet for precision.
Customize pressure sensitivity and shortcut buttons to match your workflow.
Test your setup with simple sketches to catch issues early.
Keep drivers updated to maintain compatibility and fix bugs.
Use calibration tools regularly for consistent accuracy.
How to Set Up a Drawing Tablet in Photoshop and Krita
Connect it, calibrate it, and make every stroke behave as intended. A careful setup turns offset lines, missing pressure, and awkward shortcuts into a natural, precise drawing workflow.
Windows, macOS and Linux—model support varies.
Wired stability or wireless mobility.
Hardware, driver, tablet settings and app settings.
Test lines, pressure, tilt and shortcuts early.
Build the input chain in the right order
Each layer depends on the one before it. Confirm the operating system sees the tablet before adjusting brushes, pressure curves, or application preferences.
Check compatibility
Confirm the tablet model supports your operating system and display setup.
Connect the tablet
Start with USB for stability. Power on the device and test cursor movement.
Install the driver
Download the latest release from Wacom, Huion, XP-Pen or Gaomon.
Map and calibrate
Match the active area to the intended display and correct any stylus offset.
Configure the app
Enable pen pressure, tune brush dynamics, map buttons and make a test sketch.
Proper calibration creates accurate stylus-to-screen mapping. It is one of the most important—and most frequently skipped—steps for detailed digital artwork.
Activate pressure where the brush engine expects it
Driver-level pressure is only half the setup. Photoshop and Krita must also be configured so brush size, opacity, flow, and tilt respond to stylus input.
Pressure-led brush dynamics
Brush Settings → Shape Dynamics → Control: Pen Pressure
- Enable Use Graphics Processor for smoother canvas performance.
- Link pen pressure to size, opacity, or both.
- Test a thin-to-thick stroke with one continuous motion.
- Map a pen button to undo or brush-size adjustment.
Flexible pressure and input control
Brush Editor → Size / Opacity / Flow → Pressure
- Enable tablet pressure and verify the selected input method.
- Adjust the pressure curve if strokes feel too hard or too soft.
- Link pressure to size, opacity, flow, or multiple parameters.
- Assign stylus buttons to undo, canvas pan, or brush resizing.
Pressure curve: start balanced, then tune to your hand
Example target · responsive without sudden jumpsChoose settings by stability and drawing style
There is no single perfect configuration. Use the comparison below to select a reliable connection, appropriate mapping, and practical sensitivity profile.
| Decision | Option | Best use | Trade-off | Verdict |
|---|---|---|---|---|
| Connection | USB cable | Detailed work and initial setup | Desk cable | ✓ Most stable |
| Connection | Bluetooth / wireless | Mobility and cleaner desks | Possible lag or battery limits | ~ Test first |
| Mapping | One display | Precise hand-to-screen movement | Cursor limited to one monitor | ✓ Recommended |
| Mapping | All displays | Multi-monitor navigation | Drawing area may feel compressed | ~ Situational |
| Pressure | Balanced curve | Beginners and general illustration | May need personal adjustment | ✓ Start here |
| Maintenance | Outdated driver | No practical advantage | Bugs, lag and compatibility issues | ✗ Update it |
What most affects drawing feel
A practical setup-priority index based on direct workflow impact.
A low-friction button map
Keep high-frequency actions under your drawing hand.
Find the broken link before changing everything
Most tablet issues come from the connection, driver, mapping, or application brush settings. Test one layer at a time and restart after driver changes.
Tablet not recognized
Reconnect the cable, try another USB port, confirm power, restart, and reinstall the manufacturer’s latest driver.
No pressure response
Verify pressure in the driver first, then enable Pen Pressure in the active Photoshop or Krita brush.
Stylus is offset
Run calibration again and confirm the tablet is mapped to the correct display and active drawing area.
Jittery lines
Test a wired connection, disable conflicting tablet utilities, inspect the nib, and reduce excessive smoothing.
Wireless lag
Charge the tablet, reduce interference, reconnect Bluetooth, or switch to USB for precision-heavy sessions.
Wrong monitor mapping
Select a single drawing display in the driver and preserve the screen’s aspect ratio when defining the active area.
Start With the Right Hardware and Connection Method
Your first step: make sure your tablet is compatible with your operating system. Windows, macOS, Linux — check the specs. Connecting can be via USB, Bluetooth, or wireless. For example, a Wacom Intuos often connects easily via USB, while newer models might support wireless.
Plug in your device, turn it on, and ensure it’s recognized by your OS. If your tablet has a dedicated driver CD or downloads from the manufacturer’s site, grab the latest version. This avoids issues with bugs or compatibility.
Tip: Use a USB cable for stability when working on detailed projects. Wireless is handy but can cause lag if the connection isn’t solid. Test the connection by moving the stylus around and see if your cursor responds seamlessly.
drawing tablet with pressure sensitivity
As an affiliate, we earn on qualifying purchases.
As an affiliate, we earn on qualifying purchases.
Install and Fine-Tune Your Drivers for Peak Performance
Drivers are the brain behind your tablet. Download the latest from the manufacturer — Wacom, Huion, XP-Pen — and install them. During setup, you’ll often choose the active drawing area, pressure sensitivity levels, and button functions.
For example, a Huion tablet might have a default active area of 8×5 inches, but if your monitor is 24 inches wide, you’ll want to match that for natural drawing. The driver software usually offers a calibration feature — don’t skip it.
Pro tip: Update drivers regularly. Manufacturers fix bugs and improve compatibility with new OS versions. Also, check the driver’s software for features like pressure curve adjustments or tilt sensitivity, which enhance your control.
Why it matters: Proper driver configuration ensures your stylus input accurately corresponds to your screen, which directly impacts your ability to produce precise, professional-quality artwork. Neglecting calibration or updates can lead to inconsistent strokes, offsetting lines, or unresponsive controls, ultimately disrupting your creative flow.
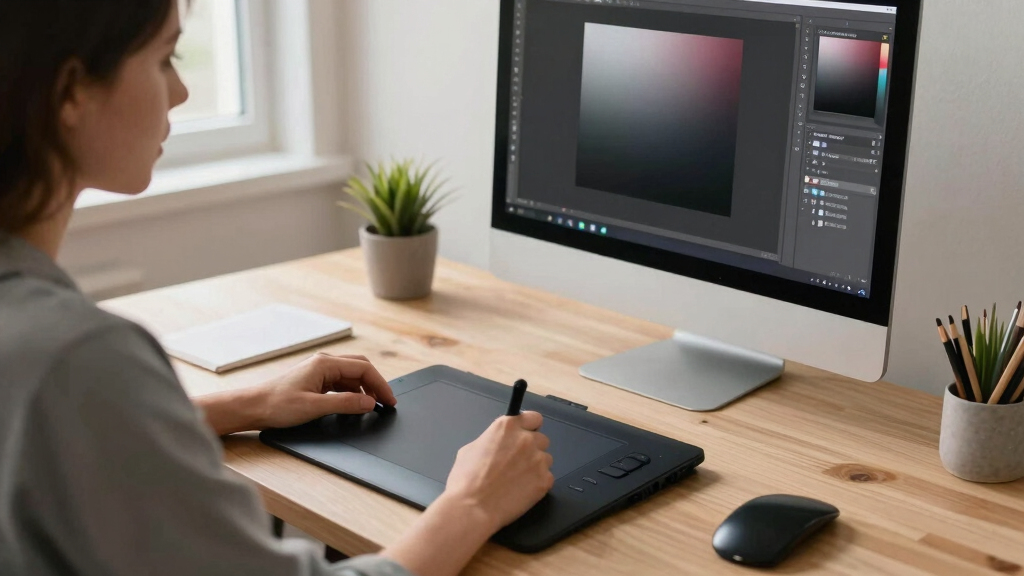
Wacom drawing tablet for Photoshop
As an affiliate, we earn on qualifying purchases.
As an affiliate, we earn on qualifying purchases.
Customize Your Settings for a Natural Drawing Feel
Now that drivers are installed, it’s time to tweak your tablet settings. Open the driver software and set pressure sensitivity to match your style — more pressure for thicker lines, less for fine details. For example, increasing pressure sensitivity to 8192 levels allows for smoother gradations and more nuanced control, which is essential for detailed shading and line work.
Adjust tilt recognition if your stylus supports it. Tilt can emulate traditional brushes’ angle, adding realism and variety to your strokes. Mapping your ExpressKeys or shortcut buttons to common commands — undo, redo, brush size — so you don’t have to reach for your keyboard. These shortcuts reduce workflow interruptions and keep your hand on the tablet, which is crucial for maintaining a natural drawing rhythm.
Why it matters: Fine-tuning pressure curves and tilt recognition enhances your ability to mimic traditional media, giving your digital art more depth and realism. Proper button mapping streamlines your process, saving time and reducing repetitive strain, thereby improving both efficiency and comfort during long sessions.
As an affiliate, we earn on qualifying purchases.
Set Up Your Tablet in Photoshop and Krita for Seamless Drawing
Both Photoshop and Krita support pressure sensitivity and customizable input. In Photoshop, go to Preferences > Cursors > Painting. Check Use Graphics Processor for smoother performance. Then, in Brush Settings, enable Shape Dynamics and set Control to Pen Pressure. This ensures your brush responds dynamically to your stylus pressure, allowing for a more natural drawing experience. Adjusting these settings impacts how your strokes behave — for example, making pressure control more or less sensitive, which is vital for achieving the desired line quality.
In Krita, head to Settings > Configure Krita > Tablet. Enable Pressure Sensitivity and assign your stylus buttons to functions like undo or brush resizing. Krita’s brush engine allows you to link pressure to size, opacity, and flow for more natural strokes. These configurations enable your brushes to respond intuitively, mimicking traditional media and allowing for expressive control.
Why it matters: Correctly setting pressure sensitivity and button mappings in these programs directly influences your ability to produce nuanced, expressive artwork. Proper setup prevents frustration with unresponsive or overly sensitive strokes and ensures your digital tools behave as naturally as traditional media, which is crucial for professional quality work.
wireless drawing tablet for digital art
As an affiliate, we earn on qualifying purchases.
As an affiliate, we earn on qualifying purchases.
Troubleshooting Common Setup Issues
If your tablet isn’t recognized, start by checking the connection. Reinstall drivers, or try a different USB port. For Bluetooth models, ensure your OS recognizes the device and that Bluetooth is enabled. Sometimes, a simple restart fixes detection bugs.
If pressure sensitivity isn’t working, confirm you’ve enabled it in both the driver and your drawing software. In Photoshop, make sure the brush dynamics are set to respond to pen pressure. In Krita, check the pressure curve settings on your brush. These settings are often overlooked but are critical for achieving the desired responsiveness and control. Misconfigured settings here can lead to unresponsive brushes or inconsistent pressure response, which hampers your ability to create detailed and expressive artwork.
Use calibration tools provided by your driver software to improve accuracy. For example, if your stylus seems offset or jittery, recalibrate until your strokes line up perfectly with your cursor. Regular calibration ensures your stylus input remains precise over time, which is essential for detailed work and professional results.
Remember: Keep your drivers updated. Compatibility issues often resolve with the latest software patches, and outdated drivers can cause unpredictable behavior or lag.
Optimize Your Workflow With Shortcut Buttons and Settings
Customizing your tablet’s shortcut buttons can save precious time. For instance, map one button to undo (Ctrl+Z), another to switch brushes, and a third for zooming. In Photoshop, this speeds up your workflow. Krita users benefit from assigning shortcuts for layer toggles or color pickers.
Set up your workspace and shortcuts so that your hand stays on the tablet. This minimizes disruption and keeps your focus on the art. Experiment with different button mappings to find what feels most intuitive.
Why it matters: Well-mapped shortcut buttons not only speed up your process but also reduce repetitive movements that can lead to fatigue or discomfort. A thoughtfully configured workflow allows you to focus more on your creative decisions rather than technical navigation, which is vital for maintaining productivity during extended sessions.
Getting the Most Out of Your Setup with Calibration and Testing
Calibration is the secret to pinpoint accuracy. Use your driver’s calibration tool to match your stylus’s tip to the cursor on screen. For example, if your lines are slightly offset or jitter, recalibrate until the cursor tracks your strokes perfectly. Proper calibration ensures that your input is directly mapped to your display, which is essential for detailed work where precision matters.
Test your setup by drawing a grid or straight lines. If lines wobble or are uneven, tweak the calibration or pressure curves. Consistent testing helps you find the sweet spot for your specific tablet and stylus, ensuring your strokes are smooth and accurate. Remember, calibration isn’t a one-time fix — revisit it after driver updates or hardware changes to maintain optimal accuracy.
Why it matters: Accurate calibration forms the foundation of professional digital artwork. It minimizes discrepancies between your stylus movements and the resulting strokes, allowing you to work confidently without fighting against hardware inconsistencies.
Frequently Asked Questions
Why isn’t my tablet responding in Photoshop or Krita?
Check if the drivers are installed correctly and updated. Ensure your tablet is calibrated and recognized by your OS. Also, verify that pressure sensitivity is enabled in both the driver and the software preferences.How can I customize my pen buttons for shortcuts?
Open your driver software and assign functions like undo, redo, or brush size to the tablet’s shortcut buttons. In Photoshop or Krita, customize your workspace so these buttons trigger commands for faster workflow.My pressure sensitivity works in one program but not the other. Why?
Each software has its own pressure settings. Make sure pressure sensitivity is enabled and correctly configured in both Photoshop and Krita. Also, check that your brush dynamics respond to pen pressure in each program’s settings.Can I use my tablet with multiple monitors?
Yes, most modern tablets support multi-monitor setups. You might need to adjust the mapping in your driver software to ensure the active drawing area matches your monitor setup, avoiding offset or mismatch issues.What should I do if my tablet lags or feels unresponsive?
Try reconnecting the tablet, updating drivers, and reducing the active drawing area in the driver settings. Also, close other background apps that might interfere, and restart your computer if needed.Conclusion
Your drawing tablet is only as good as your setup. Take the time to connect it properly, install the latest drivers, and fine-tune your settings. It might seem like small steps, but they make a world of difference in your digital art.
With a properly calibrated and customized tablet, your lines will flow naturally, and your creative flow won’t be interrupted by technical hiccups. Remember: a smooth setup isn’t just about tech — it’s about making your art feel just right. Now, go create without limits.
Fall Picks
fall essentials
As an affiliate, we earn on qualifying purchases.