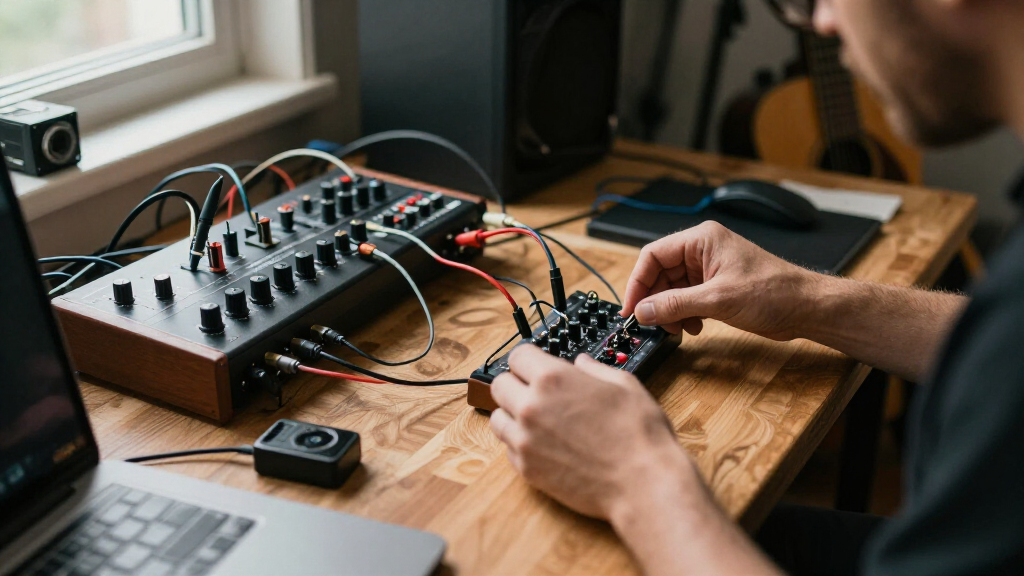

TL;DR

Get audio and creator gear delivered free with Prime
- Fast, free delivery on millions of items
- Prime Video, Amazon Music and more included
- Member-only deals all year
Ground loops happen when multiple grounding paths create a current that introduces hum or digital noise. Using proper wiring, balanced connections, and isolation devices can break these loops and restore quiet. Troubleshooting step-by-step reveals the specific fix for your setup.
Imagine your pristine synth sound, suddenly drowned in a steady 60 Hz hum or a high-pitched digital chirp. That’s ground loop noise, sneaking in through unexpected paths in your rig. It’s frustrating, sneaky, and often misdiagnosed. But understanding how these loops form and how to fix them can save your sessions from endless fuss. In this guide, you’ll learn how ground loops happen, practical wiring fixes, and the best isolation tools to clear the chaos from your sound.
Whether you’re gigging live or working in your studio, these tips come from real-world experience building gear on a budget. No need for expensive gear—just smart wiring, good practices, and a few simple devices to tame that pesky hum.
A ground loop occurs when multiple conductive ground paths create a voltage difference, causing audible noise.
Diagnose ground loops by disconnecting everything and reconnecting step-by-step, noting when noise appears.
Use proper wiring—balanced cables, stereo line isolators, DI boxes, or optical digital links—to break loops and silence hum.
USB and digital connections can carry ground loop currents; USB isolators and optical links help prevent this.
Power your gear from a single, well-grounded circuit whenever possible, and never disable safety earth for noise fixes.
Ground Loops in Synth Rigs: Isolators and Wiring Fixes
Ground loops happen when multiple grounding paths create a current that introduces hum or digital noise. Proper wiring, balanced connections, and isolation devices can break these loops and restore quiet. No expensive gear needed—just smart wiring, good practices, and a few simple devices.
What Exactly Is a Ground Loop?
A ground loop forms when interconnected gear shares more than one conductive path to ground. Tiny voltage differences—just a few millivolts—drive current through cable shields and signal grounds, turning into audible hum or digital chatter.
The result: mains hum, whining, chirping, or zipper-like interference from USB traffic, graphics hardware, switch-mode supplies, and displays. Plugging in a second monitor or USB hub can ignite a buzz that won’t quit.
How to Spot Ground Loops in Your Setup
Steady 50/60 Hz Hum
Appears or worsens when connecting certain gear. Classic loop signature, with harmonics at 100/120 Hz.
Digital Chirping
High-pitched whine or zipper noise that shifts with screen activity or USB traffic—modern rigs are full of it.
Disappears on Disconnect
Noise vanishes when a specific cable is pulled or a device powers down. That cable is your clue.
Not a Loop at All
Excess gain, hiss, dimmers, LED lamps, chargers, faulty supplies, and the “pin 1 problem” mimic loop noise.
MIDI-Thru Paths
Multiple MIDI-Thru connections can create unintended ground paths between devices.
Damaged Cables
A broken shield, damaged connector, or inherently noisy synth output can masquerade as a ground loop.
Balanced Connections Help—But Don’t Always Fix It
Balanced audio carries signal as a differential pair and rejects interference—but only when both ends are genuinely balanced. A TRS connector is not automatically balanced; many synths have unbalanced TS outputs even when the socket accepts TRS plugs.
| Connection Type | Breaks Ground Loop | Rejects Interference | Notes |
|---|---|---|---|
| TRS / XLR (both ends balanced) | ~ Sometimes | ✓ Strong | Best-case wiring; use wherever both devices support it. |
| Unbalanced TS → balanced input | ✗ Weak | ~ Partial | A balanced input can’t turn a TS source into a balanced one. |
| Impedance-balanced output | ~ Partial | ✓ Useful | One conductor carries signal; matched impedance still rejects noise. |
| Pseudo-balanced cable | ✓ Reduces shield current | ✓ Good | Source ground → cold conductor; shield tied at receiving end only. |
| Stereo headphone TRS | ✗ No | ✗ No | Stereo, not balanced mono—a false sense of security. |
Isolation Transformers: Break the Loop, Keep the Sound
A line-level transformer breaks the direct electrical connection between two devices while transferring audio magnetically—a galvanic barrier that stops loop current in its tracks. Passive units need no power and are often sufficient; active isolators add buffering but also another supply and potential noise path.
Cheap transformers may weaken bass, saturate on loud signals, or distort—choose line-level isolators over guitar-level units.
Never disable or lift the protective mains earth to cure noise. A DI box ground-lift switch disconnects only the audio shield—mains safety stays intact.
Step-by-Step Troubleshooting Flow
Disconnect everything, then add gear back one piece at a time. Note when noise appears or disappears—that’s the specific point where the loop forms, and your clear target for the fix.
Strip Down
Disconnect every cable and device. Confirm silence first.
Add One Piece
Reconnect gear one item at a time, listening carefully.
Mark the Culprit
The connection that sparks noise reveals the second ground path.
Apply the Fix
Isolator, DI with ground lift, or rewiring—match fix to path.
Verify Quiet
Re-test the full rig; single power circuit where possible.
Key Takeaways
- 1
A ground loop occurs when multiple conductive ground paths create a voltage difference, causing audible noise.
- 2
Diagnose by disconnecting everything and reconnecting step-by-step, noting exactly when noise appears.
- 3
Fix with wiring: balanced cables, stereo line isolators, DI boxes, or optical digital links break the loop.
- 4
USB and digital connections carry loop currents too—USB isolators and optical links prevent this path.
What Exactly Is a Ground Loop and Why Does It Make Noise?
A ground loop is a looped electrical path that forms when multiple pieces of gear share more than one ground connection. These loops allow tiny voltage differences—just a few millivolts—to cause current to flow. That current runs through signal shields or grounds, turning into audible hum or digital noise. For example, if your synth is connected to your audio interface via cable, and also plugged into a different power ground through your computer or display, you’ve created a potential loop. When the loop completes, current can flow, and that’s when you hear the familiar 50/60 Hz hum or high-frequency chatter.
This isn’t just theory. I’ve seen rigs where simply plugging in a second monitor or connecting a USB hub ignited a steady, steady buzz that wouldn’t quit. It all comes down to multiple ground paths—each with a tiny voltage difference—fighting for equilibrium and causing noise.
Why does this matter? Because these tiny currents can significantly degrade your audio quality, introduce digital chatter, or cause unpredictable behavior in sensitive synth modules. Recognizing and understanding the formation of these loops helps you prevent or eliminate these issues, ensuring your gear operates harmoniously. The tradeoff is that in some cases, completely isolating grounds can affect safety or other system functions, so it’s about balancing noise reduction with proper safety considerations.
ground loop isolator for synthesizers
As an affiliate, we earn on qualifying purchases.
As an affiliate, we earn on qualifying purchases.
How to Spot Ground Loops in Your Synth Setup
The first step is recognizing a ground loop. Look for a few telltale signs:
- Steady 50/60 Hz hum that appears or worsens when connecting certain gear.
- High-pitched digital chirping or zipper noise that shifts with screen activity or USB devices.
- Noise that disappears when you disconnect a specific cable or turn off a device.
For example, I once had a modular synth setup where plugging in a second monitor or connecting a USB hub caused the hum to spike. Isolating each connection step-by-step helped me find the culprit—usually a second ground path through USB or power wiring. Recognizing these symptoms early prevents hours of frustration and helps you focus your troubleshooting efforts.
Tip: Use a simple method—disconnect everything, then add gear back one piece at a time. Note when the noise appears or disappears. That’s your clue. This method is crucial because it allows you to systematically identify the specific point where the ground loop forms, giving you a clear target for fixes.
Understanding these signs helps you differentiate between ground loops and other noise sources like interference or faulty gear, which ensures you apply the right solution from the start.
As an affiliate, we earn on qualifying purchases.
Why Balanced Connections Help—But Don’t Always Fix the Noise
Balanced audio cables—TRS or XLR—are designed to reject interference by carrying signals as a differential pair. In theory, they cancel out noise picked up along the cable. But here’s the catch: many synths and interfaces aren’t truly balanced. A lot of synth outputs are unbalanced, even if the jack looks like a balanced connector.
For instance, a typical Eurorack module may have a TS output, which is unbalanced. If you connect it to a balanced input on your interface with a TRS cable, you might see some noise reduction, but not complete silence. This is especially true if the synth’s ground shares a loop with other gear. The effectiveness of balanced connections depends on proper implementation; if one end isn’t balanced, the benefit diminishes. Using balanced wiring can reduce susceptibility to external interference and sometimes break a ground loop, but it’s not a guaranteed fix for internal ground issues or existing loops.
Furthermore, the tradeoff is that balanced connections are more complex, require proper wiring, and may introduce new issues if not implemented correctly. For example, improper pinouts or grounding schemes can inadvertently create new loops or reduce noise rejection. So, understanding the limitations and the correct application is key—balanced connections are a tool, not a magic bullet.
Note: Stereo headphone outputs using TRS are not balanced mono outputs. They’re designed for stereo, not noise rejection in a balanced sense. Misusing them can give a false sense of security, so always verify your gear’s specifications and wiring practices.
As an affiliate, we earn on qualifying purchases.
Using Isolation Transformers to Break the Loop and Silence Noise
Isolation transformers are a powerful tool for breaking ground loops. They work by magnetically transferring audio signals without creating a direct electrical connection between your synth and audio interface. This magnetic coupling inherently isolates the grounds, effectively breaking the loop and stopping current flow that causes hum. Think of them as a barrier that prevents the ground path from completing, thus eliminating the noise source.
For example, plugging your synth’s output into a stereo line isolator—an inexpensive transformer—can instantly cut that buzzing hum. These transformers are designed with flat frequency response and high headroom, ensuring minimal impact on your sound quality. The key tradeoff is that some cheap models may weaken bass frequencies or saturate on loud signals, so investing in quality units is advisable. When chosen correctly, they preserve the fidelity of your audio while removing the ground loop.
Active isolators, which require power, can offer additional buffering and control, but often add complexity and potential signal degradation if not designed well. Passive transformers are simpler, more reliable, and often sufficient for most synth applications. I’ve used a simple stereo transformer in my live rig to fix persistent hum, and the result was a dramatically cleaner signal with no noticeable loss in sound quality.
In essence, isolation transformers act as a galvanic barrier, preventing current from flowing through unwanted paths. They’re especially useful when you cannot rewire or reconfigure your system easily. The tradeoff is that they add a small cost and some size, but the payoff—clean, hum-free sound—is often worth it.
As an affiliate, we earn on qualifying purchases.
When and Why to Use a DI Box on Your Synths
A DI (Direct Injection) box is a crucial tool for converting unbalanced, high-impedance signals from your synth into a balanced, low-impedance form that’s suitable for long cable runs and mixing consoles. The ground-lift switch on a DI is especially important because it can disconnect the shield, effectively breaking the ground loop without compromising your safety. This makes DI boxes invaluable for preventing hum in complex setups.
For example, running a modular synth into a mixer over long XLR cables benefits greatly from a DI. It isolates the synth’s ground from the rest of the system, preventing the formation of a loop. Passive transformer DI boxes are common, robust, and ideal when your synth’s output level is high enough—no power needed. They’re straightforward, reliable, and effective at eliminating ground loops.
Active DI boxes, which require power, are better suited for very high-impedance sources or when your synth’s output is weak. They often provide additional features like padding or EQ, but always check whether they include galvanic isolation—transformer-based circuitry that physically separates grounds. The key is to choose a DI that matches your gear’s impedance and output level for optimal noise reduction.
Pro tip: Use a DI with a pad if your synth’s output is too hot, preventing distortion or damage. Also, always verify that the ground-lift switch is functioning properly—sometimes it can be faulty, negating its benefits.
Breaking USB Loops: When and How to Use USB Isolators
USB connections are a common source of ground loops in modern synth setups, especially when connecting computers, interfaces, and external devices. They often create a closed loop that introduces hum or digital noise. A USB isolator can break this loop, but not all are equally effective. The most important factor is compatibility: many budget USB isolators only support USB 1.1 or low-speed modes, which may be insufficient for high-bandwidth audio or multichannel data.
For example, an older, low-cost USB isolator might work well for MIDI controllers but choke on a multichannel audio interface that requires USB 2.0 or higher. Always check the specifications—look for models supporting USB 2.0 or 3.0, with sufficient current limits, and proper shielding. Higher-quality isolators often use optical or galvanic isolation techniques that effectively prevent ground currents from passing through, eliminating digital chatter and hum.
Optical USB extenders with fiber optic cables offer another form of digital isolation, especially useful in complex or long-distance setups. Some digital audio protocols—like Dante or Ravenna—are inherently designed to avoid ground loops because they operate over network infrastructure, but they still require proper grounding of network equipment.
Pro tip: If your setup only exhibits noise when connecting the computer, try swapping in a high-quality USB isolator to see if it clears up the hum or digital chatter. Remember, the key is matching your device’s data rate and power requirements with the isolator’s capabilities for optimal results.
Digital Audio Options That Keep Your Signal Clean
Switching to digital audio formats such as optical S/PDIF or ADAT can inherently eliminate ground loop problems because they transfer signals via light, providing galvanic isolation. This means no direct electrical connection exists, preventing the formation of ground loops that cause hum. For instance, connecting your synth via optical ADAT to your interface ensures that the audio signal is electrically isolated, avoiding the common issues associated with analog cabling.
Coaxial S/PDIF, on the other hand, is an electrical connection that can carry ground loop currents unless a transformer is used to isolate it. Some professional gear supports transformer-coupled AES3 signals, which also provide galvanic isolation. Ethernet-based digital audio protocols like Dante or Ravenna inherently avoid ground loops because they operate over network infrastructure, which can be designed with proper isolation and grounding practices.
The key implication is that optical digital connections and networked audio systems are often the most reliable way to keep your signals free from ground-related noise. They are especially advantageous in complex setups with multiple interconnected devices, where analog cabling would otherwise invite hum and chatter. The tradeoff is that gear must support these digital formats, and optical cables require careful handling to prevent damage and signal loss.
Understanding these options allows you to design a signal chain that’s not only high quality but also immune to ground loop issues, giving you a cleaner, more reliable setup for studio or live environments.
Power, Wiring, and Good Habits to Keep Noise Away
The basics: power all interconnected gear from a single, well-grounded circuit whenever possible. This minimizes voltage differences that can cause loops. Use a quality power strip or distribution unit, ideally with filtering. But beyond that, proper wiring practices are essential. For example, keeping audio cables away from power supplies and adapters prevents induced noise. Crossing cables at right angles reduces electromagnetic interference, and avoiding coiled cables around power bricks minimizes coupling. Labeling cables and keeping power supplies separate from sensitive gear helps maintain clarity. For example, I once moved my power strip to a dedicated outlet, and the hum vanished—simple, but effective.
Remember: never defeat the mains earth pin or use unsafe “cheater” plugs. Safety always comes first, even when troubleshooting noise. Using a star grounding configuration—where all grounds connect to a single reference point—reduces the potential for loops. Also, avoid daisy-chaining multiple power sources, which can create unintended ground paths and noise.
Adopting these habits minimizes the risk of ground loops and ensures your gear operates safely and quietly. The tradeoff is that meticulous wiring and power management require initial effort but pay off with cleaner sound and safer operation.
Troubleshooting Step-by-Step: Find the Culprit and Fix It
When in doubt, the most reliable approach is to methodically strip your setup down to basics. Turn everything off, then reconnect one device at a time, listening for the reappearance of noise. For example:
- Connect your audio interface directly to your monitors. Is it quiet?
- Add your synth’s audio output. Is the hum still absent?
- Connect your USB or MIDI devices separately. Note when noise appears.
- Introduce other gear piece by piece, carefully observing when the hum or digital chatter reemerges.
This process helps you pinpoint the specific device, cable, or connection that introduces the ground loop. Once identified, you can apply targeted fixes—using balanced wiring, transformers, or digital isolators—to eliminate the problem. Retesting after each step ensures you understand exactly where the issue originates.
For example, I once discovered that disconnecting my USB hub eliminated a persistent high-frequency chirp. Replacing it with a simple MIDI DIN connection resolved the digital noise, confirming that the USB traffic was the culprit. This systematic approach saves time and prevents unnecessary guesses, leading to effective, lasting solutions.
Understanding how to methodically troubleshoot is essential because ground loop issues can be subtle and intertwined with other system factors. Patience and careful testing are your best tools for a hum-free rig.
Quick Fixes: What to Try First Based on Your Situation
Here’s a quick reference for common scenarios, with an understanding of why these fixes work:
| Situation | Likely First Fix |
|---|---|
| Unbalanced synth into interface | Use a properly wired cable or stereo line isolator to prevent ground currents from flowing through the signal path. |
| Noise spikes when USB connects | Insert a USB isolator or switch to optical digital links to break the ground loop created by the computer connection. |
| Long run to stage box or mixer | Use balanced outputs or a DI box to ensure the signal remains free of interference over distance. |
| Hum persists with inputs disconnected | Check power sources, wiring, and hardware faults—sometimes the issue lies in the mains grounding or faulty equipment. |
| Noise changes with screen activity | Investigate USB and computer interference; consider digital isolation or relocating gear away from computers or monitors. |
Remember: every rig is unique. These are starting points, and often a combination of fixes yields the best results. Patience and systematic testing are key to a quiet, reliable setup.
The implication is that proactive troubleshooting, understanding why each fix works, and tailoring solutions to your specific setup will save you time and frustration in the long run.
Your Top Questions About Ground Loops, Answered
Is every hum a ground loop? Not necessarily. If the noise only appears when connecting a specific cable or device, it’s probably a loop. Persistent noise with everything disconnected likely points to faulty hardware or gain issues. Recognizing this distinction helps you avoid unnecessary fixes and focus on the real source.
Why does unplugging USB sometimes stop the hum? USB connections create a ground reference but can also carry high-frequency noise. Disconnecting USB breaks the loop, but it may disable essential control or data transfer. Using a USB isolator or digital link can provide a cleaner solution without sacrificing functionality.
Can I just use a balanced cable to fix hum? Only if both gear support proper balanced connections. An unbalanced output—like a TS jack—won’t be fully remedied by a balanced cable. In such cases, a transformer or DI box that isolates the ground is necessary for real noise reduction.
What about ground-lift switches? They temporarily disconnect the shield or ground path to reduce hum, but don’t remove the mains safety earth connection. Never disable the safety ground—use ground-lift switches only as diagnostic tools or temporary fixes, and always restore proper grounding afterward.
Will a cheap USB isolator work with my interface? Usually not for high-end or multichannel gear. Many low-cost isolators support only MIDI or low-speed data, which may not suffice for audio or complex signals. Always check specifications and compatibility before investing, to ensure it will effectively break the ground loop without impairing performance.
These common questions reflect real-world challenges. Understanding the nuances helps you make informed decisions and avoid unintended safety or performance issues.
Conclusion
Ground loops are a common headache, but they’re also highly fixable with patience and proper wiring. The key is identifying the exact connection causing the loop and then breaking it—whether with transformers, isolators, or digital links. Remember, safety always comes first. Never compromise on mains grounding, but don’t let a little hum ruin your creative flow.
With the right approach, your synth’s pure, humming-free sound is well within reach—quiet enough to inspire new ideas instead of drowning them out. Turn off the noise, turn up the clarity, and get back to making music that sounds as good as it feels.
Evergreen bestsellers Picks
bestsellers
As an affiliate, we earn on qualifying purchases.