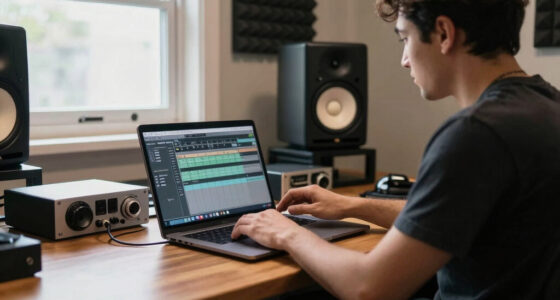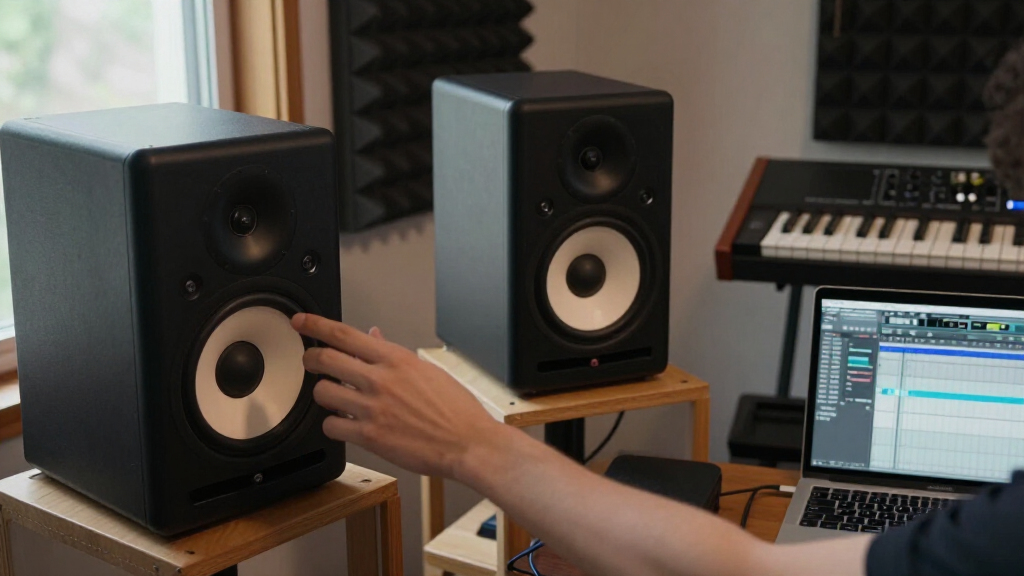
Setting up studio monitor speakers properly is essential for achieving accurate sound reproduction in a recording or mixing environment. This guide walks you through the necessary steps to select, position, connect, and calibrate your monitors to ensure reliable audio quality. Designed for audio engineers, producers, or musicians with basic familiarity with audio equipment, this process requires careful attention to placement and calibration for best results. Completing this guide will help you create a balanced, clear, and professional sound environment.

Get audio and creator gear delivered free with Prime
- Fast, free delivery on millions of items
- Prime Video, Amazon Music and more included
- Member-only deals all year

PreSonus Eris 3.5 Powered Studio Monitors (Pair)
- ✔ Power: 50 watts
- ✔ Speaker Size: 3.5 inches
- ✔ Frequency Response: 80 Hz–20 kHz
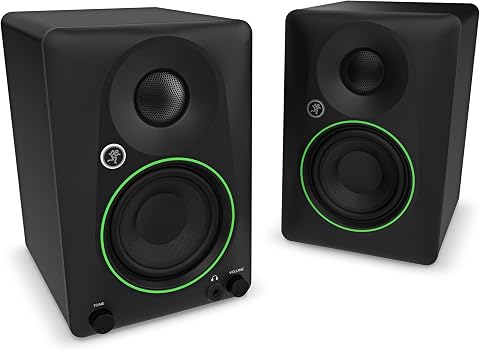
Mackie CR3.5 Studio Monitors (Pair), 3.5" Woofers, Tone Control, Black
- ✔ Woofer Size: 3.5 inches
- ✔ Connectivity: TRS, RCA, 3.5mm input
- ✔ Features: Tone knob, headphone output, switchable mode

Edifier MR3 Powered Studio Monitor Speakers
- ✔ Audio Output Mode: Stereo
- ✔ Frequency Response: 40 KHz
- ✔ Speaker Size: 4 inches
Difficulty: Intermediate | Time: 1-2 hours
What You’ll Need
Tools & Materials:
- Screwdriver
- Speaker cables
- Acoustic treatment materials (optional)
- Measuring tape or ruler
Knowledge:
- Basic understanding of audio equipment and connectivity
- Familiarity with room layout and acoustics
Ensure your power outlets are stable and your workspace is free of excessive noise or vibrations. Have your audio interface or mixer ready for connection, along with your speakers.
PreSonus Eris 3.5 Powered Studio Monitors (Pair)
<p>The <strong>PreSonus Eris 3.5</strong> stands out for delivering studio-quality sound in a small, desk-friendly package. With <strong>50W of power</strong> and adjustable high- and low-frequency controls, it offers a level of sound tuning that rivals larger monitors. Its multiple input options, including TRS and RCA, make it highly versatile for various setups. Compared to larger monitors, it sacrifices bass depth due to its 3.5-inch drivers, but its distortion-free clarity and compact size make it ideal for small spaces. The absence of wireless connectivity is a downside, but for desktop use, this is a minor issue.</p>
Pros:
- Compact size fits easily on any desk
- Powerful, distortion-free sound with clear highs and deep bass
- Multiple input options for versatile connectivity
- Adjustable sound tuning for room calibration
Cons:
- Limited to 3.5-inch drivers, may lack deep bass for some users
- No built-in Bluetooth or wireless connectivity
- Requires external power source
Best for: Best for desktop producers, content creators, or gamers who need powerful sound in a small footprint.
Not ideal for: Not suitable for those requiring deep bass or outdoor use, and those seeking wireless connectivity.
Bottom line: A top choice for small-space setups needing robust, customizable sound with flexible connectivity.
“A top choice for small-space setups needing robust, customizable sound with flexible connectivity.”
Mackie CR3.5 Studio Monitors (Pair), 3.5" Woofers, Tone Control, Black
<p>The <strong>Mackie CR3.5</strong> offers a compelling balance between sound clarity and connectivity options. Its <strong>3.5-inch woven woofer and silk dome tweeter</strong> produce articulate audio with rich bass, suitable for music, gaming, or casual production. The added <strong>tone knob and switchable desktop or bookshelf modes</strong> give users control over sound tuning and placement. While it doesn’t include a subwoofer, its multiple inputs—TRS, RCA, 3.5mm—support a variety of devices. Compared with larger monitors, it’s more suited for small to medium spaces and desktop environments.</p>
Pros:
- Versatile connectivity options for various devices
- Adjustable tone control for customized sound
- Switchable modes for desktop or bookshelf placement
- Good sound clarity with rich bass
Cons:
- Subwoofer not included for deep bass extension
- Limited to 3.5-inch woofers, not ideal for large spaces
- No built-in Bluetooth or wireless connectivity
Best for: Best for multimedia enthusiasts who want adjustable sound and flexible device connections.
Not ideal for: Large room setups needing substantial bass or those requiring wireless features.
Bottom line: A versatile, user-friendly choice for small spaces and mixed media use, with room for upgrade if bass depth is critical.
“A versatile, user-friendly choice for small spaces and mixed media use, with room for upgrade if bass depth is critical.”
Edifier MR3 Powered Studio Monitor Speakers
<p>The <strong>Edifier MR3</strong> delivers high-resolution audio with a <strong>40 KHz frequency response</strong>, making it ideal for detailed music production, editing, and high-fidelity listening. Its <strong>versatile connectivity</strong> includes Bluetooth, RCA, AUX, and balanced TRS inputs, giving users extensive options for device integration. The <strong>app-controlled EQ and sound modes</strong> allow for precise customization, which is a significant advantage for those who want tailored sound profiles. However, its <strong>plastic enclosure</strong> may impact durability, and its modest 18W RMS power limits its use in large or loud environments.</p>
Pros:
- High-Res Audio certification for accurate sound
- Versatile connectivity including Bluetooth and multiple inputs
- Customizable sound modes via app
- Excellent for detailed listening and editing
Cons:
- Plastic enclosure may affect durability
- Limited power output for large rooms
- Not waterproof or outdoor rated
Best for: Best for audio professionals and enthusiasts seeking detailed, high-res sound with flexible connectivity.
Not ideal for: Outdoor use or large spaces where higher power and durability are essential.
Bottom line: A premium choice for high-fidelity audio and flexible connectivity, best suited for studio use or high-end desktop setups.
“A premium choice for high-fidelity audio and flexible connectivity, best suited for studio use or high-end desktop setups.”
As an Amazon Associate we earn from qualifying purchases.
Before You Start
Before beginning, verify that your workspace is suitable—avoid placing monitors near reflective surfaces or corners. If possible, treat your room acoustically with panels or bass traps to minimize sound reflections. Make sure all equipment is powered off during setup to prevent damage or electrical issues.
Step-by-Step Instructions
Step 1: Choose the right monitors for your space
Select speakers that match your room size and your audio production needs. For small rooms, nearfield monitors are ideal. Larger rooms may require midfield or main monitors. Consider frequency response, power handling, and connectivity options to ensure compatibility with your audio interface.
Tip:Read reviews and listen to demo units if possible. Match your monitor’s frequency response to your typical audio projects, aiming for a flat response for accurate sound.
Check: You have selected monitors suitable for your room size and budget, and they are compatible with your existing equipment.
Step 2: Position the monitors correctly
Place the monitors on stable, vibration-free stands or surfaces at ear level when seated. Position them approximately 2-3 feet apart, forming an equilateral triangle with your listening position. Keep them at an equal distance from walls to avoid boundary reflections.
Tip:Avoid placing monitors directly against walls or corners; leave at least 12 inches clearance to reduce bass build-up. If space is limited, consider acoustic treatment to compensate.
Check: The monitors are positioned symmetrically around your listening spot, at ear level, and with adequate space from boundaries. When seated, you form an equilateral triangle with the speakers.
Step 3: Connect the monitors to your audio interface
Use appropriate cables—balanced XLR or TRS cables are preferred for noise reduction. Connect each monitor to the outputs of your audio interface or mixer, ensuring correct left and right channel connections. Power on the monitors after connections are secure.
Tip:Check cable integrity and avoid crossing cables over power cords to minimize interference. Label cables if necessary for easy troubleshooting.
Check: Monitors are connected correctly, with clear, stable audio signals when powered on and tested through your audio interface.
Step 4: Calibrate the monitors for flat response
Use a measurement microphone and room calibration software (e.g., Room EQ Wizard or built-in monitor calibration tools) to analyze your room’s frequency response. Adjust monitor volume levels and apply equalization settings as recommended to flatten the sound.
Tip:If calibration software is unavailable, manually adjust volume levels so that both monitors sound balanced when played together at your listening position. Avoid overcompensating for room anomalies.
Check: The measured frequency response is flat within ±3 dB across the audible spectrum, indicating accurate calibration.
Step 5: Test the setup with reference audio
Play familiar reference tracks or test tones at moderate volume levels. Listen critically from your listening position. Adjust monitor placement or calibration if certain frequencies sound overly emphasized or dull.
Tip:Use pink noise or a spectrum analyzer to verify frequency balance. Confirm that stereo imaging and clarity meet your expectations.
Check: The sound is clear, balanced, and detailed from your listening position, with no noticeable resonances or dead zones.
Common Mistakes to Avoid
- Placing monitors too close to walls or corners — Position monitors at least 12 inches away from walls and corners to reduce boundary interference and bass buildup.
- Ignoring room acoustics during setup — Use acoustic treatment and proper placement to minimize reflections and standing waves that distort sound quality.
- Using unbalanced or incorrect cables — Use balanced XLR or TRS cables to prevent noise and ensure clear audio signals.
Troubleshooting
Problem: Monitors produce a humming or buzzing sound
Solution: Check cable connections, replace faulty cables, and ensure power outlets are properly grounded.
Problem: Sound seems uneven or unbalanced
Solution: Recalibrate with measurement tools, verify placement, and check for room reflections or acoustic issues.
Problem: No sound from monitors
Solution: Ensure monitors are powered on, cables are securely connected, and the correct output is selected on your audio device.
What Success Looks Like
The monitors produce a neutral, flat sound across the frequency spectrum, with accurate stereo imaging and no unwanted resonances. When tested with reference audio, the sound is consistent, detailed, and faithful to the original source from your seated position.
Next Steps
Regularly review your monitor placement and calibration, especially if you change your workspace or add acoustic treatments. Use reference tracks frequently to maintain your listening skills. Consider investing in additional acoustic treatments or monitor accessories to further improve sound accuracy.
Frequently Asked Questions
How often should I recalibrate my monitors?
Recalibrate when you notice changes in sound quality, after room modifications, or periodically every 6-12 months to maintain accuracy.
Can I use regular speakers as studio monitors?
Standard home speakers are not designed for professional audio work. Studio monitors are built for flat frequency response and minimal coloration, essential for accurate mixing and mastering.
What if my room is too small or irregularly shaped?
Use acoustic treatments like bass traps and diffusers, and position monitors carefully to minimize reflections. Consider nearfield monitors to reduce room influence.
How loud should I listen to my monitors?
Keep volume at moderate levels—around 85 dB SPL—to avoid ear fatigue and maintain accurate perception. Use a SPL meter if possible for consistent levels.
Halloween Picks
halloween
As an affiliate, we earn on qualifying purchases.