
TL;DR

Get audio and creator gear delivered free with Prime
- Fast, free delivery on millions of items
- Prime Video, Amazon Music and more included
- Member-only deals all year
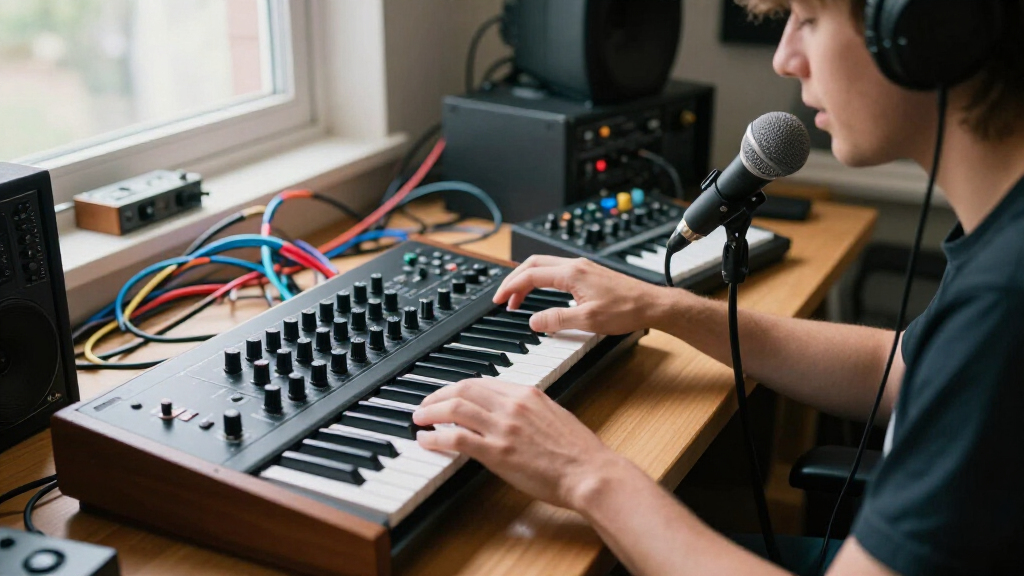
Recording both MIDI and audio from a hardware synth lets you tweak performances without re-recording and preserves the unique sound of your gear. Proper setup and synchronization are key for professional results.
When you record a hardware synth, do you capture just the sound or also the performance data behind it? If you’re not doing both, you’re leaving a lot of creative potential on the table. Recording MIDI alongside audio means you get the best of both worlds—your performance’s feel and the final, character-rich sound.
It’s a simple setup that pays off big. Whether you’re layering multiple parts, fixing timing issues, or experimenting with different sounds, capturing both signals forms the backbone of flexible, professional music production.
Always record MIDI and audio together to maximize editing flexibility and sound fidelity.
Use your DAW’s sync features to keep MIDI and audio perfectly aligned, avoiding phase issues.
Start by recording MIDI for maximum tweakability, then capture audio for final sound quality.
Modern USB MIDI simplifies connections and reduces latency, streamlining your workflow.
High sample rates (at least 44.1kHz) ensure your synth recordings remain crisp and professional.
Recording a Hardware Synth: Audio and MIDI Together
Capture the performance and the sound. Recording MIDI alongside audio gives you the best of both worlds — your performance’s feel, editable note by note, plus the final, character-rich tone of your analog gear. One simple setup, endless creative headroom.
What Is MIDI and Why Capture It Alongside Audio?
MIDI is a digital language transmitting performance instructions — which key you pressed, how hard, and with what modulation. It carries no sound itself. Audio captures your synth’s unique tonal character: filters, effects, and nuances impossible to replicate exactly later. Together, they form a powerful workflow where you refine and reimagine your sound without losing the original performance’s integrity.
MIDI Data
Editable instructions, not sound. Fix mistakes, change notes, adjust feel — without re-recording.
- Note on/off, velocity, aftertouch
- Modulation & control changes
- Transpose & quantize at will
- Swap synth sounds on the same take
Audio Signal
The actual waveform — your gear’s exact character captured forever as it sounded that day.
- Filters, drive & onboard effects
- Analog nuances frozen in time
- Ready for mixing & processing
- Immune to future patch changes
How to Set Up for Dual Recording
Six steps from cable to first take. Once connected, record MIDI first for maximum tweakability, then bounce audio — or arm both tracks at once.
Connect MIDI
Run the synth’s MIDI Out to your interface — or plug straight into USB MIDI.
Connect Audio
Plug the synth’s ¼-inch output into your audio interface’s input.
Create MIDI Track
In your DAW, link a MIDI track to the synth’s MIDI input.
Create Audio Track
Assign an audio track to the interface input carrying the synth.
Sync the Clock
Enable MIDI clock so both signals stay perfectly locked together.
Test & Record
Play and verify both MIDI data and audio are captured properly.
Sync MIDI and Audio for Professional Results
Without sync, MIDI and audio drift apart over long takes — causing phase issues and timing mismatches that are hard to fix later. How key sync factors rank in practice:
Five Rules for Dual Recording
Always record MIDI and audio together for maximum editing flexibility and sound fidelity.
Use your DAW’s sync features to keep MIDI and audio aligned — avoiding phase issues.
Record MIDI first for tweakability, then capture audio for final sound quality.
Modern USB MIDI simplifies connections and reduces latency in your workflow.
Use at least 44.1kHz sample rates to keep synth recordings crisp and professional.
The Complete Dual-Recording Chain
Common Questions
Different tracks, still synced?
Yes. Most DAWs let you record MIDI and audio separately, then sync via MIDI clock or sample-accurate timing so they stay perfectly aligned.
USB MIDI or traditional interface?
USB MIDI often offers lower latency and easier setup, especially with recent hardware — a great choice for most modern studios.
No USB MIDI on my synth?
No problem. Use a traditional MIDI interface on the synth’s MIDI Out and connect its audio output to your interface. The workflow is unchanged.
How do I handle latency?
Tune the buffer and enable low-latency monitoring. A high-quality audio interface minimizes delay and keeps recordings tight.
What Is MIDI and Why Capture It Alongside Audio?
MIDI is a digital language that transmits performance instructions—like which key you pressed, how hard, and with what modulation. It doesn’t carry sound itself but controls your synth’s parameters in real time. Recording MIDI alongside audio means you preserve your performance’s timing, velocity, and control changes, making edits easy.
Why does this matter? Because MIDI data allows you to correct mistakes, experiment with different note choices, or change the feel of a performance without redoing the entire recording. It’s like having a performance skeleton you can reshape at will. Meanwhile, recording the audio captures the synth’s unique tonal qualities—the filters, effects, and nuances that are often impossible to replicate exactly later. This dual capture creates a powerful workflow where you can refine and reimagine your sound without losing the original performance’s integrity.
Recent tech improvements, like USB MIDI, have simplified this process, letting you plug your synth directly into your computer and record both signals seamlessly. The implications are significant: you gain flexibility, reduce rework, and open new creative avenues by keeping both editable data and authentic sound at your fingertips.
USB MIDI interface for hardware synth
As an affiliate, we earn on qualifying purchases.
As an affiliate, we earn on qualifying purchases.
How to Set Up Your Hardware and Software for Dual Recording
- Connect your synth’s MIDI Out to your MIDI interface or your computer’s USB MIDI port.
- Plug the synth’s audio output (like a 1/4-inch cable) into your audio interface’s input.
- Open your DAW and create a MIDI track linked to your synth’s MIDI input.
- Create an audio track assigned to the interface input connected to your synth’s audio output.
- Set your DAW’s clock to synchronize MIDI and audio if possible. Many DAWs have a MIDI clock that keeps everything locked.
- Test the setup by playing your synth and verifying both MIDI data and audio are recorded properly.
Once set up, you can record your performance as MIDI first, then record the audio. Or, hit record on both at the same time—whatever matches your workflow best.
Why does this setup matter? Proper synchronization ensures that your MIDI data and audio stay perfectly aligned, which is crucial for maintaining timing accuracy during editing and mixing. If they drift apart, it can lead to phase issues or timing mismatches that are difficult to fix later. Investing time here pays off by enabling clean, professional recordings where edits and adjustments are seamless and intuitive.
As an affiliate, we earn on qualifying purchases.
Sync Your MIDI and Audio for Professional Results
Syncing is a critical step for achieving polished, professional recordings. Without proper synchronization, your MIDI performance and audio recording can drift apart over time, especially during longer takes or complex arrangements. This drift leads to a disjointed feel, phase issues, or timing inconsistencies that undermine the quality of your production. Using your DAW’s MIDI sync features—like MIDI clock or external sync signals—ensures that both signals stay perfectly aligned throughout the session.
For example, in Ableton Live, enabling MIDI clock sync to your hardware guarantees that your MIDI performance matches the audio playback precisely. This synchronization is especially important when working with multiple hardware units or live performances, where timing stability is paramount. Also, pay attention to latency compensation settings—incorrect values can cause subtle timing issues that are hard to spot but impact the groove. Regularly practicing quick sync tests with simple patterns helps you detect and correct issues early, preventing surprises during critical recording sessions. When everything is properly synchronized, your MIDI edits will line up perfectly with your audio, making post-production editing smoother and more predictable, ultimately saving you time and effort.
As an affiliate, we earn on qualifying purchases.
Frequently Asked Questions
Can I record MIDI and audio on different tracks and still keep them synced?
Yes. Most DAWs allow you to record MIDI and audio separately but sync them via MIDI clock or sample-accurate timing, ensuring they stay perfectly aligned.Is it better to record via USB MIDI or traditional MIDI interfaces?
USB MIDI often offers lower latency and easier setup, especially with recent hardware, making it a good choice for most modern studios.What if my synth doesn’t have USB MIDI? Can I still record both signals?
Absolutely. You can use a traditional MIDI interface connected to your synth’s MIDI Out and connect its audio output to your interface’s input. The workflow remains the same.How do I deal with latency when recording MIDI and audio simultaneously?
Properly setting your DAW’s buffer size and enabling low-latency monitoring helps. Using a high-quality audio interface also minimizes delays, keeping your recordings tight.DAW MIDI and audio recording setup
As an affiliate, we earn on qualifying purchases.
As an affiliate, we earn on qualifying purchases.
Conclusion
Recording a hardware synth with both audio and MIDI isn’t just a technical step—it’s a creative advantage. It unlocks the ability to tweak your performances and preserve the rich character of your gear. When you master this approach, your productions become more flexible, polished, and professional.
So, set up your gear correctly, sync everything tight, and embrace the power of dual recording. Your future tracks will thank you for it—full of life, detail, and endless editing potential.
Fall Picks
fall essentials
As an affiliate, we earn on qualifying purchases.