
TL;DR

Get audio and creator gear delivered free with Prime
- Fast, free delivery on millions of items
- Prime Video, Amazon Music and more included
- Member-only deals all year
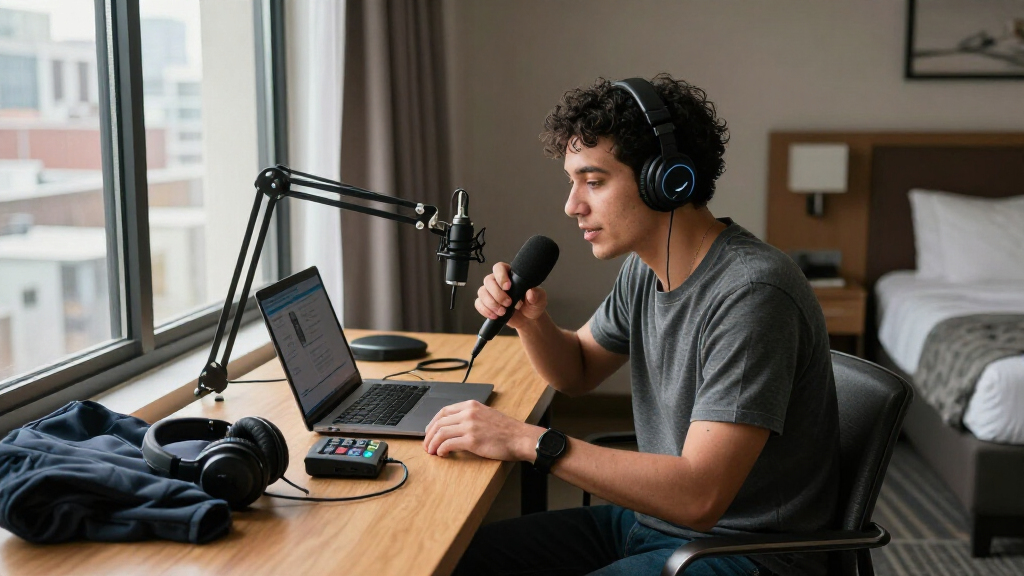
A hotel room can work well as a temporary podcast studio if you choose a quiet spot, soften reflections with curtains or upholstered furniture, and keep the microphone about 10–15 cm (4–6 inches) from your mouth. Make a headphone-monitored test, record locally, and save a verified backup; room choice and mic technique usually matter more than buying a more expensive microphone.
Your best hotel-room podcast upgrade may be a curtain, not a new microphone. A soft window covering, a quiet corner, and a mic held just a few inches from your mouth can make a bigger difference than a costly piece of gear set up beside a rattling air vent.
A hotel room can work well as a temporary studio, but you are not trying to turn it into a professional booth. You are trying to capture clear, consistent speech while keeping echo, HVAC rumble, traffic, and handling noise under control. That matters whether you are recording a solo update between flights or hosting a remote interview from a hotel desk.
This guide gives you a practical setup you can repeat: how to choose a recording spot, arrange the room, pack a compact kit, test your sound, and protect your files. The goal is simple: make it sound like a professional recording through good decisions, not by hauling a studio into your suitcase.
Listen for elevators, HVAC, refrigerators, traffic, and shared-wall noise before choosing where to record.
Use curtains, carpet, bedding, or clothes to soften reflections; they will not reliably block low-frequency rumble.
Start with the mic about 10–15 cm (4–6 inches) from your mouth, then test and adjust for your voice and microphone.
Record a short headphone-monitored test and 30–60 seconds of room tone before the episode.
Save a local recording, make a second copy, and verify that the backup file opens before you leave.
A hotel room can work as a temporary studio
Choose a quiet spot, soften nearby reflections, and keep the microphone close. Good room choice and technique often matter more than buying pricier gear.
Choose a quieter recording spot
Listen before unpacking: steady room noise is easier to prevent than repair.
Listen for HVAC, refrigerators, plumbing, traffic, and voices through shared walls.
Avoid vents, windows, elevators, ice machines, and busy common areas.
Test the desk, bed, and curtained wall; choose the spot with the least persistent noise.
Soften reflections, not rumble
Soft furnishings can calm echo, but they will not reliably block low-frequency noise.
- Thick curtains, carpet, or bedding
- An upholstered chair or wardrobe with clothes
- Soft material behind or beside you
- Bathrooms with hard, reflective surfaces
- A cramped closet that sounds boxy
- Expecting a blanket to block HVAC or traffic
Set up for a clear voice
Close placement helps your voice stand out from distant room sound.
Start close
Place the mic about 10–15 cm from your mouth, slightly off-axis, then adjust by listening.
Wear headphones
Check for rumble, clipping, cable noise, and accidental mic contact before recording the episode.
Pack what works
Use a reliable mic, headphones, cables and adapters, a stand, and a recorder or laptop.
Test and protect the recording
Check the complete setup before the real session, then secure the files before leaving.
- Record a short test and listen back on headphones.
- Leave headroom; clipped audio cannot be repaired cleanly.
- Capture 30–60 seconds of room tone to help with edits; it does not remove noise from speech.
- Record locally, save a second copy, and verify that the backup opens.
Choose a quiet corner before you unpack your gear
Podcasting on the Road starts with choosing the quietest room position you can find, because steady background noise and sudden interruptions can spoil an otherwise clean take. Ask for a room away from elevators, ice machines, busy common areas, and street-facing traffic when you book or check in. Then pause and listen before setting up.
Give the room a quick sound check with your ears: listen for an air conditioner, refrigerator hum, plumbing, traffic, and voices through shared walls. A room can sound calm at first, then reveal a low mechanical rumble once everything else goes quiet. Move your chair away from vents and windows, and avoid placing the mic right against a shared wall.
For example, if traffic swells every few minutes, record a test during a quieter time rather than assuming editing will erase it later. If the HVAC is clearly audible, you can try switching it off for a short take only when the room stays comfortable and safe. Restore a comfortable temperature between sessions; no recording is worth overheating yourself or your equipment.
Think of room choice like choosing a seat in a café: the table beside the espresso machine gives you a different recording from the quiet corner by the curtains. Before you unpack, listen at the desk, near the bed, and by a curtained wall. Choose the spot with the least persistent noise, not simply the one with the nicest view.
Room noise is easier to prevent than to repair. Noise reduction can help with steady, moderate background sound, but loud or changing noise can damage speech when software tries to remove it.
Popular right now

KitchenAid Artisan Mini Tilt-Head Stand Mixer, 3.5 Qt, Contour Silver

Bose QuietComfort Earbuds (2nd Gen) – True Wireless Bluetooth Earbuds with Active Noise Cancellation

De'Longhi Magnifica Start Fully Automatic Espresso Machine with Milk Frother, Silver
As an affiliate, we earn on qualifying purchases.
Use curtains and furniture to tame room echo
Podcasting on the Road sounds clearer when you soften the hard surfaces around the microphone and your voice. Hotel rooms often combine a bare desk, large windows, painted walls, and a hard floor; those surfaces bounce speech back into the mic as a short, sharp echo. Curtains, carpet, bedding, and upholstered chairs help calm those reflections.
Try placing your recording chair near thick curtains or beside an open wardrobe filled with clothes. Put soft furnishings behind or beside you, rather than building a tiny blanket cave around the microphone. The aim is a natural voice, not a muffled one. A blanket draped over a chair can help with reflections, but it will not reliably block traffic or low HVAC rumble.
A bathroom usually sounds like the wrong choice: tile, glass, and stone throw your voice around like a ping-pong ball. A closet can work if it has clothes and enough room to sit comfortably, yet a cramped closet may make your voice sound boxy. Record a short test in both the closet and the main room; trust the take that sounds more natural, even if the closet looks more “studio-like.”
Imagine the room as a small stage. A thick curtain acts like a soft backdrop, while a bare window acts like a mirror for sound. If you are at a desk with a hard wall behind you, rotate the setup so your mic faces away from the window and your voice has soft material nearby. You do not need acoustic foam for a short stay; a sensible position and hotel furnishings often give you enough control.
Soft materials reduce reflections, not deep noise. Keep that distinction in mind when a blanket helps the voice but leaves the refrigerator hum untouched. Solve each problem with the right tool: change position for room reflections, and change timing or location for noise.
Set the microphone close enough to hear you, not the room
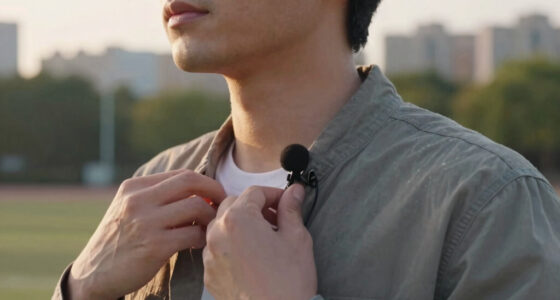
Podcasting on the Road gets a cleaner voice when you place the microphone close to your mouth, usually around 10–15 cm (4–6 inches) as a starting point. Close placement makes your voice stronger relative to distant room sound, much like leaning closer to a friend in a noisy café instead of asking them to shout across the table.
Angle the mic slightly off to the side of your mouth to reduce sharp bursts of air on sounds such as “p” and “b.” The exact distance depends on the microphone and how loudly you speak, so make a test and listen. If the recording booms when you get close, move back a little; if you hear too much room, bring the mic closer while keeping a steady posture.
A dynamic microphone can be a sensible choice in an untreated room because it can pick up less distant room sound than many condenser microphones. It is not a noise shield, though. A dynamic mic still hears a loud vent if you place it beside one, and it still needs good technique. A phone can also make a usable recording, especially with a compatible external mic; set it on a stable surface, check battery and storage, and monitor with headphones if you can.
Wear closed-back headphones while you test and record. They reveal clipping, cable crackle, HVAC rumble, and accidental contact with the stand before you finish an entire episode. If your normal speech peaks too close to the recorder’s maximum, lower the input level and leave headroom; clipping is not cleanly repaired in post-production.
For speech, many creators record at 44.1 or 48 kHz and use 24-bit recording when available. Follow your editing workflow and keep settings consistent rather than chasing numbers. The practical win is a clean, unclipped voice that stays at a steady distance from the mic.
Pack a small kit you can set up without surprises
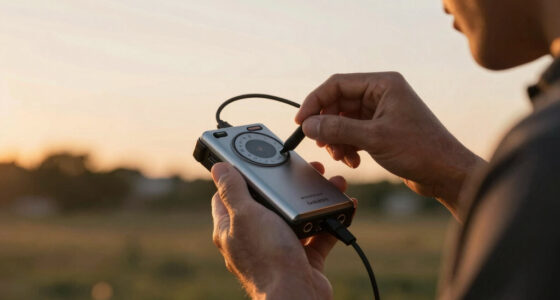
Podcasting on the Road needs a compact kit that you know how to operate, not a suitcase full of gear. A dynamic USB microphone can keep the setup simple; an XLR mic gives you more flexibility with an interface or recorder but brings extra cables and power needs. The best travel option is the one you can connect reliably in the room you have.
USB is often the straightforward choice for a solo host working from a laptop. XLR can work well when you already travel with a recorder or interface, or when you need separate inputs. Check the connectors before you leave: a short USB cable, the right adapter, and a reliable power supply take little space, yet a missing adapter can stop the session cold.
For a typical solo recording, pack a microphone, closed-back headphones, a small stand or travel boom, a windscreen or pop filter, the needed cables and adapters, and a laptop or recorder with its power supply. Add backup storage or a plan to upload when the connection is stable. Keep delicate gear in a padded pouch, and coil cables loosely so they do not become a tangled knot at the hotel desk.
For an interview, use one microphone per person if possible and record separate tracks. One mic placed between two guests often captures uneven levels and more room sound, especially when one person leans back. If a remote guest joins by call, make a local recording on each participant’s device as well as the call recording; separate local tracks can preserve cleaner audio when the internet stutters.
Modern USB-C devices and portable recorders can make travel workflows easier, and some recorders include automatic level adjustment or noise reduction. Treat these features as helpers, not replacements for room choice and mic technique. Before your trip, test the full chain at home once, including the adapter and power source. A five-minute rehearsal beats discovering a compatibility problem after your guest arrives.
| Setup | Good fit | Tradeoff |
|---|---|---|
| USB microphone | Solo host, laptop, simple setup | Fewer routing options |
| XLR microphone with recorder or interface | Separate tracks or gear you already own | More cables and power needs |
| Phone with external mic | Light travel and quick updates | Check compatibility, storage, and battery |
Run this five-minute test before the real recording
Podcasting on the Road is more reliable when you test the whole setup before recording the episode. A brief playback check can catch the problems that are frustrating to fix later: a loose cable, echo, noisy HVAC, clipping, or a nearly full storage drive. Do not judge sound only while you are speaking; listen back on headphones.
- Listen around the room. Check the vent, refrigerator, window, and shared wall, then choose the quietest spot.
- Place the mic close. Start at 10–15 cm (4–6 inches), angle it slightly off-axis, and keep it away from vents and windows.
- Record a test. Speak at your normal volume for 20–30 seconds, then listen for echo, rumble, distortion, and cable noise.
- Adjust one thing at a time. Move the chair, mic, or recording level, then make another short test to hear what changed.
- Check the file and storage. Confirm the recording opens and that you have enough room for the session.
For example, a host who hears a steady low rumble in the test can move the mic away from the air vent or pause the HVAC briefly if the room remains comfortable. If a passing siren interrupts only one line, stop, wait for quiet, and repeat that line. That often produces a cleaner result than trying to scrub a loud, changing sound from the finished file.
Before the episode, record 30–60 seconds of room tone: the room’s background sound with nobody speaking. That sample can help an editor make cuts sound more even, but it does not remove noise from the spoken track. Keep some headroom rather than recording at the edge of clipping. You want the loudest natural sentence to stay clean, not hit the ceiling.
Make the test part of your setup routine, even if you use the same microphone every week. Hotel rooms change, cables loosen, and neighboring guests arrive. A quick check is like checking your route before a drive: it catches a small issue before it turns into a long detour.
Protect your recording before you leave the room
Podcasting on the Road is not finished when you press stop; it is finished when you know the files are safe and usable. Record locally whenever possible rather than depending only on a live internet connection. Hotel Wi-Fi can slow down or drop out, and a compressed call recording may not give you the same editing flexibility as a local file.
After recording, open the file and listen to a few points: the beginning, a section in the middle, and the end. Confirm that both channels or tracks appear as expected, that the voice is present, and that the file plays without interruption. Then copy it to a second location, such as an external drive or a cloud service once the connection is stable.
For a remote interview, ask each participant to record locally if the platform supports that workflow, then keep the call recording as a fallback. Separate local tracks can preserve a clearer voice when the network compresses or glitches. Tell your guest what you are recording and get their consent; respect hotel privacy and security rules, avoid capturing other guests or staff, and follow local laws and platform requirements for recording conversations.
Noise-removal and transcription tools can save time, but listen before trusting their output. Aggressive cleanup can make a voice sound watery or artificial, and automated transcripts can miss names, technical terms, and quotations. Keep the original recording untouched, make edits on a copy, and check important transcript details against the audio.
Before you pack, verify the backup rather than assuming a progress bar means success. A real example: if your laptop copied a 40-minute interview while the hotel Wi-Fi was cutting out, play a section from the copied file before leaving. That small check can spare you the unhappy discovery that your only clean take never transferred.
Use the room you have instead of chasing a perfect booth
Podcasting on the Road works best when you aim for clear, consistent speech rather than a fantasy of total silence. A hotel room will not behave like a treated studio, and a blanket or foam panel cannot block every truck, neighbor, or air conditioner. You can still make the recording listenable by controlling the problems you can actually change.
Start with the easy wins: move away from the window and vent, close the curtains, sit near soft furnishings, and keep the mic close. If the room has persistent construction noise, ask whether another room is available or record at a quieter hour. If the noise comes in bursts, pause and repeat the affected sentence instead of pushing through and hoping software will fix it.
Cheap gear can be enough. A phone with a compatible external microphone, a stable surface, and a careful test may be better than an expensive mic sitting several feet away in an echoing corner. On the other hand, a two-person interview deserves separate microphones when you can manage them; one shared mic often creates uneven levels and more room sound.
Use processing with restraint. Noise reduction can help with steady, moderate background noise, but sudden traffic or a loud door can mask speech in a way that software cannot cleanly reverse. Think of cleanup as a small polishing cloth, not a repair shop for a broken take. A clean source makes every later editing choice easier.
The practical standard is simple: can a listener follow the words without fighting echo, rumble, or level jumps? If yes, you have done the important work. You are building a repeatable field setup, not a miniature studio set, and that distinction keeps your travel kit lighter and your recording decisions sharper.
Frequently Asked Questions
What microphone should I use in a hotel room?
A compact dynamic microphone is a practical starting point for many solo hosts in an untreated room, but there is no universal best choice. Pick USB for a simpler laptop setup, or XLR if you already carry a recorder or interface and need separate inputs. Placement and room noise matter more than price alone.
Can I record a podcast with my phone?
Yes. A modern phone can capture a usable episode, especially with a compatible external microphone and headphones. Put it on a stable surface, check storage and battery, use airplane mode if practical, and make a test recording before you start.
Should I record in a hotel closet?
Try it, but do not assume it will sound best. Clothes can reduce reflections, while a tiny, crowded closet can make your voice sound boxy or uncomfortable. Record a short test in the closet and the main room, then choose the more natural-sounding take.
Should I turn off the air conditioner while recording?
Only if the noise is audible and the room remains comfortable and safe. Try a short test with the HVAC on and off, and record in brief sessions if switching it off helps. Restore a comfortable temperature between takes.
How do I reduce traffic noise in a hotel recording?
Close the window, move the microphone away from the noise source, and try another position or quieter time of day. If a passing vehicle interrupts a sentence, pause and record that section again. Software may help with steady background sound, but it cannot reliably restore speech masked by loud or sudden noise.
Is USB or XLR better for podcasting while traveling?
USB is usually simpler and more compact for a solo laptop setup. XLR adds flexibility when you use a recorder or interface, but it also adds cables and power needs. Choose the setup you can connect and test reliably with the gear you already own.
How should I record an interview with a remote guest?
Use one microphone per person and separate tracks when possible. For a remote guest, keep the call recording and ask each participant to make a local recording too; the local tracks can sound cleaner if the internet connection fluctuates. Check levels and connections before the conversation starts.
Conclusion
Remember this: quiet position, close microphone, headphone test, verified backup. Those four habits will usually improve a hotel-room podcast more than adding another piece of gear to your bag.
Set up the softest, quietest corner you can find, make a short test, and listen before you commit to the full take. When you leave, take the recording with you twice—once on your main device and once in a verified backup.