TL;DR

Get audio and creator gear delivered free with Prime
- Fast, free delivery on millions of items
- Prime Video, Amazon Music and more included
- Member-only deals all year
Proper monitor placement in a small bedroom involves keeping speakers 1-2 feet from walls, angling them inward, and using acoustic treatment. This prevents bass buildup and reflections, ensuring clearer sound for mixing or critical listening.
Ever tried setting up studio monitors in a tiny bedroom? It feels like fitting a concert hall into a shoebox. But with a few smart moves, you can tame those walls and get your sound crystal clear. This guide shows you how to work around walls, avoid muddiness, and still get professional-quality audio at home.
If space is tight, your biggest challenge isn’t just placement — it’s turning a small, reflective box into a balanced listening environment. Let’s dive into practical tips to make the most of your tiny studio.
Keep monitors at least 1-2 feet from walls to prevent bass boost and muddiness.
Use stands or mounts to lift speakers, reducing reflections and vibrations.
Slight inward angling (toe-in) sharpens stereo imaging in small spaces.
Acoustic treatments like panels and soft furnishings significantly improve sound clarity.
Modern small-room monitors with room correction tech can offset space limitations.
Monitor Placement in a Small Bedroom: Working Around Walls
TL;DR: Keep monitors 1–2 feet from walls, lift tweeters to ear level, angle each speaker toward your listening position, and treat the first reflection points. Those four moves reduce bass buildup and create a clearer, more reliable stereo image.
Build the listening triangle
Start with geometry before adding treatment or software. Equal distances and symmetry create a dependable stereo center—even when the room itself is far from ideal.
Align tweeters with your ears
Use stable stands, isolation pads, or adjustable mounts to reach seated ear level.
Match left and right distances
Unequal wall spacing produces different reflections and pulls the stereo image off-center.
Toe in toward the listener
Begin around 10–15 degrees and aim both speakers at the same listening point.
Stay out of room corners
Corners combine multiple boundaries, often producing the strongest and muddiest bass boost.
Walls reshape what you hear
Boundary reflections add delayed copies of the direct sound. The result can be excessive bass, phase cancellation, harsh echoes, and a stereo image that changes with tiny head movements.
Close placement can make low end feel bigger than it really is.
That artificial boost encourages over-correction. A mix may sound controlled in the bedroom but thin everywhere else.
+6–10 dB of potential bass exaggeration near a wallThree upgrades with an outsized impact
When the room will not allow textbook placement, prioritize precise height, controlled vibration, and repeatable angles.
Decouple the desk
Dedicated stands reduce furniture vibration, clear desktop reflections, and make ear-level alignment easier.
Recover working space
Adjustable arms or sturdy mounts free the desktop and provide fine control over height and toe-in.
Tame the first bounce
Use panels behind the monitors and at side reflection points; add bass traps where low frequencies accumulate.
| Placement option | Desk vibration | Position control | Space efficiency | Main tradeoff |
|---|---|---|---|---|
| Directly on desk | ✗ High | ✗ Limited | ✓ Good | Strong surface reflections |
| Isolation pads | ~ Reduced | ~ Moderate | ✓ Good | Still occupies desk space |
| Floor stands | ✓ Low | ✓ Excellent | ~ Moderate | Requires floor clearance |
| Adjustable mounts | ✓ Low | ✓ Excellent | ✓ Excellent | Needs secure installation |
From placement to better translation
Each adjustment improves the next part of the chain. The real goal is not merely a nicer-sounding bedroom—it is making decisions that remain valid on other playback systems.
Equal triangle
Match speaker spacing to listening distance.
Ear-level focus
Raise tweeters and apply measured toe-in.
Reduce buildup
Add wall clearance and avoid corners.
Control reflections
Absorb first bounces without deadening everything.
Reliable mixes
Hear balances that translate beyond the room.
Technology can finish the job
Correction tools help compensate for unavoidable room irregularities, but they work best after physical placement and basic acoustic control are already addressed.
Compact nearfield monitors
Designed for close listening, nearfields increase the ratio of direct sound to reflected sound and reduce the room’s influence.
DSP and room correction
Built-in processing or measurement software can reduce persistent bass bumps and tonal imbalance caused by constrained placement.
Portable acoustic systems
Modular panels, compact bass traps, and freestanding absorbers can move with the room and require no permanent renovation.
Wireless and adjustable setups
Fewer cables and flexible mounts make it easier to test positions, preserve symmetry, and maintain an uncluttered workspace.
Place. Listen. Adjust. Treat.
Small changes matter. Move one variable at a time, replay familiar reference tracks, and keep the most balanced position—not simply the loudest one.
How to Position Monitors for Clear, Accurate Sound in Small Rooms
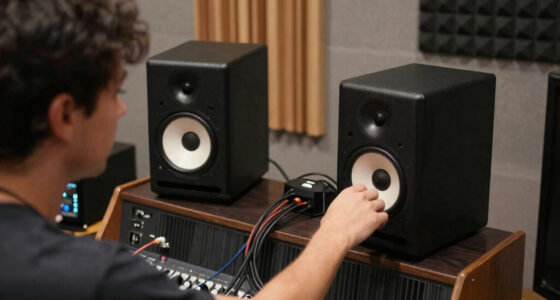
In small rooms, your goal is to place monitors where they can breathe without sounding boomy or echoey. Keep the tweeters at ear level when seated. Position your monitors in an equilateral triangle with your listening spot—about 3 feet apart and 3 feet from your ears. This setup ensures balanced stereo imaging. For example, if you’re sitting in a small corner desk, place the monitors on sturdy stands about 2 feet from the back wall and a foot from the sides to avoid reflections.
Using stands is better than placing monitors directly on furniture. It isolates vibrations and helps position the speakers at the right height. Slightly angling them inward (toe-in) sharpens stereo focus. This small tweak makes a huge difference—your sound becomes more focused, less diffuse.
studio monitor stands for small rooms
As an affiliate, we earn on qualifying purchases.
As an affiliate, we earn on qualifying purchases.
Working Around Walls: The Art of Avoiding Sound Reflections
Walls in small bedrooms can turn your monitors into echo chambers, which is why understanding their influence is crucial. When monitors are placed too close to walls, bass frequencies can be exaggerated—sometimes by as much as 6-10 dB—creating a muddy or boomy sound that misrepresents your audio. This bass boost can distort your perception of the low-end balance, leading you to make incorrect mixing decisions. The key is to keep monitors at least 1 to 2 feet away from walls, which significantly reduces these reflections and bass buildup. Moving your monitors away from walls allows you to hear a more truthful representation of your sound, preventing you from being misled by artificially enhanced bass that could cause you to overcompensate in your mixes.
Beyond just distancing, thoughtful acoustic treatments are essential. Placing foam panels or bass traps at reflection points—behind the monitors and along sidewalls—absorbs sound waves that would otherwise bounce around and cause muddiness. Soft furnishings like curtains, rugs, or plush furniture diffuse sound, reducing harsh echoes and flutter echoes. For example, hanging a thick curtain behind your desk can soften wall reflections, giving your sound more clarity and focus. The tradeoff here is balancing absorption without making the room overly dead, which can also hinder accurate sound judgment. The goal is to create a room environment where sound behaves predictably—absorbing enough reflections to prevent muddiness but remaining lively enough to maintain a natural stereo image. This balance is key to ensuring your mixes translate well outside your space.
acoustic treatment panels for home studio
As an affiliate, we earn on qualifying purchases.
As an affiliate, we earn on qualifying purchases.
Smart Placement Hacks for Tiny Rooms: Stands, Mounts, and Angle Tricks
Sometimes space just doesn’t allow perfect placement. That’s when creative solutions become essential. Using adjustable monitor stands or mounts allows you to optimize positioning without sacrificing space. Elevating monitors on stands or attaching them to wall mounts minimizes the footprint on your desk and provides better control over placement. Proper height and angle are critical; elevating the monitors to ear level and angling them inward (around 10-15 degrees) can dramatically improve stereo imaging and focus. This inward tilt directs sound directly toward your ears, reducing the influence of reflections bouncing off nearby surfaces, which can cause phase issues or stereo smear. The tradeoffs involve ensuring mounts are sturdy and positioned at the right height, but the payoff is a cleaner, more precise soundstage even in cramped environments.
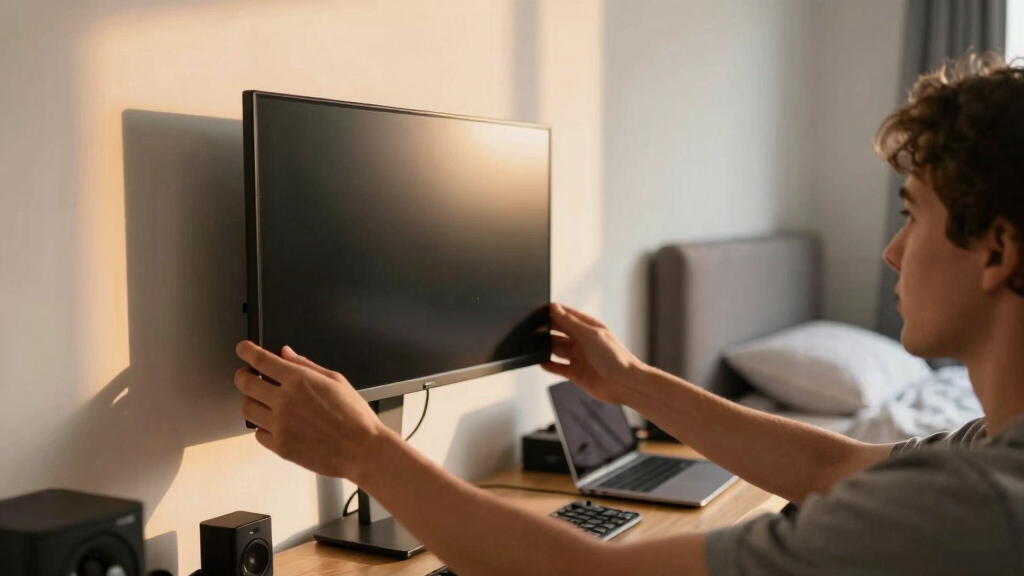
In a tiny bedroom, mounting monitors on adjustable arms attached to the wall not only saves space but also allows you to fine-tune angles easily. Slight inward angles—around 10-15 degrees—are often enough to significantly enhance stereo clarity. Remember, small adjustments in placement and angle can turn a cluttered corner into a professional-sounding setup, providing clarity and focus in a limited space.
nearfield studio monitors with room correction
As an affiliate, we earn on qualifying purchases.
As an affiliate, we earn on qualifying purchases.
Recent Tech Changes Making Small Room Setups Easier
New monitor designs and room correction tools are revolutionizing how we approach small room setups. Compact nearfield monitors are specifically designed for close-up use, delivering sound directly to your ears while minimizing room influence. Many of these models now include built-in DSP or are compatible with room correction software, which automatically adjusts for bass bumps or dips caused by proximity to walls. These features help compensate for less-than-ideal placement and room acoustics, providing a more accurate and balanced sound without extensive physical treatments. The tradeoff is that these tech solutions can be more costly, but they often save time and effort in tuning your environment, making them ideal for small spaces where room treatment options are limited.
Wireless monitors are also emerging, offering flexible placement options without the clutter of cables. Portable acoustic panels, diffusers, and modular treatments are now more affordable and easy to install, allowing you to adapt your room acoustics without major renovations. These technological advances mean you can achieve a professional sound environment even with space constraints, reducing the need for perfect placement and extensive construction. The key is choosing solutions that fit your budget and workflow, enabling you to focus more on your music and less on battling room acoustics.
As an affiliate, we earn on qualifying purchases.
The Key Facts You Need to Know About Monitor Placement in Tight Spaces
Proper placement isn’t just about looks — it’s vital for sound accuracy. When monitors sit too close to walls, bass frequencies can double, making your mixes sound muddy and imprecise. Research shows that placing monitors within 1 foot of a wall can boost bass by 6-10 dB, which can mislead your perception of low-end balance. This exaggerated bass can cause you to cut or boost frequencies unnecessarily, leading to mixes that don’t translate well on other systems. Using stands or isolators to lift monitors away from walls helps maintain a more natural bass response, ensuring your mixes sound accurate across different playback environments. The tradeoff is that moving monitors away from walls requires space, which may be limited; however, even small adjustments can significantly improve sound clarity.
In addition, acoustic treatment is essential. Soft materials absorb reflections, and bass traps help tame standing waves. Without proper placement and treatment, your sound will be colored and less reliable, making critical listening and mixing a challenge. The goal is to create an environment where your monitors reveal the true character of your audio—free from exaggerated low frequencies caused by proximity to walls. Investing in these adjustments ensures your mixes are honest and balanced, crucial for professional results in small spaces.
Your Top Questions About Monitor Placement Answered
- How far from the walls should monitors be? Aim for at least 1-2 feet away to avoid bass exaggeration and reflections. This distance helps ensure your low frequencies are accurate and not artificially boosted by wall proximity, which can mislead your mixing decisions. Keep in mind that in very tight spaces, even small increases in distance can improve clarity significantly.
- Can I put monitors directly on my desk? Yes, but use isolation pads or stands to cut vibrations and reduce reflections from the surface. This prevents the desk from acting as a soundboard, which can muddy your audio and cause unwanted resonances. Proper isolation is key to maintaining clarity and preventing resonant peaks caused by vibrations.
- What angle should monitors face? Slight inward tilt (toe-in) of 10-15 degrees improves stereo focus. Proper angling directs sound directly toward your ears, creating a cohesive stereo image and preventing sound from bouncing off walls or furniture, which can cause phase issues. Small adjustments here can dramatically improve stereo imaging.
- How do I handle reflections from small rooms? Use acoustic panels, soft furnishings, and positioning to absorb or scatter sound waves. This reduces echo and flutter, providing a clearer and more accurate listening environment essential for precise mixing. The goal is to control reflections without making the room overly dead, which can hinder natural sound cues.
- Are wireless monitors worth it? They offer flexible placement but check that sound quality meets your needs. While convenient, ensure they have adequate fidelity and low latency for critical listening tasks. Weigh the convenience against potential compromises in sound quality, especially for professional work.
Conclusion
In a small bedroom, every inch counts. Smart placement, combined with acoustic treatments and adjustable stands, transforms a cluttered corner into a balanced, accurate listening spot. If you want your mixes to sound right — don’t just shove your monitors in the corners — work around the walls.
Remember: a little effort in placement and treatment pays off with clearer, more honest sound. Your ears — and your mixes — will thank you.
Halloween Picks
halloween
As an affiliate, we earn on qualifying purchases.