TL;DR

Get audio and creator gear delivered free with Prime
- Fast, free delivery on millions of items
- Prime Video, Amazon Music and more included
- Member-only deals all year
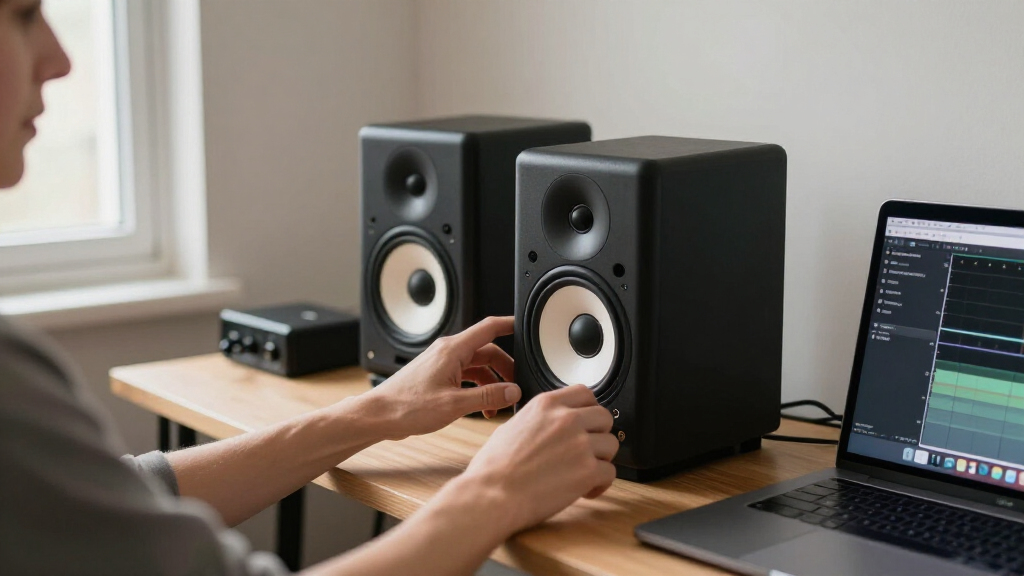
Proper monitor toe-in and tweeter height are key for clear sound and ergonomic comfort on small desks. Small tweaks—like angling speakers or raising them—can transform your listening experience.
Getting your small desk studio sounding right isn’t about fancy gear or big budgets. It’s about smart tweaks—adjustments you can make with what you have. Two of the most impactful are monitor toe-in and tweeter height. When space is tight, getting these right matters more than ever.
In this guide, you’ll learn exactly how to position your monitors for the best sound, how to raise or angle them, and why these small changes can make your music, mixing, or gaming sessions far more satisfying.
Start with a 10°–15° toe-in for focused stereo imaging; adjust based on listening tests.
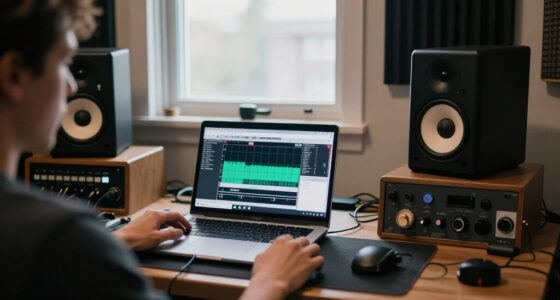
Align tweeters with your ears—use stands, books, or mounts to achieve this in small desks.
Spacing monitors 1–2 feet apart prevents muddiness and enhances clarity.
Use acoustic treatments and reflection mitigation to improve sound in tight spaces.
Small tweaks—like angling or raising monitors—can transform your listening experience in a cramped setup.
Monitor Toe-In & Tweeter Height
A clear, comfortable desktop soundstage does not require expensive gear. Align the tweeters, form a tight listening triangle, then adjust the inward angle a few degrees at a time. On a small desk, these modest changes can deliver the biggest audible improvement.
Begin with a 10°–15° inward angle and keep each tweeter level with your seated ears. This strengthens the center image while reducing distracting desk and wall reflections.
Build the geometry before chasing the sound
Toe-in, tweeter height, and equal distance work as one system. Correcting only one variable can improve the setup, but aligning all three produces a stable center image and more dependable detail.
Start with gentle toe-in
Turn each speaker inward by 10°–15°. The acoustic axes should point toward your ears or cross just behind your head.
Bring tweeters to the ear line
Measure your seated ear height, then raise or tilt the monitors until their tweeters meet that horizontal line.
Form an equal listening triangle
Keep the two monitors equally distant from your head and begin with roughly 1–2 feet between them.
A five-step path to a focused sweet spot
Change one variable at a time. A methodical sequence makes the result repeatable and prevents angle, height, and room reflections from masking one another.
Measure
Measure seated ear height in your normal working posture.
Raise
Use stable supports to place each tweeter on the ear line.
Equalize
Match left and right distances to the listening position.
Angle
Set 10°–15° of toe-in and point both speakers symmetrically.
Listen
Use familiar tracks and adjust in small, repeatable increments.
A centered vocal, precise panning, controlled brightness, and a natural stereo width signal that the geometry is working.
Find the angle that balances focus and width
The 10°–20° range is a practical search zone, not a universal prescription. Speaker directivity, wall proximity, desk reflections, and listening distance all influence the final setting.
Toe-in tuning spectrum
Begin at 15°, then move each speaker by the same small amount.
Symptom-to-adjustment guide
Listen for one symptom, make one correction, then reassess.
| What you hear | Likely cause | Next move |
|---|---|---|
| ✗Muddled center | Asymmetry or reflections | Match distances; add slight toe-in |
| ~Wide but vague | Too little toe-in | Rotate inward by 2°–3° |
| ~Narrow or harsh | Too much toe-in | Rotate outward slightly |
| ✗Missing detail | Tweeters off ear level | Raise, lower, or tilt monitors |
| ✓Stable image | Geometry is aligned | Stop and document placement |
Tip / Mark successful stand and speaker positions with removable tape.
Control the desk before buying more equipment
Hard desktop surfaces and nearby walls can create early reflections that blur imaging. Placement remains the first priority, but simple isolation and absorption can make a tight workspace more forgiving.
Use what you have safely
Books and boxes are valid height tools when they are rigid, level, wide enough for the speaker, and unable to wobble.
Soften the first bounce
A desk mat, isolation pads, curtains, or targeted wall panels can reduce sharp reflections without consuming valuable desk space.
Calibrate after placement
Room-correction software can refine frequency response, but it cannot fully repair poor symmetry, unstable supports, or severe reflections.
How do I know whether toe-in is wrong?
A vague, overly wide image usually needs more toe-in. A narrow, bright, or unnatural image usually needs less. Adjust both speakers equally and listen again.
Can books raise the monitors?
Yes. Use sturdy, identical stacks with a flat base. Confirm that the speakers cannot slide, tip, or vibrate during normal use.
Does monitor design change the target?
Yes. Wider-dispersion speakers tolerate more placement variation, while directional models make precise height and angle more important.
Placement or acoustic treatment first?
Start with placement because it is free and directly controls the sound path. Then add targeted treatment where nearby surfaces still create audible reflections.
Small adjustments can make a tiny studio sound much bigger.
Align the tweeters, establish equal distances, begin near 15° of toe-in, and refine with familiar audio. Comfort and clarity should improve together.
Why your monitor’s toe-in can make or break your sound
Monitor toe-in is simply the angle at which your speakers point inward toward your ears. Imagine a spotlight shining directly on your head—that’s the goal. When done right, it creates a tight, focused stereo image and reduces reflections bouncing off nearby surfaces.
Why does this matter? Because a well-angled monitor directs sound precisely where you need it—toward your ears—minimizing the spread of sound waves that can cause muddiness or phase issues. This focused sound enhances clarity, making it easier to distinguish elements in your mix or enjoy a more immersive gaming experience.
However, there’s a tradeoff: too much toe-in might cause overly harsh reflections or narrow the stereo image excessively, making the sound feel unnatural. Conversely, too little reduces the sense of space and detail. Fine-tuning the angle is about finding that sweet spot—usually around 10°–15°—that balances direct sound with a natural stereo field. In small rooms, subtlety is key because reflections are more prevalent, and aggressive toe-in can exacerbate echo or reverb issues.
In essence, proper toe-in isn’t just about pointing speakers at your head—it’s about controlling how sound interacts with your environment to optimize clarity and imaging. The right angle helps you hear more detail and makes your setup more forgiving of reflective surfaces.
Popular right now

KitchenAid Artisan 5-Qt Tilt-Head Stand Mixer, Cardamom

KitchenAid Classic Series 4.5-Quart Tilt-Head Stand Mixer, Onyx Black

De'Longhi Dinamica Plus Fully Automatic Espresso Machine
As an affiliate, we earn on qualifying purchases.
How to find the perfect tweeter height without buying new gear
Achieving optimal tweeter height is more than just aligning it with your ears; it’s about understanding how high frequencies behave and how they interact with your space. High frequencies are very directional—they tend to reflect off surfaces and are absorbed quickly. If the tweeters are below or above your ear level, you’ll notice a loss of detail, harshness, or a less focused stereo image.
Why does this matter? Because when tweeters aren’t at ear level, the direct sound doesn’t hit your ears as intended, causing a mismatch that can lead to fatigue or misinterpretation of your mix. Raising or lowering monitors to align the tweeters with your ears ensures that high-frequency sound waves arrive directly and evenly, preserving clarity and transparency.
Here’s a deeper look at the process: measuring your seated ear height isn’t enough; consider your typical listening position and the angle at which your ears face the monitors. Slight adjustments—using stands, books, or foam pads—alter the path of high frequencies, influencing how you perceive detail and brightness. For example, raising a monitor by a few inches might reduce harshness and improve the sense of air in your sound, but too high can cause the sound to become overly bright or directional, leading to listening fatigue.
Ultimately, the goal is to create a balanced high-frequency response that feels natural and detailed. This often involves iterative testing—listening to familiar tracks, adjusting slightly, and noting how the sound changes. Small changes in tweeter height can significantly impact your perception of clarity, spatial image, and fatigue over long sessions, making this a crucial step in setting up your small space for optimal audio performance.
Defining a logical setup progression for optimal placement
Before making any adjustments, it’s essential to establish a clear and logical sequence for setting up your monitors. Proper placement begins with understanding your space and then applying a step-by-step approach to optimize sound and ergonomics.
First, measure your seated ear height and mark the ideal tweeter level. Next, position your monitors at an equal distance from your listening position—generally 1 to 2 feet apart—forming an equilateral triangle with your chair. Then, adjust the monitor angle (toe-in) so that the speakers point directly toward your ears, aiming for a 10°–15° inward angle.
After the initial placement, fine-tune the height of the monitors if needed, raising or lowering them to align the tweeters with your ears. Once the basic positioning is set, listen critically to familiar tracks and make incremental adjustments to toe-in and height. Use your ears as the ultimate judge, ensuring your stereo image is centered and clear.
This step-by-step process ensures a systematic approach that prevents guesswork and helps you achieve consistent, high-quality sound in your small space. Remember, small iterative changes often produce the best results, so be patient and methodical in your setup.
Frequently Asked Questions
How do I know if my monitor toe-in is too much or too little?
If the stereo image feels off-center or muddled, your toe-in might be too much. If the soundstage is too wide or unfocused, it’s probably too little. Adjust gradually, listening to familiar tracks, until it feels natural and precise.
Can I just use books or boxes to adjust tweeter height?
Absolutely. Just make sure whatever you use is stable and won’t wobble during use. Stacking sturdy books or boxes is a quick, affordable way to get your tweeters at ear level in a small space.
Should I worry about the room reflections more than monitor placement?
Both matter. Proper monitor placement reduces direct reflections, but acoustic treatments like desk pads or foam panels help manage reflections bouncing off walls and surfaces. In small spaces, combining both strategies gives the best results.
Does the type of monitor matter for toe-in and height adjustments?
Yes. Some monitors have adjustable tweeters or wider sweet spots, making fine-tuning easier. Others are more directional, so precise placement is even more critical. Know your gear’s capabilities and adjust accordingly.
Conclusion
In a small desk setup, perfecting your monitor toe-in and tweeter height isn’t just about sound—it’s about making your space work for you. With simple tools and a little patience, you can turn a cluttered corner into a clear, immersive soundstage.
Remember: small adjustments are your secret weapon. Keep experimenting, and soon your tiny studio will sound much bigger—and better—than it looks.