
TL;DR

Get audio and creator gear delivered free with Prime
- Fast, free delivery on millions of items
- Prime Video, Amazon Music and more included
- Member-only deals all year
Window light can make video look natural, but clouds, the sun, and reflected light change its brightness, color, and direction. Soften direct sun, keep your camera and subject in a fixed setup, and lock exposure and white balance when possible. Record a short test, check bright areas as well as skin, and pause or add a steady light if the daylight shifts between takes.
A cloud can change the look of your video before you finish a sentence. Your face dims, the shadow under your chin softens, and a phone set to automatic exposure may brighten the whole image a beat later. The footage still looks like daylight, but the shift can become distracting when you cut between takes.
Window light can give a face a soft, natural look without a studio-sized lighting budget. You’ll learn how to choose and soften a window, set your camera, balance the light with a reflector or LED, and handle a passing cloud. The aim is simple: make daylight changes less noticeable, or adapt your setup when they become too large.
Choose a window with indirect light when possible; a north-facing window is often a good starting point, not a promise of constant conditions.
Use a sheer curtain or diffusion to soften hard sunlight, knowing that clouds and the sun can still change its level and direction.
Lock exposure and white balance for multi-take work, then check both skin and the brightest parts of the frame.
Use a reflector for inexpensive shadow fill or a color-matched LED when you need steadier light across takes.
Record a test and pause when daylight shifts enough to disrupt continuity; clipped highlights and strongly mixed light are hard to repair in editing.
Window Light for Video: Taming Daylight That Keeps Changing
Window light can make video feel natural, but clouds, the sun and reflected light keep shifting its brightness, color and direction. Fix your setup, soften hard sun, lock camera settings when possible, and adapt when daylight moves too far.
Build a repeatable starting point
A north-facing window often avoids direct sun for much of the day, but season, location, nearby buildings and reflections all matter. Treat the window as a useful source, not a promise of stable conditions.
Look for indirect light
Choose a window without a hard beam when you can. Direct sun can create bright patches, sharp shadows and highlights that clip.
Soften, then monitor
A sheer curtain spreads light across a larger apparent source and softens shadows. Clouds and the sun can still change its level and direction.
Keep the window in front
Face it or place it just off to one side. A bright window directly behind you can turn you into a silhouette.
Keep the chair, camera, framing and diffusion in place so changes are easier to notice. Secure curtains and reflectors, keep exits clear, and check heat or glare during longer shoots.
Balance the face and the brightest area
Turn slightly toward a window at your side for a gentle gradient across the face. A white board or reflector opposite the window can lift shadows by redirecting existing light.
Bounce light into shadows
Move a white board closer for stronger fill or angle it away for a softer lift. Its effect depends on the available daylight, so it may change as the window changes.
Match the daylight
A continuous LED can provide steadier output across takes. Match its color temperature as closely as possible; warm lamps mixed with cool daylight can make skin hard to correct.
Check the brightest visible areas as well as the face. Once highlights clip, their detail may be impossible to recover. If the outside view matters, expose for the window and add bounce or light to the face.
Lock brightness and color separately
Automatic controls can react to a passing cloud, a white shirt or a bright window. For multi-take work, manual settings and a short test provide a steadier reference, even though they cannot stop daylight changing.
Sets image brightness. Choose it while checking the face and the brightest parts of the frame.
Affects how colors are rendered. Set it for the room’s daylight and keep the light mix consistent.
- Set the frame and place your subject.
- Choose exposure; preserve needed highlight detail.
- Set white balance for the daylight in the room.
- Record and review a short test for brightness, skin color and shadows.
Choose your fill for the level of control you need
A reflector is inexpensive and uses existing window light. A powered continuous light costs more, but can give you a more repeatable source across several takes.
| Option | Best for | What to watch | Control |
|---|---|---|---|
| Window alone | Simple clips with soft, indirect light | Weather, sun position and reflections can shift the look | Variable |
| White board / reflector | Inexpensive shadow fill | It redirects available light, so brightness is less predictable | Some |
| Color-matched LED | Interviews and multiple takes | Match color temperature; keep other sources consistent | Steadier |
| LED key + window fill | Repeatable output when daylight changes often | Balance the window so it does not compete or clip | More |
Make daylight shifts easier to manage
Clouds can change brightness, soften shadows and alter color before a sentence ends. A fixed camera makes the shift easier to spot; a pause or steadier key light can keep takes consistent.
Fix the setup
Keep camera, subject and framing in position.
Record a test
Check face, highlights, color and shadow direction.
Watch for a shift
Compare takes for brightness and color changes.
Pause or add light
Wait for conditions to settle or use a steady key.
Editing has limits.
Modern tools can correct modest exposure and color differences, but clipped highlights and strongly mixed light are difficult to repair. For interviews or multi-take videos, a short test and a pause during major shifts can save more work than matching every change later.
Choose a window that gives you a steadier starting point
Window light for video is easiest to manage when the window gives you broad, indirect light instead of a hard beam of sun. A north-facing window often avoids direct sun for much of the day, though the actual result depends on your location, season, nearby buildings, and reflected light. The window is your starting point, not a guarantee of constant brightness.
Direct sunlight can put a bright patch on one cheek and a dark, sharp shadow under the other. Try a window without direct sun, or wait until the sun moves off the glass. If you’re filming at a desk, turn your chair so the window sits in front of you or off to one side. A window directly behind you can turn you into a silhouette unless that’s the look you want.
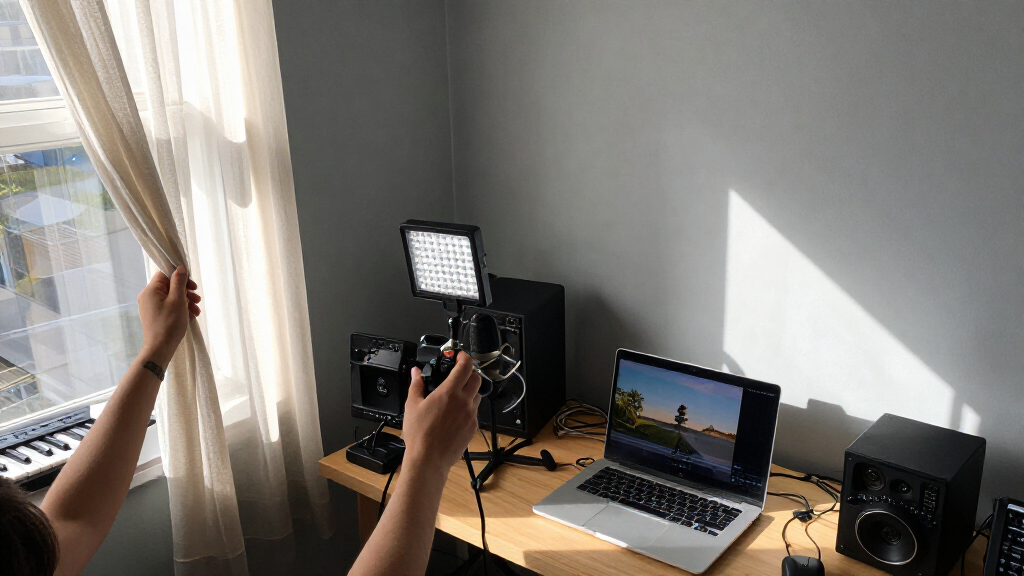
Use a sheer curtain or proper diffusion material to soften a harsh beam. Diffusion spreads the light over a larger apparent area, which softens shadows; it does not freeze the daylight. For example, a creator filming a cooking demo might hang a sheer curtain over the window and see softer shadows on the counter, then still notice the room darken when clouds move across the sun.
Before you record, fix your chair, camera position, and framing. If the camera stays put, changes in the light become easier to spot. Secure curtains and diffusion, keep exits and walkways clear, and check for heat or glare if you’ll be filming for a long stretch.
Popular right now

De'Longhi Rivelia Fully Automatic Espresso Machine with Milk Frother, White

TCL 65-Inch QM6K QLED Mini-LED 4K HDR Smart Google TV, 144Hz

KitchenAid Classic Series 4.5-Quart Tilt-Head Stand Mixer, Onyx Black
As an affiliate, we earn on qualifying purchases.
Face the window and keep your brightest highlights in check
To light your face evenly, point it toward the window or turn it slightly toward a window at your side. This gives you a clear, repeatable starting position and keeps the main light on your face. For a simple talking-head video, place the window just off camera so the light shapes your face without leaving one eye in deep shadow.
Window light can make video look flat if you face it square on and fill every shadow. A slight turn gives the light a gentle gradient across your cheeks, like turning a blank page so it catches a wash of watercolor. But if the window is far to one side, the contrast may grow too strong. Move a white board or reflector opposite the window to lift the shadow.
Watch the brightest part of the image, not just your face. A bright window can lose all detail when its highlights clip, and that detail may be impossible to recover later. If you want to see the view outside, expose for the window and add light or bounce to bring your face up. If the view doesn’t matter, shift your framing so less glass appears.
For instance, in an interview recorded beside a large city window, you might keep the subject turned toward the glass but frame a plain wall behind them. That choice avoids a blown-out rectangle competing with their expression. Check the face and the brightest areas after a short test; skin that looks good on a small camera screen can still hide clipped highlights elsewhere in the frame.
Lock exposure and white balance before you record
Set exposure and white balance manually when you can, because they control two different things: exposure sets image brightness, while white balance affects how colors appear. Automatic exposure may brighten or darken a shot when a cloud passes. Automatic white balance can shift skin tones as the mix of daylight and indoor light changes.
Use this quick setup before a multi-take recording:
- Set your frame and place your subject where they’ll stay.
- Choose exposure while looking at both the face and the brightest visible area. Keep highlight detail where you need it.
- Set white balance for the daylight in the room, then avoid changing the mix of lights mid-scene.
- Record a short test, watch it back, and look for shifts in brightness, skin color, and shadow direction.
Imagine you’re recording a five-minute tutorial in a home office. If auto exposure reacts to a white shirt or the bright window, it can change the room’s brightness halfway through your explanation. Locked settings help the picture stay consistent, even though they can’t stop the actual daylight from changing.
Modern phones and cameras often offer face exposure, HDR processing, or automatic white-balance tracking. These features can make a quick clip look good with little setup, but they can also change the look between takes. For a single casual clip, automation may be enough; for an interview you’ll edit from several takes, a test recording and manual controls give you a steadier reference.
Use a reflector or LED to fill shadows without muddying skin tones
A reflector redirects existing window light, while a powered light can add a steadier source. A white board, foam board, or reflector set opposite the window can bounce light back into the shadow side of your face. An LED can provide a more controlled fill or become your main light if the daylight keeps changing.
A reflector is often the cheapest fix, but its effect depends on where you put it and how much light the window provides. Move it closer to the subject for a stronger bounce, or angle it away for a gentler lift. For example, if a creator’s cheek looks too dark during a product demo, a white board propped just outside the frame can brighten it without adding another powered fixture.
If you add an LED, match its color temperature to the daylight as closely as its controls allow. A warm household lamp next to cool daylight can make one side of a face look orange and the other blue, and that mixture can be difficult to correct later. Many modern LEDs offer adjustable color temperature, which makes matching easier, but a setting on the lamp alone doesn’t account for every nearby reflection or bulb.
Use a continuous light as the key when you need repeatable output across several takes, and let the window act as fill or background light. That setup costs more than a reflector but gives you more control. Keep the light’s brightness and color stable, then record a fresh test if clouds change the daylight in the room.
Keep a shoot consistent when clouds move or the sun shifts
Continuity is the match between shots: brightness, color, framing, and shadow direction should feel like they belong together. Clouds move and the sun shifts, so a window-lit setup can look different even when your camera and subject haven’t moved. Diffusion makes those changes less sharp; it does not make them disappear.
Before a longer shoot, record a short clip and watch it back. Look for the face getting brighter or darker, skin taking on a new color, or a shadow moving across the wall. A creator filming several short course lessons might record them all in one sitting, but if the sun changes between lessons, the edit can look like the presenter moved to another room.
When a cloud passes, pause and wait for conditions to settle if the shot depends on natural light. If the change is small, keep going and note which takes were filmed under the same conditions. If it’s large, switch to a steady LED as the key light and use the window as fill, or close the curtains and rely on the controlled light.
Editing can help with modest exposure and color differences, but it can’t reliably restore clipped highlights or fix every mixed-color shadow. Matching several takes in post can also take longer than waiting a few minutes for the light to settle. When you record at different times of day, write down your camera settings and light placement, then repeat the test clip before the next session.
Build a simple window-light plan that fits your room
A useful window-light plan needs only four things: a place for the subject, a repeatable camera position, a way to soften or bounce the light, and a backup for bigger changes. That could mean a curtain, a white board, and one adjustable LED. You don’t need expensive gear to improve a short video, but you do need to know what each item can and cannot control.
Try this example in a small apartment: set a chair about a meter from a window, turn it slightly toward the glass, and put the camera at eye level. If direct sun makes the face look sharp and contrasty, close a sheer curtain. Place a white board on the opposite side to lift the shadows, then lock exposure and white balance before recording.
Check the setup again if the room has colored walls, a bright floor, or a nearby lamp. Reflected light changes the color and direction of what reaches your face, even if the sky hasn’t changed much. A green wall, for example, can throw a faint tint onto skin that a white reflector won’t fully cancel.
Keep the arrangement safe and practical: secure anything hung over the window, don’t block an exit, and leave a clear route around stands and cables. If you’re filming in summer, direct sun can also heat the room quickly. Move the subject or close the curtain if glare or heat makes the shoot uncomfortable; a technically tidy setup isn’t useful if you can’t work in it.
Frequently Asked Questions
Should I face the window or sit with it behind me?
Face the window or turn slightly toward it for an evenly lit face. A window directly behind you can leave your face dark as the camera adjusts to the bright background, unless you want a silhouette.
Which window direction gives the most consistent light?
A north-facing window often provides softer, more indirect light, but the result depends on your location, season, nearby buildings, and reflections. Check the actual light at the time you plan to film.
How do I soften direct sunlight without making the room too dark?
Try a sheer curtain or diffusion material to spread the light and soften shadows. If the room loses too much brightness, move the subject closer to the window or add a white reflector to return some light to their face.
Should I use a reflector, a lamp, or both?
Use a reflector when you have enough window light and just need to lift shadows; it is inexpensive and quick to position. Add a continuous LED when you need a more repeatable key or fill, and match its color temperature to the daylight as closely as you can.
Can I fix changing window light in editing?
Editing can correct modest exposure and color differences, but clipped highlights may have no recoverable detail. Strongly mixed lighting can also leave skin tones difficult to match, so pausing for steadier conditions can save work later.
Conclusion
Keep your setup simple and repeatable: soften harsh sun, face the subject toward the window, and lock exposure and white balance when consistency matters. Check a short test before the full take, especially the brightest areas in frame.
Daylight will still change. Your job is to spot the change early, wait for it to pass, or give your camera a steadier light to follow.