
TL;DR
A studio condenser microphone uses a powered capsule to turn sound into an electrical signal, often capturing quiet detail and fast transients. Choose by source, room, polar pattern, self-noise, and maximum SPL, then test placement before assuming a new microphone will fix a recording.
A condenser microphone can make a quiet breath, pick scrape, or soft consonant sound startlingly close. That detail can flatter a singer in a calm room—and expose a humming fridge in the next one. Studio condenser microphones are useful tools, but their sensitivity makes the room and technique part of the recording.

Get audio and creator gear delivered free with Prime
- Fast, free delivery on millions of items
- Prime Video, Amazon Music and more included
- Member-only deals all year
This guide explains what they are, how their key specifications affect real sessions, and when a dynamic mic may suit you better. You’ll also get practical starting points for connecting and placing one, so your first test takes minutes instead of turning into an expensive guessing game.
Most XLR studio condensers need 48-volt phantom power; USB models usually receive power through USB.
Large-diaphragm mics are common for vocals and small-diaphragm models for instruments, but source and tone should guide the choice.
Cardioid is a useful starting pattern for one source; omni and figure-eight can suit particular rooms and setups.
Check self-noise for quiet recordings, maximum SPL for loud sources, and frequency response for tonal color.
Test distance, angle, room noise, and reflections before buying another microphone.
What a Studio Condenser Microphone Does for Your Recording
A studio condenser microphone turns sound into an electrical signal using a capsule that works like a capacitor: sound moves a thin diaphragm, changing the electrical relationship inside the capsule. Most XLR models need power, commonly 48-volt phantom power supplied by an interface, mixer, or preamp. USB condensers draw power through the USB connection, while some designs use batteries or an external supply.
In practice, that design often gives you high sensitivity and a clear capture of small details and quick transients. Record an acoustic guitar and you may hear the pick attack shimmer at the start of each note. That can be lovely, but it can also reveal finger squeaks, computer fans, or traffic outside your window.
“Studio condenser” describes the microphone’s intended use, not a promise of polished sound. Capsule tuning, electronics, polar pattern, placement, and the room all shape the result. A budget mic in a quiet, well-managed space can beat a costly mic pointed at a reflective wall; the mic is one link in a chain, not a magic filter.
Useful first check: An XLR condenser generally needs an interface or mixer with a mic preamp and phantom power. Check the microphone’s manual before connecting it, especially if your setup includes unusual adapters or ribbon microphones.
Popular right now

Ninja Mega Kitchen System Blender and Food Processor, 1500W, 72 oz Pitcher, 8-Cup Bowl, Black (BL770)
Bose QuietComfort Ultra Earbuds (2nd Gen), Wireless Noise-Cancelling Earbuds, Black

Sony WH-1000XM6 Wireless Noise-Canceling Headphones, Black
As an affiliate, we earn on qualifying purchases.
Choose the Diaphragm That Fits Your Source
Studio condenser microphones with large diaphragms are common choices for vocals and voice-over, while small-diaphragm models often suit acoustic instruments and stereo recording. Those are useful tendencies, not rules: diaphragm size alone does not determine sound quality, bass response, or whether a mic will suit your voice.
A large-diaphragm model might give your spoken voice a smooth, substantial feel in a home booth. Put a small-diaphragm pair in front of a piano or acoustic guitar, and their consistent response off to the sides can help preserve detail across the instrument. Think of the first as a portrait lens and the second as a dependable way to capture a wider scene; neither lens is right for every shot.
Pick by source and desired tone, then listen to a short test. If your voice already has sharp “s” sounds, a bright vocal mic could make them more noticeable. A warmer model may help, but moving the mic slightly off-axis could solve the problem at no cost. Likewise, a small-diaphragm mic can sound excellent on vocals when its voicing and placement suit the singer.
- Vocals and voice-over: Try a large-diaphragm mic as a starting point.
- Acoustic instruments: Consider small-diaphragm models for transient detail and off-axis consistency.
- Stereo recording: Choose a pair and technique suited to your room and instrument.
Use Polar Patterns to Control What the Mic Hears
A polar pattern describes which directions a microphone hears most strongly. Cardioid favors the front, omnidirectional captures sound from all directions, and figure-eight hears the front and rear while rejecting much of the sound at the sides. A multi-pattern mic lets you change that pickup shape for different rooms and setups.
In a modest bedroom, cardioid is a sensible first choice for a singer: aim the front at the voice and place the mic so its least sensitive rear area faces a noisy computer or reflective surface, where the pattern allows. But cardioid does not erase the room. A bare wall can still send reflections into the capsule from the front, so a thick rug or a change of position may improve the take more than switching patterns.
Omni can sound open and natural in a good room because it captures sound from every direction, including the space around the source. Figure-eight can help with two-person interviews when speakers sit on opposite sides of one microphone, while the side nulls can reduce sound from the sides. Each choice trades one kind of pickup for another: test the room as well as the mic, and don’t treat a pattern switch as a substitute for listening.
Try this: Record the same sentence once in cardioid and once in omni. If the omni take feels roomy in a pleasing way, keep it; if it sounds like the voice is bouncing around a hallway, cardioid may be the better fit.
Read the Specs That Change Your Recording
The useful microphone specs tell you about noise, tone, loudness limits, and rumble control—not whether the mic is universally “good.” Self-noise matters most when you record quiet sources; maximum SPL tells you how loud a source the mic can handle before its electronics distort; and frequency response hints at the mic’s tonal balance.
| Spec | What it tells you | When you’ll notice it |
|---|---|---|
| Self-noise | The mic’s own electronic noise | Quiet voice, room tone, or soft instrument takes |
| Maximum SPL and pad | How loud a sound the mic can handle; a pad lowers signal entering its electronics | Close drums, brass, or loud guitar cabinets |
| Frequency response | Where the mic boosts or reduces frequencies | Bright voices, sibilance, or a source that sounds muddy |
| High-pass filter | Reduces low-frequency rumble and some handling noise | Vibration or traffic rumble, as long as useful bass stays intact |
A low self-noise figure can be valuable when recording a delicate fingerpicked guitar in a quiet room, but published figures may use different measurement methods. Compare them in context, and remember the preamp and room also contribute noise. A brighter response can add presence to a soft voice, yet emphasize harsh consonants. There is no response curve that wins for every singer or instrument.
If a loud guitar cabinet distorts, check the mic’s maximum SPL and try its pad if it has one. If a high-pass filter removes traffic rumble, keep it; if it strips warmth from a spoken voice, switch it off. More gain does not inherently create noise; the source of noise could be the mic, preamp, room, or another part of the recording chain.
Set Up Your Mic So the Room Helps You
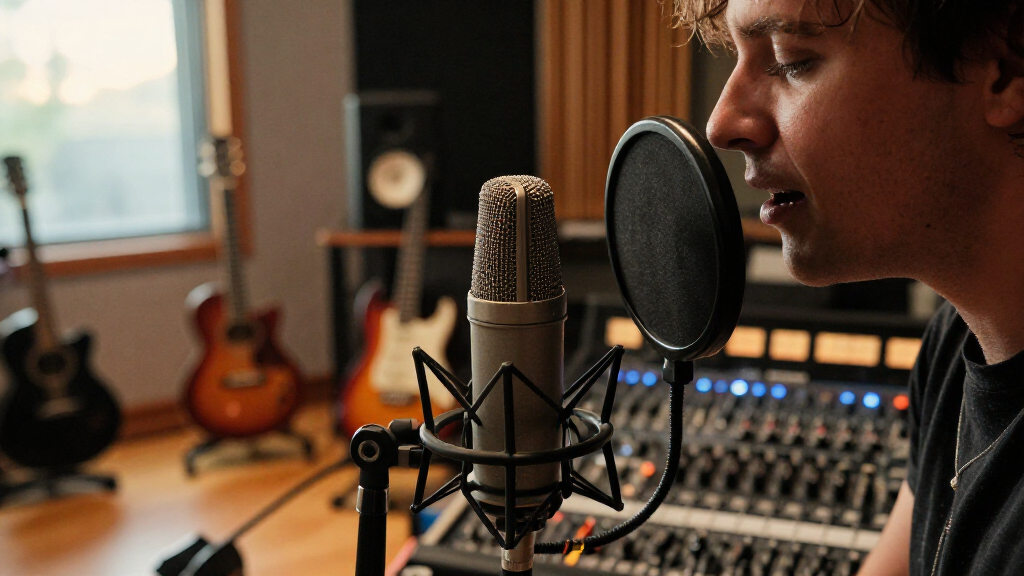
Mic distance and angle can change a recording more than buying a different condenser. Start a few inches to roughly a foot from your mouth, then adjust for your voice, room, microphone, and desired proximity effect. Use a pop filter and avoid directing your breath straight into the capsule; a simple screen can tame hard “p” bursts before they knock into the mic like a tiny gust of wind.
- Quiet the space: Turn off fans if practical, close the window, and move away from reflective walls.
- Place the mic: Begin at a comfortable speaking distance, with the capsule aimed slightly off the mouth.
- Set your level: Speak or sing at the real performance volume and adjust gain so the loudest phrases do not clip.
- Record a short test: Listen for room echo, rumble, harshness, or plosive pops before recording the full take.
- Change one thing: Move the mic, change its angle, or try a different pattern, then compare.
Imagine recording a podcast beside a bare desk and laptop: the condenser may capture your voice clearly along with reflections and fan noise. Move closer, aim the mic away from the laptop, and add soft furnishings nearby. Those steps can make the recording cleaner without covering the room in foam. A dynamic microphone may be more forgiving in a noisy or untreated space, but a condenser can still work if you manage distance and background sound.
When handling or connecting an XLR condenser, follow its manual and your interface guidance. Confirm phantom-power compatibility before switching it on; power down or follow the equipment’s specified connection procedure when changing connections. Keep the microphone dry, use a pop filter for close vocals, and store it safely. Condensers are not all fragile, but moisture, drops, and poor storage can damage them.
Choose a Mic That Matches Your Budget and Workflow
The right studio condenser microphone is one that fits your source, room, and recording setup; price and sensitivity do not tell you whether it will sound best for your job. Affordable large-diaphragm models are widely available, while premium designs may offer distinct capsule voicing, transformerless electronics, or selectable patterns. Those features help when they solve a real need, such as recording several sources with different pickup patterns.
USB models simplify a direct-to-computer setup by building in conversion and headphone monitoring. Hybrid models with USB and XLR outputs can give you a straightforward start and a route into an interface later. Some add onboard processing or companion software, but those conveniences do not remove the need for good placement or a quiet enough space. If you already own an interface, an XLR model may fit more naturally into the studio you have.
Before spending more, record a familiar source with the gear you have. For example, if your voice sounds boxy on a new mic, try moving away from the corner and adjusting distance before blaming the capsule. A higher-priced microphone can be a poor match for one singer and a perfect match for another. Product launches and availability change quickly, so check current models, compatibility, and prices before you buy.
A sensible purchase order: Get a mic that fits your room and source, confirm that your interface can power it if required, and reserve some budget for a stand, pop filter, and headphones. Those practical pieces help you get repeatable recordings on an ordinary Tuesday, not just on demo day.
Frequently Asked Questions
What is the difference between a condenser and a dynamic microphone?
Condensers often offer higher sensitivity and detailed transient capture, while dynamics are often less sensitive and practical for loud sources or noisy spaces. There are exceptions, so compare the sound and workflow for your particular source and room.
Do studio condenser microphones need phantom power?
Most XLR studio condensers use 48-volt phantom power from an interface, mixer, or preamp. USB models get power through USB, and some specialized microphones use another supply; check the manual for your model.
Can I plug an XLR condenser microphone directly into my computer?
An XLR condenser generally needs an audio interface or mixer with a mic preamp and the required power. A USB condenser can connect directly, subject to its operating system and software compatibility.
Is a condenser microphone good for an untreated room?
It can work, but it will pick up room reflections and background noise along with your voice. Record closer, choose a suitable pattern, and reduce nearby noise; a dynamic mic may be more forgiving in some spaces.
How far away should I sing or speak?
A few inches to roughly a foot is a practical starting range. Adjust for your voice, the room, and the effect you want, and use a pop filter to reduce breath blasts.
Why does my condenser recording sound harsh, boomy, or noisy?
Room reflections, sibilance, proximity effect, background noise, gain, placement, or the source itself can cause those problems. Try changing the mic’s position or angle first; a small move often changes the sound more than a new piece of gear.
Conclusion
Choose your condenser by the sound you need and the room you have, then spend a few minutes testing placement before you record the keeper take. A modest microphone aimed well in a quiet corner can capture more useful detail than an expensive one facing a noisy, echoing room.
Start close, listen carefully, and let the room tell you what to change. The best upgrade may be a moved chair and a closed window.