
TL;DR

Get audio and creator gear delivered free — and shop member deals
- Fast, free delivery on millions of items
- Access to Prime Big Deal Days deals on October 6–7
- Prime Video, Amazon Music and more included
Achieving the right decay time in a voice room improves clarity without making the space lifeless or boomy. Targets vary by use, but generally fall between 0.2 and 0.5 seconds for spoken voice. Measure carefully, treat based on room specifics, and avoid over- or under-treatment.
Ever wonder why some rooms make your voice sound clear and natural while others turn it into a muddy echo chamber? The answer lies in decay time—how long sound lingers after you stop speaking. Getting this right isn’t about making the room dead, but about tuning it to support your voice without distractions.
In this guide, you’ll learn how to set practical decay targets, how to measure them, and what real-world treatment looks like. Whether you’re recording vocals, doing voice-overs, or hosting a podcast, understanding decay time helps you craft a space that sounds professional without breaking the bank.
Set decay targets between 0.2 and 0.5 seconds for most voice applications, depending on room size and purpose.
Measure decay times in multiple spots, using octave or third-octave bands, to get an accurate picture.
Balance treatment—avoid overly dead or lively rooms—by listening carefully and adjusting materials.
Use the Sabine formula as a starting point to estimate how much absorption your room needs, but always verify with measurements.
Real-world testing with actual speech reveals problems that measurements alone can miss, ensuring your space sounds natural and professional.
How Much Treatment Is Enough?
Decay time is how long sound lingers after speech stops. For most spoken-voice rooms, the useful target lies between 0.2 and 0.5 seconds—controlled enough for clarity, but not so dry that the voice loses warmth and dimension.
A practical mid-frequency starting point for tight, focused narration.
Judge primary targets here, then inspect the wider frequency response.
Review octave or third-octave bands instead of trusting one average.
RT60 estimates the time required for sound energy to fall by 60 dB. In small rooms, T20, T30, and EDT use shorter measured decays and extrapolate the result.
Start with a range, not a magic number.
Room volume, occupancy, microphone technique, recording style, and geometry all shift the ideal target. These mid-frequency ranges are practical starting points—not universal specifications.
| Voice application | Approximate decay target | Listening priority |
|---|---|---|
| Voice-over or audiobook booth | 0.10–0.30 sec | Tight focus; minimal room signature |
| Podcast or spoken-word studio | 0.20–0.40 sec | Clarity with natural vocal warmth |
| Broadcast or video-production room | 0.20–0.40 sec | Consistent speech across positions |
| Home office for calls | 0.30–0.50 sec | Intelligibility for near and far microphones |
| Small meeting room | 0.30–0.60 sec | Clear conversation throughout the room |
| Classroom | 0.40–0.70 sec | Projection without blurred consonants |
| Lecture room or small auditorium | 0.60–1.00 sec | Useful acoustic life with intelligibility |
Primary targets are typically judged around 500 Hz–2 kHz; always inspect low-frequency decay separately.
The voice-room balance
0.0 seconds → 1.0 secondOne position and one average are not enough.
Small booths and domestic rooms rarely behave like perfectly diffuse spaces. Treat RT60 as a useful descriptor, then pair it with frequency-specific curves, listening tests, and spatial comparisons.
Choose positions
Include the main microphone point plus several nearby listening and working locations.
Set the system
Use a calibrated measurement microphone with room-analysis software such as REW.
Excite the room
Run a sweep for detailed data; use a clap as a fast check for flutter and obvious reflections.
Read the curves
Review EDT, T20, or T30 by octave or third-octave band from roughly 125 Hz to 4 kHz.
Verify with speech
Record real voice at the intended distance and listen for smear, boxiness, boom, or unnatural dryness.
Uneven decay between positions or frequency bands usually calls for targeted treatment. A single averaged RT60 can look acceptable while low-frequency resonances or early reflections still damage the voice.
Clarity lives between lively and lifeless.
The most common failure is not simply too much or too little absorption. It is unbalanced absorption—especially thin foam removing treble while lower frequencies continue to ring.
Words begin to smear.
Late energy competes with the next syllable, reducing intelligibility and making distant microphones sound increasingly roomy.
- Hollow or bathroom-like tone
- Flutter between parallel surfaces
- Harsh sibilance and listener fatigue
- Boomy male voice from lingering lows
Speech stays clear and human.
Reflections are controlled without stripping away every spatial cue. The voice feels close, articulate, warm, and easy to follow.
- Consonants remain distinct
- No audible flutter or boxiness
- Low and high decay feel balanced
- Measurements agree with real speech
The room loses dimension.
Excessive or frequency-skewed absorption can make speech dull, uncomfortable, claustrophobic, and difficult to enliven.
- Dry, flat, close-miked character
- Dull treble with untreated bass
- Weak spatial cues for speakers
- Little ambience when warmth is desired
Flutter is directional
A clap that produces a rapid metallic repeat often points to parallel hard surfaces. Treat the reflection path, not the entire room indiscriminately.
Boom can hide below the average
Long low-frequency decay can color deeper voices even when the mid-band RT target appears correct.
Microphone distance changes the result
Beyond the critical distance, the microphone receives more reverberant than direct sound. Moving closer can improve clarity before adding treatment.
Treatment is not isolation
Absorption controls reflections inside the room. It generally does not prevent traffic, HVAC, or neighboring sound from entering the recording.
Use Sabine as a starting map.
Treatment area cannot be determined from floor area alone. Room volume, existing finishes, absorber thickness, mounting, furnishings, and frequency-dependent performance all matter.
Metric form: volume is measured in cubic metres and total equivalent absorption area in square metres.
Room volume
Length × width × height. Two rooms with the same floor area can need different treatment when ceiling heights differ.
Equivalent absorption area
The combined absorption of surfaces, furnishings, people, and installed treatment—not simply the number of panels.
Frequency-dependent coefficient
Materials absorb differently by frequency. Thickness and air gaps usually improve performance below the treble range.
Measure the result again
Install treatment in stages, repeat the same test positions, and compare both data and real speech recordings.
Practical rule: place broadband absorption at strong early-reflection points, address low-frequency persistence with sufficient depth, and preserve some reflective or diffusive surface area when the room starts to feel unnaturally dry.
Decay time is one part of voice quality.
A professional result emerges when reverberation, reflections, noise, geometry, and microphone placement work together. The number matters—but the full signal path decides what listeners hear.
Early decay
Often tracks the listener’s immediate impression of how live or dry the room feels.
Speech clarity
Compares useful energy arriving within the first 50 ms with later reverberant energy.
Intelligibility
Evaluates how effectively speech information travels from source to listener.
Signal-to-room context
Quiet moderate decay can outperform shorter decay compromised by HVAC or outside noise.
The finish line is not “dead.” It is believable.
Treatment is enough when speech remains intelligible, consistent, and tonally balanced across the working area—without audible flutter, distracting reverberation, low-frequency overhang, or a sterile loss of natural space.
What exactly is decay time, and why does it matter for voice?
Decay time is the length of time it takes for sound energy to drop by 60 dB after the source stops. For voice, it’s a key to clarity. Too long, and words smear together; too short, and it sounds sterile and unnatural. Think of decay time as the room’s personality—too lively, and it’s chaotic; too dead, and it’s dull.
Imagine speaking in a bathroom versus a library. The bathroom’s long decay creates a hollow echo, while the library’s short decay keeps words crisp. The goal is to find that sweet spot—usually around 0.2 to 0.5 seconds for spoken voice—so your recordings sound natural and intelligible.
Choosing the appropriate decay time influences how your voice is perceived—too much decay can cause muddiness, reducing intelligibility, while too little can make your voice sound unnatural or overly dry. Balancing this aspect ensures your recordings are clear, warm, and professional, which is critical in voice-over work, podcasts, and singing.
It’s important to understand that decay time isn’t just about reducing echo; it shapes the overall tonal quality and intimacy of your recordings. Too long a decay can produce a spacious but indistinct sound, while too short can make your voice feel unnaturally dry or close. The tradeoff involves balancing speech clarity with a natural sense of space—finding that point where your voice sounds lively yet controlled.
sound absorption panels for voice recording
As an affiliate, we earn on qualifying purchases.
As an affiliate, we earn on qualifying purchases.
How to measure decay time in your room—step-by-step
Measuring decay time isn’t magic; it’s about using the right tools and approach. Here’s a simple process:
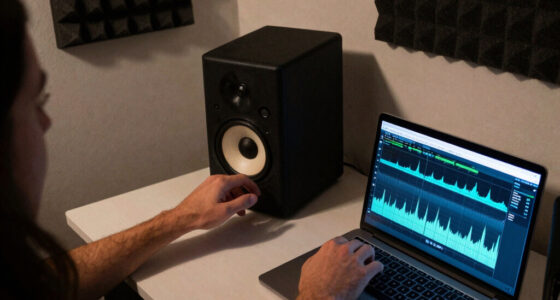
- Choose several spots around the room—your main microphone position, a few others if possible. This ensures you capture how sound behaves in different areas, accounting for uneven surfaces or furniture placement.
- Use a calibrated measurement mic connected to software like REW or Room EQ Wizard. These programs analyze the sound decay after a test signal, providing precise data.
- Play a sweep signal or hand clap. Record the decay of sound in each spot. Claps are quick and effective, but sweeps give more detailed frequency-specific data.
- Review the decay curves, focusing on T20, T30, or EDT—these are shorter-range measures that can be extrapolated to estimate RT60. Understanding these helps identify how different frequencies decay, revealing if certain problematic resonances need targeted treatment.
- Compare across points to see how uniform your room’s decay is. Discrepancies might indicate areas needing additional absorption or diffusion.
Don’t rely on a single spot. Multiple measurements give a clearer picture of overall room acoustics. And remember: a loud clap can reveal flutter echoes or problematic reflections that need fixing. Addressing these issues early prevents over- or under-treatment later.
Deep understanding of decay measurement ensures you’re not just chasing numbers but interpreting what they mean for your space’s character. For example, if your room has uneven decay across frequencies or spots, it indicates that some areas may need targeted treatment to balance the overall sound. Recognizing these nuances allows you to tailor your treatment plan for optimal clarity and naturalness.
As an affiliate, we earn on qualifying purchases.
What decay times should you aim for in different voice spaces?
Target decay times vary based on room size, purpose, and style. Here’s a quick comparison:
| Application | Approximate Decay Target |
|---|---|
| Voice-over or audiobook booth | 0.10–0.30 sec |
| Podcast or spoken-word studio | 0.20–0.40 sec |
| Broadcast/video production | 0.20–0.40 sec |
| Home office for calls | 0.30–0.50 sec |
| Small meeting room | 0.30–0.60 sec |
| Classroom | 0.40–0.70 sec |
| Lecture hall | 0.60–1.00 sec |
Understanding these ranges helps you tailor your treatment to your specific needs. For example, a voice-over booth benefits from a shorter decay—around 0.2 seconds—to keep speech tight and focused, preventing muddiness. Conversely, a classroom or lecture hall may require longer decay to support natural speech and create a sense of space, but too long can cause distracting echoes. The tradeoff involves balancing clarity with naturalness—overly dead rooms can sound unnatural, while overly lively spaces can be confusing or harsh. Achieving the right decay time is about understanding the purpose of the space and how the room’s acoustic environment influences communication and recording quality.
As an affiliate, we earn on qualifying purchases.
What happens if your room is too lively or too dead?
Long decay times turn your room into a reverberant nightmare. Words smear, sibilance becomes harsh, and distant microphones pick up more echo than voice. Think of shouting in a canyon—sound bounces wildly, making it hard to understand. Excessive reverberation not only reduces speech intelligibility but can also cause listener fatigue, as the ear struggles to separate the voice from the echo, leading to a less engaging listening experience.
Over-treating with foam and heavy absorption creates a dull, lifeless space. Voices sound close and flat, with little room ambiance. It’s like recording in a padded cell—your voice loses warmth, spatial cues, and natural resonance, making it hard to breathe life into the recording. Overly dead rooms can also create a sense of claustrophobia, reducing listener engagement and making even lively speech sound flat and uninspiring. The tradeoff here is between clarity and naturalness—too much deadening material can strip away the room’s personality, leaving a sterile sound that feels disconnected from real-world acoustics.
Finding balance means avoiding these extremes. Use measured treatment and listen critically to your voice, adjusting until the sound feels natural and clear. Often, small adjustments—adding diffusion or selective absorption—can significantly improve the overall sound quality, creating a space that supports natural speech and comfortable listening without unwanted echoes or dullness. Remember, the goal isn’t perfection but achieving a balance that enhances your voice’s clarity and warmth while minimizing distracting reflections.
As an affiliate, we earn on qualifying purchases.
How to decide how much treatment your room needs
Estimating treatment needs starts with the room size and what’s already there. Use the Sabine formula:
RT60 ≈ 0.161V / A
Where V is volume in cubic meters, and A is total absorption area in square meters. This formula provides a theoretical starting point based on physics, but real-world conditions often differ due to furniture, materials, and room shape. Recognizing these factors helps you plan more effectively.
For example, if your room is 20 m³ and untreated measures 0.8 seconds, you might aim to reduce it to around 0.3 seconds. To do this, you need to increase the absorption area—adding panels, bass traps, or diffusers—until the measured RT60 aligns with your target. It’s important to remember that the goal isn’t to eliminate all reflections but to create a balanced acoustic environment where speech is clear and natural. Over-treatment can deaden the space excessively, making it sound dull and unnatural, while under-treatment leaves problematic echoes. The tradeoff is in finding that middle ground—adding enough absorption to tame echoes without sacrificing the liveliness that supports natural speech and comfort.
Typical treatment includes:
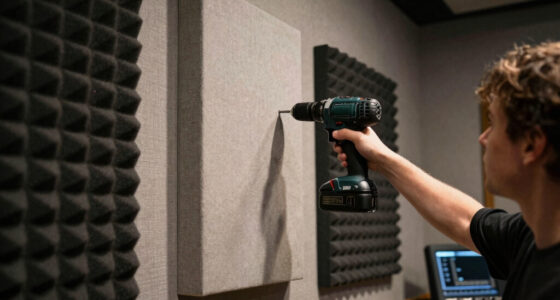
- First reflection panels at speaker and mic height
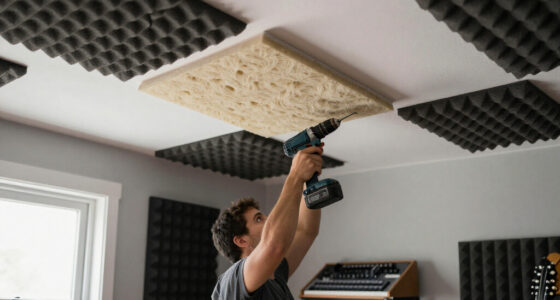
- Ceiling clouds above the speaking position
- Corner bass traps for low-frequency control
- Absorptive panels on parallel walls
It’s a process of trial, measurement, and adjustment. Recognizing that each room is unique, you should treat as needed based on actual measurements rather than relying solely on formulas. Proper planning and adjustments help you avoid the pitfalls of over- or under-treatment, ensuring your space supports natural, clear speech.
Why measuring in real-world conditions matters most
Measuring decay in an empty room is a start, but real voice rooms aren’t empty. Furniture, curtains, and even people absorb sound differently, significantly affecting decay times. That’s why testing with actual speech or recordings in the furnished room gives the most accurate picture of how your space performs during typical use.
For instance, a room might measure 0.3 seconds at 1 kHz when empty but jump to 0.5 seconds once filled with furniture and equipment. This variation can dramatically change your perception of the room’s acoustics. Adjust your treatment accordingly—what looks good on paper might need fine-tuning in practice. Listening critically and measuring under typical conditions ensures your treatment aligns with real-world performance, leading to more reliable and consistent results.
This emphasizes that the true test of your acoustic setup isn’t just the measurements alone but how your voice interacts with the space during actual use. Recognizing the influence of furnishings and occupancy helps you make smarter decisions about where and how to treat, ensuring your room remains balanced and effective for your specific needs.
Emerging trends: smarter, adaptable voice spaces
Modern voice spaces are becoming more flexible and intelligent. Movable panels, curtains, and electronically controlled acoustics allow you to adapt decay times for different tasks, making a single room versatile. For example, a conference room might switch from 0.4 seconds for meetings to 0.2 seconds for recording podcasts, optimizing the environment for each purpose.
AI tools now help identify problem frequencies and suggest targeted treatment, saving time and improving results. Beamforming microphones can better analyze room issues, prompting more precise fixes. Additionally, adjustable acoustics—like sliding panels or motorized diffusers—offer real versatility, especially in multipurpose spaces where needs change frequently.
Staying updated with these trends means your room can support a variety of voice applications without constant overhaul, ensuring your space remains functional and optimized for evolving needs.
Your quick action plan for the perfect voice space
Ready to tune your room? Follow this simple plan:
- Measure your current decay times using a calibrated mic and software. Use multiple points to get an accurate overview.
- Identify problem areas—long decay at certain frequencies, flutter echoes, or uneven decay curves.
- Start with basic broadband absorption at reflection points, ceiling clouds, and corners.
- Re-measure after treatment, aiming for 0.2–0.4 seconds at mid frequencies, and compare results.
- Adjust by adding or repositioning panels, especially near identified trouble spots, and re-test.
- Test with real speech, listening for clarity, dryness, or echo. Use your ears as the ultimate judge.
- Fine-tune treatment until your voice sounds natural, clear, and consistent, balancing absorption and diffusion as needed.
Remember: less is often more. Focus on even decay spectrum and avoid unnecessary over-treatment that can dull the space or cause unnatural dryness.
Frequently Asked Questions
Is there one ideal RT60 for voice rooms?
Not exactly. Smaller booths often aim for around 0.2 seconds, while larger rooms can go up to 0.7 seconds. It depends on purpose, size, and the type of voice work involved.Can I just use foam panels to treat my room?
Foam helps with high-frequency absorption but has limited effect on low frequencies. A balanced approach, including bass traps and broadband panels, yields better results.How do I know if my room is too dead?
If speech sounds flat, muffled, or too close, your room might be over-absorbed. Adding some diffusion or a touch of reverberation can restore natural space and warmth.Should I measure decay with or without furniture?
Measure with furniture and equipment in place—they naturally absorb sound. This gives a realistic picture of how your room actually sounds during use.Can AI or software fix a poorly treated room?
They can help reduce some reverberation or noise, but physical treatment provides a much better foundation. Software alone rarely solves fundamental acoustic issues.Conclusion
Deciding how much treatment your voice room needs isn’t about hitting a magic number. It’s about finding the right decay time that makes your voice clear, natural, and pleasant to listen to. Think of your room as a musical instrument—you tune it until it sings just right.
Next time you set up or tweak your space, remember: measurement guides you, but your ears decide. Keep it simple, measure often, and let your voice tell you when it sounds just right.
Fall Picks
fall essentials
As an affiliate, we earn on qualifying purchases.