
TL;DR

Get audio and creator gear delivered free with Prime
- Fast, free delivery on millions of items
- Prime Video, Amazon Music and more included
- Member-only deals all year
Positioning your mic correctly on a boom arm—about 6-12 inches from your mouth, at mouth level, slightly off to the side—is key for clean speech. Using the right accessories and understanding recent updates helps you get professional results on any budget.
Imagine your voice filling the room, crisp and clear, with no background noise or echo. That’s what a proper boom arm setup can do for your recordings or streams. It’s not about fancy gear—it’s about placement, stability, and understanding what makes your voice sound its best.
If you’ve ever struggled with muffled sound or pops ruining your take, this guide will give you straightforward tips. You’ll learn how to position your mic for top-notch clarity, what recent tech developments can help, and common pitfalls to avoid. Ready to boost your sound game? Let’s get into it.
Keep your mic 6-12 inches from your mouth, slightly off to the side, at mouth level.
A sturdy, adjustable boom arm stabilizes your mic and makes positioning easy.
Use a pop filter and shock mount to cut pops and mechanical noise.
Manage cables neatly and improve room acoustics with soft furnishings.
Stay updated with innovations like motorized boom arms and damping tech for better control.
How to Position Your Microphone for Clear, Consistent Sound
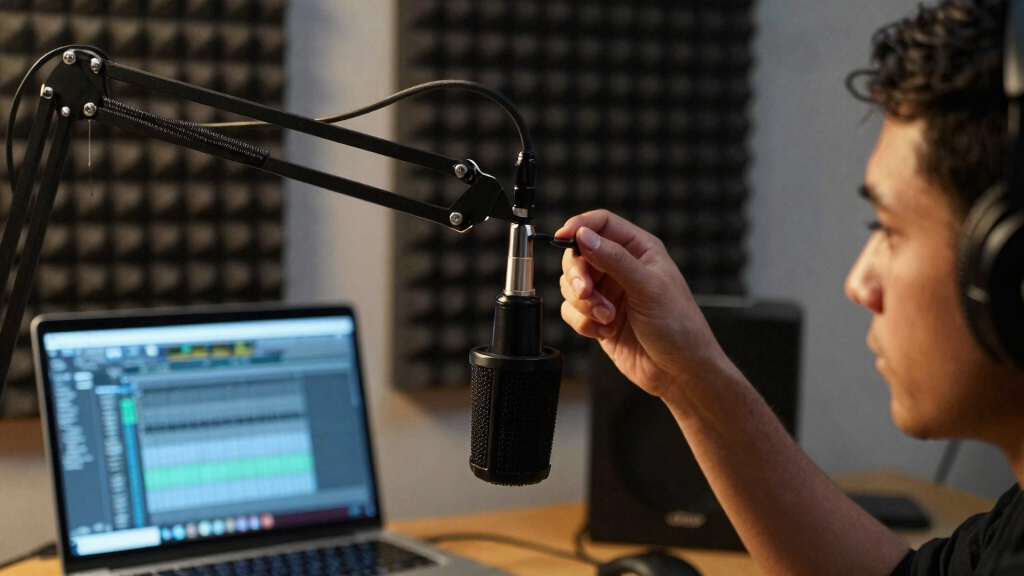
The first step in setup is knowing exactly where to place your mic. For clean speech, aim for about 6 to 12 inches from your mouth. This distance is crucial because it balances the proximity effect—where being too close can cause a boomy bass and muffled sound—and the need for clarity. If you’re too close, your voice might sound muddy or exaggerated in bass; too far, and it can be faint or lose detail. Positioning slightly off to the side reduces plosive sounds like ‘p’ and ‘b’ that cause popping noises, but still captures your voice naturally. The mic should sit at your mouth level or just below, ensuring your voice remains consistent across recordings or streams. Proper placement impacts not just volume but tonal balance and background noise rejection. A well-placed mic minimizes the need for post-production correction, saving time and improving overall professionalism. Think of it as setting the foundation for your sound; even the best mic can’t compensate for poor positioning. When you get this right, your voice will sound fuller, clearer, and more engaging, regardless of your environment.
Deeply understanding why positioning matters helps you make smarter choices. For example, placing the mic too close causes proximity effect, which boosts bass frequencies and can make your voice sound unnatural or boomy—a common mistake that can be hard to fix later. Conversely, positioning too far reduces the signal-to-noise ratio, making your voice faint and more susceptible to background sounds. Slightly off to the side minimizes plosives—those harsh pops—by directing airflow away from the capsule, which is essential for professional recordings. The level of precision in placement directly influences the tonal quality, background noise rejection, and overall clarity. Proper positioning isn’t just about volume; it’s about controlling the sound profile and ensuring consistency, especially during long sessions. Think of your mic placement as setting the stage—when done correctly, it ensures your voice stands out crisply and naturally, saving you time in editing and post-production. The tradeoff is that minor adjustments can significantly impact your sound, so patience and experimentation are key to mastering this step.
As an affiliate, we earn on qualifying purchases.
Choosing the Right Boom Arm for Stability and Flexibility
A good boom arm isn’t just about holding your mic—it’s about providing stability, smooth movement, and cable management that support your workflow. Think of it as the backbone of your setup: if it wobbles or sags, your mic’s position can shift unexpectedly, disrupting your recording or stream. A sturdy arm with a strong clamp or weighted base ensures everything stays steady even during long sessions, preventing unwanted noise or accidental bumps. Modern boom arms made of aluminum alloys are lightweight yet durable, making adjustments easy without sacrificing strength. Features like 360-degree rotation allow you to fine-tune your mic’s position without repositioning the entire setup, while adjustable tension keeps the arm stable at any angle. Built-in cable clips help organize your wires, reducing clutter and minimizing handling noise. When choosing a boom arm, consider the weight of your mic and accessories—overloading can cause sagging, which affects sound quality and positioning precision. Investing in a quality boom arm means fewer frustrations, cleaner recordings, and more confidence in your setup’s reliability. Deeply evaluating these features helps you balance flexibility with stability. For example, a lightweight arm might be easier to adjust but less stable with heavier mics, leading to unwanted movement or sagging over time. Conversely, a heavier, more robust arm offers stability but may be less maneuverable. Understanding these tradeoffs ensures you pick an option that suits your specific needs, environment, and budget, ultimately making your setup more reliable and your recordings more professional.
pop filter for condenser microphone
As an affiliate, we earn on qualifying purchases.
As an affiliate, we earn on qualifying purchases.
Cable Management and Environment Tips for Best Sound
Proper cable routing is essential not just for aesthetics but for sound quality. Loose or tangled cables can generate handling noise as they bump or bend, which can be picked up by sensitive microphones—especially condensers. Using cable clips, sleeves, or ties keeps wires organized and reduces these unwanted noises. Additionally, the environment plays a significant role in your recording quality. Hard surfaces like windows and bare walls reflect sound, creating echo and reverberation that muddy your voice. Incorporating soft furnishings—like rugs, curtains, or acoustic panels—absorbs these reflections, making your voice clearer and more natural. Positioning your mic away from reflective surfaces minimizes echo and background noise, allowing your voice to stand out. The room’s acoustics directly influence the effectiveness of your mic setup; a poorly treated space can negate even the best equipment. Proper cable management not only prevents accidental disconnections but also reduces handling noise, which is crucial for maintaining clarity. Room treatment, such as adding soft furnishings, helps absorb unwanted reflections and reduces echo, making your recordings sound more professional. The tradeoff here is that neglecting environment considerations can lead to a muddy or echoey sound, regardless of mic quality. Investing in good cable management and room acoustics ensures your setup consistently delivers clear, high-quality audio, saving you time in editing and post-processing while elevating your overall production value.
As an affiliate, we earn on qualifying purchases.
What Are the Latest Tech Advances in Boom Arm and Mic Setup?
Recent technological innovations are transforming how we set up microphones, making the process more precise, convenient, and adaptable. Motorized boom arms equipped with electronic controls allow you to adjust position at the push of a button, which is especially useful for streamers or content creators who frequently change scenes or mic angles. These automated systems can save time and ensure consistent placement, reducing the risk of misalignment. Lightweight materials like advanced aluminum alloys and composites make these arms easier to reposition without compromising strength, enabling quick adjustments during live sessions. Additionally, new damping mechanisms and shock mounts on boom arms significantly reduce mechanical noise—those squeaks, bumps, or vibrations that can ruin a recording. Some boom arms now incorporate integrated cable management with built-in clips and channels, simplifying setup and maintenance. Wireless microphones are also gaining popularity, offering freedom from cables altogether. However, even with wireless tech, a well-positioned boom arm remains vital for optimal sound. It helps achieve precise placement, reduces handling noise, and maintains a professional appearance. Embracing these innovations means you can focus more on your content and less on technical fiddling, leading to higher quality audio with less effort. The tradeoff is that these advanced features often come at a higher cost and may require a learning curve, but they ultimately provide greater control, consistency, and efficiency in your setup—crucial for professional-grade recordings and streams.
motorized adjustable microphone arm
As an affiliate, we earn on qualifying purchases.
As an affiliate, we earn on qualifying purchases.
Quick Tips to Perfect Your Mic Placement Every Time
- Keep the mic about 6-12 inches from your mouth. This range balances clarity and bass response, preventing muddiness or thinness in your sound.
- Position it slightly off to the side to minimize plosive sounds without losing directness. This reduces popping and sibilance that can be distracting or damaging to recordings.
- Set the mic at your mouth level for consistent tonal response. Variations in height can cause changes in tone and volume, making your voice sound inconsistent.
- Use a pop filter to catch explosive plosive sounds before they reach the mic. This simple addition preserves clarity and reduces post-production cleanup.
- Ensure your boom arm is stable and well-adjusted. A loose or sagging arm can shift your mic unexpectedly, compromising sound quality or causing accidental noise.
After each adjustment, record a short test and listen critically. Check for clarity, background noise, and pops. Small, deliberate tweaks can dramatically improve the professionalism of your sound, making your recordings or streams more engaging and polished.
Compare Different Microphone Types for Different Environments
| Type | Best For | Pros | Cons |
|---|---|---|---|
| Dynamic | Untreated rooms, noisy environments | Less sensitive to ambient noise, durable, reliable for rough handling | Less detailed high frequencies, may sound dull in some recordings |
| Condenser | Soundproofed spaces, studio quality recordings | High fidelity, captures nuance and detail, ideal for vocals and acoustic instruments | More sensitive to room noise, requires phantom power, more fragile |
Frequently Asked Questions
How close should my mic be for the best speech quality?
Aim for about 6-12 inches from your mouth. This distance balances clarity and prevents excessive bass buildup caused by proximity effect.Can I use a boom arm with a wireless microphone?
Yes, but make sure the wireless transmitter is securely mounted on the boom arm and that the setup doesn’t cause interference or sagging. Wireless mics benefit from precise positioning just like wired ones.What’s the biggest mistake people make when setting up a mic on a boom arm?
Many place the mic too close or too far from their mouth, or they don’t stabilize the arm properly. Both errors lead to poor sound quality or unwanted noise—small adjustments fix most issues.Should I use a shock mount or pop filter first?
Use the pop filter first to reduce plosive sounds. The shock mount helps isolate the mic from mechanical noise, so ideally, have both for the best sound quality.How often should I check my mic setup?
Every few sessions. Small shifts happen over time—tighten clamps, realign the mic, and tweak positioning for consistent sound.Conclusion
A well-placed mic on a reliable boom arm transforms your voice into a smooth, clear stream of sound. Proper positioning isn’t just a detail—it’s the secret to professional-quality recordings and streams. Take a few minutes to set up correctly, and your voice will thank you.
Think of your mic setup as the stage for your voice. When everything’s aligned and stable, every word hits home with clarity and punch. So, adjust that boom arm, check your distance, and get ready to sound your best every time.
Fall Picks
fall essentials
As an affiliate, we earn on qualifying purchases.