TL;DR

Get audio and creator gear delivered free with Prime
- Fast, free delivery on millions of items
- Prime Video, Amazon Music and more included
- Member-only deals all year
Placing acoustic panels at first reflection points cuts early reflections by up to 80%, vastly improving sound clarity. Use mirrors or software to find these spots and treat them effectively for better audio in your room.
Ever wonder why your recordings sound muddy or your mixes lack clarity? The secret often lies in where you place your acoustic panels. Many overlook the importance of first reflection points—those spots where sound first bounces off surfaces and messes with your soundstage.
In this guide, you’ll learn how to find these critical spots and treat them effectively. No fluff, just practical steps and real-world tips to make your room sound professional without breaking the bank.
Use a mirror or software to precisely locate your room’s first reflection points.
Placing panels at these points reduces early reflections by up to 80%, vastly improving clarity.
Treat side walls and ceilings in small rooms for maximum impact with minimal panels.
Modern panels are both effective and stylish, making treatment easy and attractive.
Don’t guess—measure and plan for best acoustic results.
Where to Place Acoustic Panels: Finding First Reflection Points
Stop treating walls at random. Locate the first places where speaker sound bounces toward your ears, then absorb those early reflections for a cleaner stereo image, sharper transients, and mixes that translate.
The first bounce shapes what you hear.
Direct sound should reach the listening position before strong reflected copies. When those copies arrive moments later, they interact with the original signal and distort tonal balance, timing, and spatial detail.
Tone becomes uneven
Direct and reflected waves add or cancel at different frequencies, creating peaks and dips that can mislead mix decisions.
Transients lose focus
Closely timed reflections smear attacks and fine detail, making recordings sound muddy, harsh, or less immediate.
The soundstage blurs
Strong side-wall and ceiling reflections weaken phantom-center focus and make instrument positions harder to judge.
Find the exact spots without guesswork.
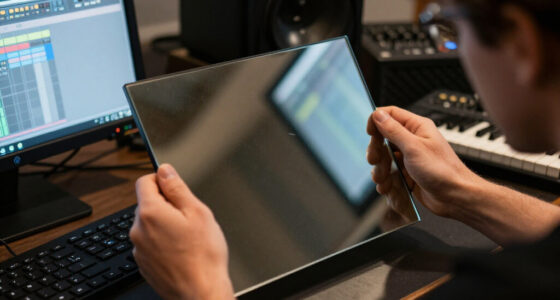
The mirror trick converts an invisible sound path into a visible one. Repeat it for both speakers and both side walls; then use the same principle for the ceiling cloud.
Sit at the listening position
Keep your head where it normally is while mixing or listening.
Slide a mirror along the wall
Ask a helper to keep it flat against each side wall at ear height.
Watch for each speaker
When a speaker appears in the mirror, the reflection path is visible.
Mark, center, and mount
Cover the full marked zone with a panel rather than only its midpoint.
Precision tip: Mark the mirror position for both the left and right speaker. The useful treatment zone may be wider than a single point, so choose a panel that spans the complete cluster of marks.
Prioritize side walls, then look up.
In compact rooms, the strongest early reflections commonly arrive from the left wall, right wall, and ceiling. Treating these zones delivers a large clarity gain with relatively few panels.
Left and right side walls
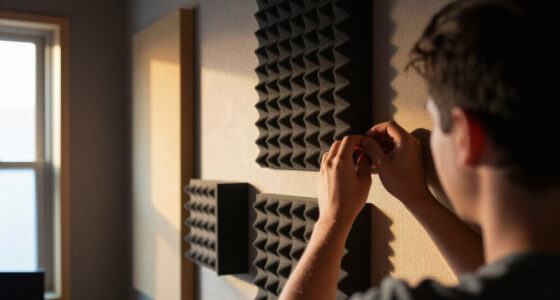
Mount matched panels at seated ear height, centered over the mirror marks.
Ceiling reflection zone
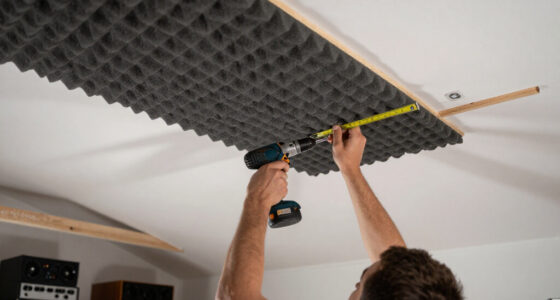
Add a secure overhead cloud between the speakers and listening position.
Front and rear boundaries
Treat only after the primary reflection points; use absorption or diffusion according to room behavior.
Mirror, software, or listening?
Each method answers a slightly different question. Start with the mirror for physical placement, then use measurement software to validate the room’s time and frequency behavior.
| Decision factor | Mirror method | Software analysis | Ear-based search |
|---|---|---|---|
| Ease | ✓High; minimal setup | ~Moderate learning curve | ✓High; no equipment |
| Placement precision | ✓Strong physical guide | ✓Detailed room mapping | ✗Subjective and broad |
| Acoustic diagnosis | ~Shows reflection paths | ✓Shows timing and response | ~Reveals audible symptoms |
| Best fit | DIY rooms and fast setup | Complex rooms and studios | Quick secondary check |
High-impact treatment targets
Relative figures show the headline research benchmarks for a focused first-reflection plan.
Coverage sweet spot
Treat targeted reflective surfaces—not every available wall—to preserve useful energy and spatial life.
Use enough absorption—without deadening the room.
Target the problem paths first. A balanced room retains some natural energy while preventing the strongest early reflections from competing with direct sound.
Panels to start
For many small to medium rooms, this is enough to cover paired side-wall points plus a ceiling zone. Larger or more critical rooms may need added absorption and diffusion.
Choose panels at least 2 inches thick
Thicker porous absorbers work across a broader band than thin decorative foam.
Center treatment at seated ear height
Align wall panels with the actual reflection path, not with arbitrary décor lines.
Cover the full reflection zone
Partial coverage can leave one speaker’s reflection untreated and skew the stereo image.
Mount ceiling panels securely
Use suitable brackets and hardware; an air gap can also improve porous absorption.
Measure, listen, adjust.
Panel placement is a tuning process. Make small changes, compare familiar recordings, and verify that clarity improves without stripping the room of all liveliness.
Target with intention
- Keep speakers and listening position symmetrical.
- Repeat mirror checks for both speakers on both walls.
- Use Room EQ Wizard or similar tools for verification.
- Blend panel fabrics and colors with the room design.
Common placement errors
- Scattering thin foam randomly across every wall.
- Ignoring the ceiling in a low or compact room.
- Confusing first-reflection panels with corner bass traps.
- Adding excessive absorption until the room sounds lifeless.
TL;DR: Sit at the listening position, use a mirror to locate each speaker’s first bounce on the side walls and ceiling, cover those zones with properly sized panels, then measure and fine-tune. Precise placement can reduce early reflections by up to 80%.
What Are First Reflection Points and Why Do They Matter?
First reflection points are the spots on your walls or ceiling where sound waves hit immediately after leaving your speakers or microphone. These points are critical because they are the first places where sound bounces and can interfere with your direct sound, causing comb filtering, phase issues, and a less accurate stereo image. Ignoring these reflections can lead to muddiness and a lack of clarity in your recordings or mixes.
By treating these specific points with acoustic panels, you effectively absorb or diffuse the bouncing sound, preventing early reflections from reaching your ears or microphone. This results in a cleaner, more accurate soundstage, allowing your recordings and mixes to translate better across various playback systems. Understanding and addressing these points is a tradeoff: it requires some effort and precise placement, but the payoff is a significant improvement in sound clarity and room acoustics.
Popular right now

LG 85-inch QNED75B Mini LED Smart TV Bundle with HDMI and CPS Protection Plan

eufy E25 Robot Vacuum and Mop Combo with HydroJet Roller Mop

Hisense 85 U6 Pro Series Mini-LED ULED 4K UHD HDR Gaming AI Smart Fire TV (85U6SF Pro)
As an affiliate, we earn on qualifying purchases.
How to Find First Reflection Points Without Guesswork
Finding these spots is more than just a visual guess; it’s about understanding how sound interacts with your space. The mirror trick is the most reliable method. Sit in your listening or recording position and have a friend move a mirror along the side walls and ceiling. When you see your speakers reflected in the mirror from your listening position, mark that spot. This is where the sound first bounces and where your acoustic treatment will be most effective.
If you’re alone, use your hand or a small mirror while playing music or a test tone. Walk around your room, paying attention to where the sound seems most lively, echoey, or harsh. These areas are where early reflections are most prominent. The tradeoff here is that while the mirror method provides precise physical locations, the ear-based approach offers a practical, real-world sense of where reflections are impacting your sound. Combining both methods yields the best results for tailored treatment.
Best Practices for Placing Acoustic Panels at Reflection Points
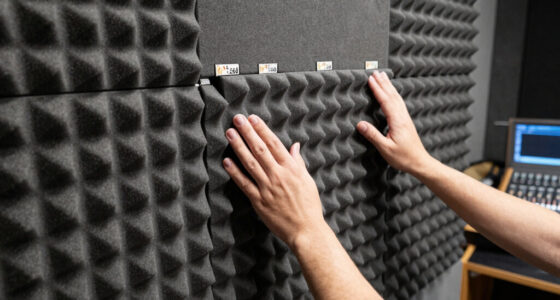
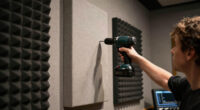
Once you’ve identified the reflection points, proper placement is crucial for maximum effectiveness. Position panels at ear level when seated because this is where early reflections predominantly hit, directly impacting your listening accuracy. Cover the entire reflection point—partial coverage may still leave some reflections unchecked, reducing the benefit.
Use thick foam, fabric-covered panels, or specialized acoustic treatments of at least 2 inches thickness to absorb a broad range of frequencies, especially mid and high frequencies that contribute most to clarity. Don’t forget ceiling reflection points—use a mirror to locate these and treat them similarly. The tradeoff involves balancing coverage with aesthetic considerations; over-treating can deaden the room, while under-treating leaves reflections unmitigated. Think of it as tuning a musical instrument—small adjustments lead to a harmonious sound.
Modern Tools and Tips to Make Finding Reflection Points Easier
Technology can streamline your room treatment process. Acoustic modeling software like Room EQ Wizard (REW) allows you to virtually map out reflection points based on your room dimensions, providing a visual guide that can be more precise than manual methods. This can save time and ensure you don’t overlook critical spots, especially in complex or irregularly shaped rooms.
Some advanced panels now incorporate built-in sensors or are adjustable, enabling you to fine-tune their position and absorption characteristics in real time. This flexibility is especially helpful in rooms with multiple reflection issues or unusual layouts. The tradeoff is that these tools and panels may require some initial investment, but they can significantly improve your treatment accuracy and ease of setup.
For aesthetics, many modern panels come in stylish fabrics, colors, or even custom designs, allowing your acoustic treatment to blend seamlessly with your decor. This prevents your studio from looking cluttered or unfinished, making both sound and style priorities easier to achieve.
Quick Comparison: Mirror Method vs. Software Analysis
| Method | Ease | Precision | Best For |
|---|---|---|---|
| Mirror Method | High — simple, no tech needed | Moderate — depends on eyesight and patience | Most rooms, DIY setups |
| Software Analysis | Moderate — needs computer skills | High — precise, detailed mapping | Complex rooms, professional studios |
How Many Acoustic Panels Do You Actually Need?
In most typical small to medium-sized rooms, treating the first reflection points on side walls and ceiling with 4-6 panels effectively reduces early reflections without overloading the space with absorption. The goal is to target the most problematic surfaces that cause muddiness or comb filtering, not to deaden the entire room. The tradeoff here is that over-treating can make the room sound unnaturally dead, reducing liveliness and spatial cues, so a balanced approach is key. For larger or more critical spaces, additional panels or diffusion may be necessary to maintain a natural sound while controlling reflections.
Aesthetic and Practical Tips for Acoustic Panel Placement
Modern panels are designed to be both functional and stylish. Choose colors and fabrics that complement your room decor, turning acoustic treatment into a design feature rather than an afterthought. Mount panels at ear level when seated to intercept the most impactful early reflections and ensure they are securely attached to prevent shifting or falling. For ceiling placement, sturdy brackets are recommended to keep panels flush and stable.
Remember, effective placement balances acoustic performance with visual harmony. Strategically placed panels can subtly enhance your space’s look while delivering superior sound quality. The tradeoff involves selecting treatments that fit your aesthetic preferences without compromising their acoustic effectiveness, ensuring your room remains both beautiful and functional.
Frequently Asked Questions
How do I find the first reflection points in my room?
Use a mirror held against the wall or ceiling while you sit in your listening position. When you see your speakers reflected in the mirror, mark that spot. That’s where you want your panels.
Can I just place panels anywhere on the walls?
No. The most effective placement is at the first reflection points—where sound bounces directly from your speakers to your ears. Random placement offers less benefit and may not improve your sound much.
How many panels do I need for my room?
It depends on room size and your goals. Usually, 4-6 panels on side walls and ceiling are enough for small to medium rooms. Larger spaces may need more, but start with the key reflection points first.
Are aesthetic considerations really important?
Yes. Modern acoustic panels come in many styles and colors. Choosing panels that match your decor can make the treatment feel like part of your space, not an eyesore.
Should I hire a professional or do it myself?
If you follow simple methods like the mirror trick, DIY is feasible. But for complex rooms or perfect results, a professional analysis can save you time and ensure the best placement.
Conclusion
Getting your acoustic panels in the right spots transforms your room from a muddled echo chamber into a sleek, clear space. Focus on first reflection points—those quick bounces that distort your sound—and treat them well.
Remember: a few well-placed panels can do more than dozens of random ones. Treat your space like a pro, and your ears will thank you every time you hit ‘play.’