TL;DR

Get audio and creator gear delivered free with Prime
- Fast, free delivery on millions of items
- Prime Video, Amazon Music and more included
- Member-only deals all year
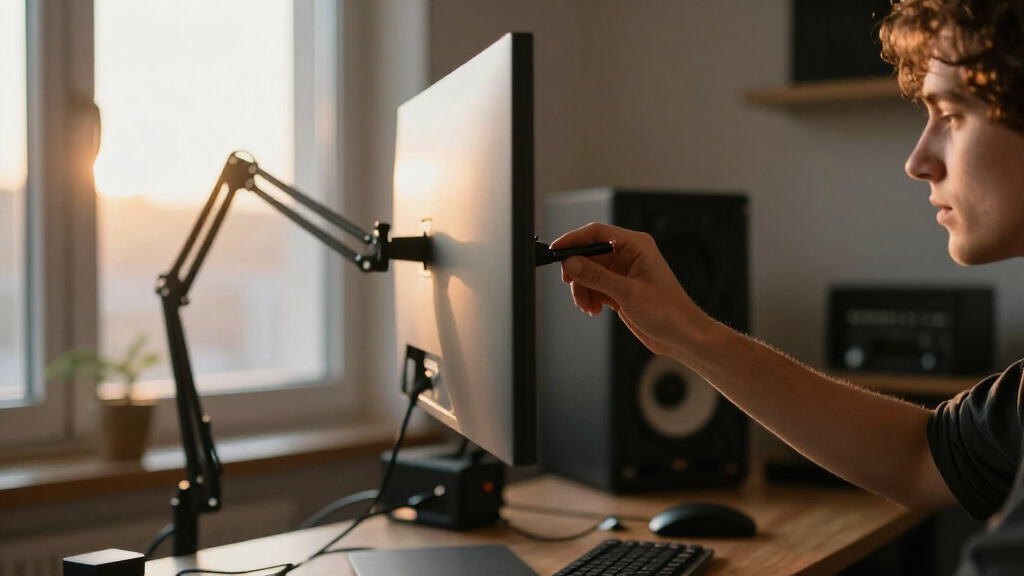
Mounting a pen display on a monitor arm requires careful attention to weight support and tilt mechanisms. A properly chosen arm prevents sagging, drift, and discomfort, making your workflow smoother.
Imagine freeing up your desk space and transforming your drawing setup into a sleek, ergonomic station. Mounting a pen display on a monitor arm can make your workspace more flexible, comfortable, and organized. But it’s not just about attaching the device—it’s about making sure the arm can handle the weight and keep the display stable at your favorite angles.
If you’ve ever had a display tilt down slowly or drift out of position just when you’re about to sketch, you know how frustrating it can be. This guide will walk you through the essentials—what to look for in terms of weight support, tilt strength, and positioning—to help you pick the right arm and set it up safely and comfortably.
Always choose an arm with a safety margin—at least 20-30% above your total setup weight.
The tilt joint’s strength and lockability are as important as weight capacity, especially at low drawing angles.
Center of gravity and display depth significantly influence torque and stability.
Verify VESA compatibility and use manufacturer-approved adapters for secure mounting.
Test your setup thoroughly before committing—check for sag, drift, and cable tension.
Mounting a Pen Display on a Monitor Arm: Weight and Angle
A stable drawing station depends on more than the arm’s headline weight rating. Real working load, display depth, center of gravity, tilt-hinge strength, desk structure, and cable movement all determine whether the screen stays exactly where you place it.
Choose capacity above the complete mounted load.
A practical starting point for visibility and arm comfort.
A deeper display can challenge a hinge despite staying within its weight rating.
Rate the complete setup, not the screen alone
Adapters, brackets, holders, and permanently attached accessories all count. Check the arm’s minimum load too: an undersized display may rise or resist positioning on a gas spring.
Illustrative working-load stack
Add reserve before choosing the arm
A 20–30% safety margin reduces the chance of sagging, drift, premature wear, or instability when hand pressure is added.
Target rating: at least 4.1 kg for this example
Equal weight does not mean equal stress
Slim and upright
The center of gravity stays close to the pivot, reducing sustained force on the tilt hinge.
Deep and inclined
A thicker housing moves mass away from the VESA plate and increases rotational demand.
Low angle plus pressure
Near-horizontal placement and drawing pressure create the toughest test for hinge stability.
Comfort and mechanical demand move together
Start with relaxed shoulders, comfortable elbows, a neutral wrist, and a screen close enough to prevent leaning. Then confirm that the hinge holds the position under real drawing pressure.
Nearly upright
Useful for general viewing, but prolonged drawing may fatigue the shoulder.
Moderate incline
Often the best balance of visibility, posture, reach, and hinge stability.
Low incline
Feels natural for many artists but increases torque and potential neck flexion.
Nearly flat
Familiar on the hand, yet demanding for tilt strength, glare control, and cooling.
Look beyond the headline capacity
The main lift spring and the tilt hinge often use separate adjustments. Tightening the lift mechanism cannot compensate for a weak rotating joint.
| Feature | Basic office arm | Drawing-ready arm | Why it matters |
|---|---|---|---|
| Adjustable tilt tension | ~ May be limited | ✓ Firm adjustment | Prevents slow downward rotation. |
| Lockable tilt | – Often absent | ✓ Preferred | Resists changing hand and stylus pressure. |
| Low-angle support | ~ Unclear | ✓ Explicitly rated | Confirms use beyond an upright monitor position. |
| Short working extension | ✓ Possible | ✓ Recommended | Less extension means less leverage and wobble. |
| Separate joint controls | ~ Varies | ✓ Lift plus tilt | Allows precise balancing of movement and angle. |
Best evidence: reviews from pen-display, touchscreen, or deep-monitor users working at low angles.
Build stability from the mount outward
Measure
Add display, adapter, hardware, accessories, and cable load.
Match
Confirm capacity range, VESA pattern, screws, and spacers.
Mount
Use a reinforced clamp or grommet on a strong desk area.
Balance
Adjust lift and tilt tension independently at the working angle.
Stress-test
Check sag, drift, wobble, cable pull, ports, heat, and clearance.
Protect the display, desk, and drawing motion
A mechanically sound arm can still fail in practice if the adapter shifts, the desktop flexes, or tightly routed cables pull the display out of position.
VESA and adapter
- Confirm 75 × 75 mm, 100 × 100 mm, or a proprietary pattern.
- Verify thread type and maximum screw depth.
- Use required spacers without blocking ventilation.
- Prefer a manufacturer-approved adapter.
Desk and clamp
- Avoid unsupported edges and hidden cable trays.
- Reinforce thin or hollow desktops with a steel plate.
- Use a broad clamp or secure grommet mount.
- Avoid glass unless the desk maker approves mounting.
Cables and clearance
- Leave a service loop near moving joints.
- Respect each cable’s minimum bend radius.
- Keep ports, buttons, vents, and holders accessible.
- Move through the full range before tightening clips.
Run three stability tests before daily use
Hold the display at your lowest angle, apply normal palm and stylus pressure, then reposition it through its full range. Any sag, rotational drift, desk flex, cable tension, or adapter movement should be corrected before a long drawing session.
How to Make Sure Your Pen Display Won’t Sag or Drift
The first step is understanding the importance of the arm’s weight capacity—more than just a number. Many artists overlook the actual load, especially when you include cables, mounting brackets, and accessories. For example, a 4K pen display weighing around 2.5 kg (about 5.5 lbs) might seem light, but add in a thick VESA adapter, stylus holder, and cables, and the real weight creeps higher.
Choose an arm with a safety margin—ideally 20-30% above your total load. This extra buffer ensures the arm doesn’t sag over time or under pressure. Remember, leaning into the display, pressing your stylus, or tilting the screen can all increase the torque, especially if the display is deep or has a center of gravity far from the mount point.
As an affiliate, we earn on qualifying purchases.
Why the Tilt Joint Is Your Best Friend (or Worst Enemy)
The tilt joint is often the weak link when mounting a pen display. Unlike standard monitors, which sit upright most of the time, artists frequently tilt their displays at low angles—sometimes almost horizontal. That puts a lot of rotational force on the hinge, which can cause drift or sag if it’s not robust enough.
Look for a tilt mechanism that offers adjustable tension—preferably with a lock. Check reviews for reports about tilt strength, especially from users who draw at steep angles. Remember, tightening just the lift spring won’t prevent the display from slowly drooping; the tilt hinge needs to be equally strong and lockable.
adjustable monitor arm with weight support
As an affiliate, we earn on qualifying purchases.
As an affiliate, we earn on qualifying purchases.
How Depth and Center of Gravity Affect Your Setup
Pen displays tend to be thicker and deeper than regular monitors. This affects how much torque the tilt joint must handle. Imagine two displays of the same weight: one slim, one bulky. The bulkier one’s center of mass is farther from the VESA mount, which increases leverage and the force exerted on the hinge. This means that a deeper display can cause more stress on the arm’s tilt mechanism, especially when tilting at low angles or applying pressure while drawing.
Understanding this is crucial because the deeper the device, the more leverage it exerts on the mount. This increased leverage translates into higher torque on the tilt joint, which can lead to sagging or drift over time if the arm isn’t rated for such loads. When selecting an arm, consider the depth and how the center of gravity shifts during use—especially if you frequently tilt the display to low angles or press firmly on the screen. Opting for a support system that accounts for these factors helps prevent mechanical wear and maintains stability, ensuring your display remains in the desired position during long creative sessions.
As an affiliate, we earn on qualifying purchases.
Matching VESA Mounts and Avoiding Compatibility Snags
Most pen displays use standard VESA patterns—75×75 mm or 100×100 mm—but some have proprietary mounts or no VESA holes at all. Confirm the pattern, screw size, and whether spacers are needed before buying an arm.
For instance, a popular 13-inch drawing tablet might require a specific VESA adapter, or you might need to use a universal clamp. Be cautious: some adapters or clamps can block ports or buttons, or cause the device to shift during intense strokes.
Choosing a manufacturer-approved adapter usually offers better stability and fewer surprises during long sessions.
ergonomic monitor arm for drawing tablet
As an affiliate, we earn on qualifying purchases.
As an affiliate, we earn on qualifying purchases.
Finding the Perfect Drawing Angle (And Why It Matters)
There’s no one-size-fits-all angle for mounting a pen display, but understanding your preferred drawing position helps. Many artists like a moderate incline—around 45 degrees—where the screen feels natural, and the arm can support it without strain.
Some prefer nearly flat setups, like a traditional drafting table, especially for detailed work. Others opt for a near-upright position, mimicking a regular monitor, but this can cause shoulder fatigue during long sessions.
Think about your body: relaxed shoulders, elbows at comfortable angles, wrists neutral. The goal is to keep your posture healthy and your drawing fluid without fighting gravity or the arm’s limits.
Controlling Movement and Preventing Wobbles During Drawing
Monitor arms aren’t designed for the constant contact and pressure of drawing. Without proper features, your display can wobble or drift when you press your stylus hard. To avoid this, look for arms with high joint stiffness, adjustable tension, or locking mechanisms.
For example, a heavy-duty arm with a locking tilt feature will resist unwanted movement. Using a shorter extension while drawing also improves stability, as less leverage means less wobbling.
Some artists add a secondary support—like resting the display edge lightly against the desk or a small pad—to minimize movement and improve control.
Ensuring Your Desk Can Handle the Load
The force transferred through the arm can put stress on your desk—especially if it’s hollow or thin. Check your desk’s material and thickness. A hollow-core or particleboard desk might bend or crack over time.
If your desk is on the thin side, consider reinforcing the area with a steel plate or using a grommet mount with a thick, sturdy clamp. When mounting, avoid positions near unsupported edges or areas with cable trays that could interfere with the clamp.
For example, a solid wood or thick laminate desk can handle a clamp mount easily, but a glass desk probably won’t. Reinforcing or choosing a different mounting point can save headaches down the line.
Managing Cables and Keeping Them Out of Your Way
Cables for power, USB, HDMI, or USB-C need to move smoothly as you reposition the display. Leave enough slack in the cables near the joints—bending cables sharply can damage them over time.
Use cable sleeves or clips to keep the cords tidy and prevent pulling or pinching while you move the arm. For example, a 6-inch service loop near a joint prevents tension during repositioning, and a flexible sleeve reduces wear.
Remember: thicker video or USB-C cables need gentler bends—check the minimum bend radius recommended by the manufacturer to avoid damage.
Ergonomics, Ports, and Heat: What to Watch For
Mounting your display should not block ventilation vents or access to ports and buttons. Position the mount so that side ports and shortcut buttons stay within easy reach.
If your display has a touchscreen or stylus holder, make sure the mount doesn’t obstruct those features. Also, consider lighting—glare can be a problem at low angles or with reflections from overhead lights.
Adjust the position to reduce glare and heat buildup. For example, tilting the display slightly away from ceiling lights can make a big difference.
Test Before You Use: Make Sure Everything Holds Up
Once installed, test your setup thoroughly. Support the display with a second person if possible. Check for sagging, tilt drift, or rotation under pressure. Move the arm through its full range—up, down, tilt, and rotation.
Pay attention to any looseness or instability, especially after a few hours. If the display shifts or the screws loosen, tighten or adjust the tension. If problems persist, revisit the mounting technique or consider a sturdier arm.
Remember, safety first—never ignore signs of stress or deformation, and avoid pushing beyond the arm’s rated capacity.
Latest Trends in Pen-Display Mounting Technology
Recent innovations include heavier-duty monitor arms with higher load ratings, better tension-adjustable tilt joints, and quick-release VESA plates for easier swapping. USB-C displays are simplifying cable management, and specialized adapters now support larger or deeper pen displays more securely.
Some setups now leverage reinforcement plates or sit-stand workflows, letting you switch between drawing and regular monitor use seamlessly. However, remember: a higher weight rating doesn’t guarantee stability—it’s about the combination of support, torque, and desk strength.
Your Quick-Check List Before Buying a Mount
- Calculate the total weight of your display, accessories, and cables.
- Confirm VESA pattern, screw size, and depth requirements.
- Check the display’s center of gravity and depth.
- Match the arm’s weight capacity with your total load, leaving a safety margin.
- Ensure the tilt range and joint strength support your drawing angles.
- Verify your desk material and thickness can handle the clamp or grommet mount.
- Plan cable routing for smooth movement and minimal wear.
- Consider ergonomic factors—angle, glare, and accessibility.
- Review return policies in case the setup doesn’t meet your needs.
Frequently Asked Questions
Can any monitor arm hold a pen display?
No. It must match the display’s weight, VESA pattern, and center of gravity. Also, it needs to support the drawing angles you prefer without drifting or sagging.Is staying under the arm’s maximum weight enough?
Not always. Deep or heavy displays at low angles can exert extra torque, stressing the tilt joint even if the weight is within limits. Check the display’s depth and balance.How much spare capacity should the arm have?
A safety margin of 20-30% above your total load is recommended. Prioritize arms with robust tilt joints and support for low angles over just high weight ratings.Why does the display sag when tilted but stay upright otherwise?
Tilting shifts the center of mass, increasing torque on the joint. If the tension isn’t tight enough or the joint isn’t strong, it will sag over time.Will drawing pressure make the display wobble?
It can. To reduce wobbling, use a high-stiffness arm, tighten joints, or add a secondary support like resting the edge on the desk.Conclusion
Mounting a pen display on a monitor arm isn’t just about fitting it in place. It’s about understanding the forces at play—weight, leverage, and angle—and choosing hardware that can handle them. When done right, it transforms your workspace into a sleek, ergonomic zone that sparks creativity and keeps your body happy.
Remember, stability and comfort come from thoughtful setup and quality hardware. So, measure twice, tighten well, and keep your workspace flexible. Your best art is just a well-supported display away.
Halloween Picks
halloween
As an affiliate, we earn on qualifying purchases.