TL;DR

Get audio and creator gear delivered free — and shop member deals
- Fast, free delivery on millions of items
- Access to Prime Big Deal Days deals on October 6–7
- Prime Video, Amazon Music and more included
An audio interface for a home studio turns microphone and instrument signals into audio your computer can record, then sends playback to headphones or studio monitors. Choose it by counting the sources you record at once, checking the connections you need, and testing monitoring and computer compatibility; most solo creators can start with a reliable two-input model.
Your first audio interface does not need to cost as much as your laptop. It needs to let you record the things you actually make, without crackle, confusing setup, or a headphone delay that throws your singing off.
An audio interface for a home studio connects microphones and instruments to your computer and routes sound back to your headphones or speakers. In this guide, you’ll learn how to choose the right input count, understand the specifications that affect real recording, and avoid paying for features that will sit untouched. The aim is a practical setup, not a desk full of blinking lights.
Count the sources you record simultaneously; a two-input interface records two independent sources at once.
Check for combo inputs, instrument mode, and 48-volt phantom power if your microphone or guitar setup needs them.
Prioritize compatible drivers, clean preamps, and comfortable monitoring over a high sample-rate headline.
Use direct monitoring or a lower DAW buffer when computer delay makes performance feel sluggish.
Test the signal chain with a short recording before committing to a full take.
What an Audio Interface Does for Your Home Studio
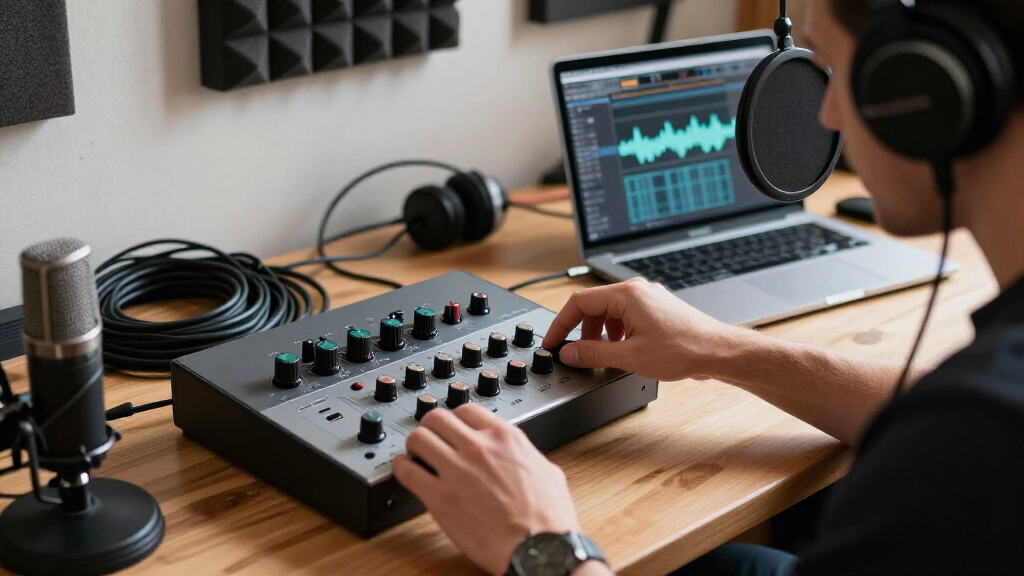
An audio interface for a home studio converts analog sound from a microphone or instrument into digital audio your computer can record, then converts computer playback back into a signal for headphones or monitors. It also provides the physical inputs, microphone preamps, and monitoring controls that a typical laptop lacks. That’s the whole job, in plain terms.
Think of it as a two-way doorway: your voice enters the computer through the interface, and your mix comes back out through it. Record a vocal into a digital audio workstation (DAW), and the interface handles the trip from microphone to track. Play the session back, and it sends that sound to your headphones or speakers.
That doorway matters even if you already own a computer with a headphone jack. A headphone jack is designed for listening, not necessarily for connecting an XLR microphone or recording a guitar directly. For example, if you want to record a singing voice and an electric guitar separately, a two-input interface can connect both at once and give your DAW two distinct tracks to mix.
Some models add MIDI connections, extra headphone outputs, or built-in digital effects. Those can help a keyboard-heavy setup or a band recording together. But if you record one voice at a time in a spare bedroom, a simple interface with two inputs, a headphone output, and monitor connections may cover the important aspects without needless extras. A small, clear signal path beats a crowded feature list.
As an affiliate, we earn on qualifying purchases.
Choose the Input Count That Matches What You Record
Pick an interface by counting how many separate sound sources you need to record at the same time. A two-input model suits many solo musicians and podcasters; a larger input count helps when you record several people, a drum kit, or a group of instruments together. Count simultaneous sources, not everything you own. Each input you use at once can become its own track, which gives you control to adjust its level or tone later. If sources share a single input, you may have to balance them during recording, when changes are harder to undo.
Imagine recording a podcast with one guest: you need two microphone inputs to capture each speaker on a separate track. That separation lets you reduce one person’s level, remove a cough, or edit pauses without changing the other speaker’s audio. For a singer-songwriter recording vocals now and guitar later, one input at a time could work, but two inputs let you record both performances together. This is useful if you want a live, simultaneous performance, though it also means both parts are committed to the timing and feel of that take. By contrast, a drum kit with four microphones needs at least four inputs if you want to adjust each microphone independently in the mix.
Combo jacks are common on small interfaces. Each one accepts an XLR microphone cable or a quarter-inch cable for an instrument or line-level source. Look for an instrument or Hi-Z mode if you plan to plug an electric guitar or bass directly into the interface. This setting changes the input to suit the instrument’s electrical signal; using a line input instead can make the guitar sound weak or dull. For condenser microphones, check for 48-volt phantom power; many interfaces provide it, but you should confirm before buying. Phantom power is commonly needed to operate condenser mics, while it is generally unnecessary for dynamic mics, so check the microphone’s instructions before switching it on.
| Recording setup | Useful starting point | Why it fits |
|---|---|---|
| Solo vocals or guitar, one at a time | 1–2 inputs | Leaves room to record a second source or microphone. |
| Voice and guitar together | 2 inputs | Captures each source on its own track. |
| Two-person podcast | 2 microphone inputs | Records each speaker separately for easier editing. |
| Small drum setup | 4 or more inputs | Allows multiple microphones to be recorded simultaneously. |
More inputs are not automatically better. A four-input unit costs more and takes up more space, and you may never use the extra sockets. But replacing a two-input interface after starting a band project can cost more than buying the right capacity upfront. Ask yourself: “What do I need to record together this year?” Then add a little headroom if a likely project calls for it. Extra inputs are most valuable when they prevent a real workflow compromise, not simply because the larger number looks reassuring.
2 input audio interface with phantom power
As an affiliate, we earn on qualifying purchases.
As an affiliate, we earn on qualifying purchases.
Which Specs Matter More Than a Big Sample-Rate Number?
For most home recording, clean preamps, dependable drivers, and workable monitoring matter more than chasing the highest sample-rate number. Many interfaces advertise support for formats such as 24-bit/192 kHz, but a bigger number alone will not make a weak performance or a badly placed microphone sound polished. Treat specifications as clues, not a shortcut to a great recording. The practical question is whether a spec solves a limitation you are likely to encounter; otherwise, it may add cost or complexity without changing your sessions.
Bit depth describes how precisely digital audio represents level, while sample rate describes how often it measures the signal. A common 24-bit session gives you useful recording headroom; you can set sensible input levels without trying to record right up against the digital ceiling. That matters because performances naturally get louder and quieter, and leaving headroom reduces the risk of clipping, which can distort a take in a way that turning it down later cannot repair. For a home vocal or guitar session, careful mic placement and a clean recording environment usually make a more audible difference than switching to an unusually high sample rate. Higher sample rates can also use more storage and processing power, so choose one your workflow supports rather than assuming the maximum is best.
The microphone preamp raises a quiet mic signal to a usable level. If a dynamic microphone sounds too quiet with the gain knob nearly maxed, the interface’s available clean gain becomes a practical concern: pushing a preamp to its limit can leave less room to raise the signal without also raising noise. Before buying, check the manufacturer’s specifications and reviews for your microphone type and intended use. According to the provided product overview, modern interfaces often offer improved preamps and converters, but that broad trend does not make every model identical. Reviews and real-world compatibility checks matter because a headline specification may not tell you how much clean gain or usable control you will get.
Also check the headphone output and monitor controls. A singer who hears their voice with a distracting delay may struggle to perform naturally, even when the recorded file sounds fine later. In a bedroom session, direct monitoring—hearing the input through the interface rather than waiting for computer processing—can make tracking feel immediate. The tradeoff is that direct monitoring may let you hear a dry signal rather than software effects such as reverb or amp simulation. Some interfaces add onboard digital signal processing for effects during monitoring; useful if you want effects without relying on your computer, but not a must-have if you already work comfortably in your DAW.
Spend first on the fit: enough clean inputs and comfortable monitoring will help more sessions than a headline sample-rate figure you never use.
USB audio interface for recording guitar and vocals
As an affiliate, we earn on qualifying purchases.
As an affiliate, we earn on qualifying purchases.
Make USB, Compatibility, and Latency Work on Your Computer
A good interface needs to work reliably with your computer, DAW, and cables—not just look current on the box. USB is common in home studios, and USB-C describes a connector shape rather than a guarantee of better sound or lower latency. Check the actual connection, the operating-system support, and whether the manufacturer provides drivers for your setup. A mismatch can turn a seemingly simple purchase into a session-stopping problem, such as an interface that cannot connect directly or lacks support for your computer’s current software.
Before ordering, confirm that the interface works with your computer’s version of macOS or Windows and the DAW you plan to use. On a laptop with only USB-C ports, you may need a compatible cable or adapter; check whether one comes in the box. If you want to use a tablet, verify that the interface supports it and whether the tablet can supply enough power. “It has USB” does not answer every compatibility question. Also consider whether the manufacturer maintains drivers for your operating system, since reliable driver support affects both connection stability and how well the interface works with recording software.
Latency is the small delay between playing or singing and hearing the sound return through your computer. If you monitor through a software effect chain with an oversized buffer, that delay can feel like trying to clap along to an echo. Lower buffer settings can reduce it, though they ask more from your computer: if it cannot keep up, you may hear clicks or crackles instead. Direct monitoring avoids much of the software round trip when you only need to hear a dry input.
For example, a guitarist recording in a DAW with amp-simulation plugins may want a low buffer so the simulated amp responds naturally. If the computer crackles at that setting, try closing heavy applications, updating the interface driver, or recording with direct monitoring where the setup allows. Direct monitoring is not a complete substitute in this case if you need to hear the amp simulation while playing; lowering the buffer or using an interface with suitable DSP may be more useful. Thunderbolt connections and DSP features can help particular workflows, but they are not required for a basic two-track home setup. Choose based on the work you do, not a connector name alone.
audio interface with direct monitoring
As an affiliate, we earn on qualifying purchases.
As an affiliate, we earn on qualifying purchases.
Set Up Your Interface in Five Steps Before Recording
You can get a basic interface recording in five steps: connect it, select it in your DAW, plug in a source, set a safe level, and test monitoring. A short setup check catches routing mistakes before you record a full take. It also gives you a repeatable routine when you sit down in a hurry. The test is useful because a signal can reach the DAW meter yet still be routed incorrectly for playback, or sound fine in headphones but clip during a louder part.
- Install or check the driver. Follow the maker’s setup instructions, then restart the computer if prompted. Confirm the interface appears in your system’s audio settings. This helps distinguish an audio-routing issue from a connection or driver issue later.
- Connect the interface and speakers. Use the supplied or recommended cable, then connect monitors to the main outputs or headphones to the headphone jack. Turn speaker levels down before powering up. This avoids an unexpected loud burst reaching your speakers when the interface connects or playback starts.
- Plug in your source. Use XLR for a microphone or a quarter-inch cable for an instrument. Turn on phantom power only if your microphone needs it; check the mic’s manual if unsure. The right input and power settings help the source reach a usable level without unnecessary noise or an incorrect signal.
- Select the interface in your DAW. Choose it for both input and output, then assign the right physical input to your recording track. Selecting the wrong input can leave a track silent even though the interface itself is receiving a signal.
- Set the level and test. Play or speak at your normal performance volume. Raise the gain until the meter shows a healthy signal without clipping, then record a short test and listen back. Test at the loudest part of the performance, not just a quiet phrase, so the level has room for peaks.
For a real example, say you are tracking a vocal with a condenser microphone. Connect the XLR cable, enable phantom power if the mic requires it, select input one in your DAW, and sing the loudest line while watching the meter. If it hits the red, lower the gain; if the waveform is barely visible, raise it and test again. Listening back confirms more than the meter alone: you can catch crackle, an accidental input selection, or a level that is technically present but too quiet for a clean workflow.
Once you hear the test through headphones, save the project with the interface selected and label the track clearly. If no signal appears, check the simplest things first: the cable, the selected input, the track’s record-arm button, and the input gain. Troubleshooting in that order is faster than changing every setting at once. A two-minute test can save an otherwise excellent take from silence.
Spend Your Budget Where You’ll Hear the Difference
A sensible starter interface is often more valuable than an expensive one with features you will not use. The supplied overview places entry-level interfaces around $100 and professional models above $1,000, though exact prices change by brand, region, and time. That spread reflects different input counts, routing, construction, and advanced features—not a thousand-dollar difference in every home recording. Price is most useful as a prompt to compare what changes for your workflow, rather than as a guarantee that the costlier unit will sound noticeably better in your room.
If you record one voice or guitar at a time, a two-input interface from a reputable entry-level line can cover the basic job. The Focusrite Scarlett 2i2 and PreSonus AudioBox are examples named in the supplied overview, alongside brands such as MOTU, Audient, Universal Audio, and Behringer. Treat brand names as a starting point for research, not a promise that one model suits every computer or microphone. Compare the specific model’s inputs, monitoring, driver support, and included connections; product lines change, and a brand name alone does not tell you whether a particular unit fits.
Pay more when the upgrade solves a real limit: you need four or more simultaneous inputs, several independent headphone mixes, extra line outputs for outboard gear, or onboard DSP effects. These features can save setup time or avoid workarounds when your projects need them. But if you only record solo vocals, those additions may gather dust. Put some of the saved budget toward a decent microphone stand, a pop filter, or room treatment; a bare wall that throws a sharp flutter echo can be more noticeable than a small difference between competent converters. The tradeoff is between extending the interface’s capabilities and improving the sound or comfort of the recording space you already use.
Here’s a useful buying test: describe your next three recording sessions. If all three need one microphone, you probably do not need eight inputs. If one involves a drummer and several microphones, a small interface may force you to record parts in separate passes, which changes the performance and can make it harder to capture how the musicians play together. Your best value is the least expensive model that handles those sessions comfortably, works with your system, and leaves a sensible path for the way you expect to grow. Buy extra capacity when you can name the project it will support—not just because future possibilities feel endless.
Frequently Asked Questions
Do I need an audio interface if I already have a USB microphone?
A USB microphone contains its own conversion hardware, so you can record with it without a separate interface. An interface becomes useful when you want to connect conventional XLR microphones or instruments, record several sources separately, or use studio monitors through dedicated outputs.
Is a two-input interface enough for a home studio?
It is enough for many solo musicians, voice artists, and two-person podcast setups. You can record a microphone and guitar together, or two microphones at once. If you plan to record a multi-mic drum kit or a larger group simultaneously, count the inputs you need before buying.
What cables do I need for a microphone and guitar?
Most XLR microphones connect with an XLR cable, while an electric guitar usually connects with a quarter-inch instrument cable to an interface input set to instrument or Hi-Z mode. Combo jacks accept either connection, but check your interface’s manual for the right input setting.
What does latency sound like when I record?
Latency is the delay between making a sound and hearing it through your computer. When it gets distracting, your voice or guitar can seem to trail behind your performance. Try direct monitoring or reduce the DAW buffer, then check whether your computer can run reliably at that setting.
Can I connect a home-studio interface to a laptop or tablet?
Many interfaces work with laptops, but you should check operating-system, driver, and DAW compatibility before purchasing. Tablet support and power requirements vary by model. If your computer uses USB-C, confirm the included cable or budget for a suitable adapter.
Conclusion
Buy for the sessions you actually plan to record. Count your simultaneous sources, check your computer and microphone requirements, and make sure the monitoring feels comfortable before you spend extra on advanced features.
A good interface should disappear into the work: one clean signal in, one clear performance captured, and no mystery delay in your headphones. Choose that dependable doorway, then get back to making noise.
Halloween Picks
halloween
As an affiliate, we earn on qualifying purchases.