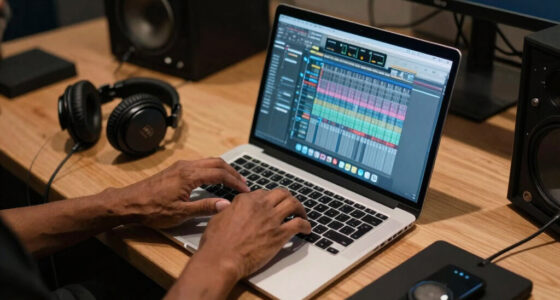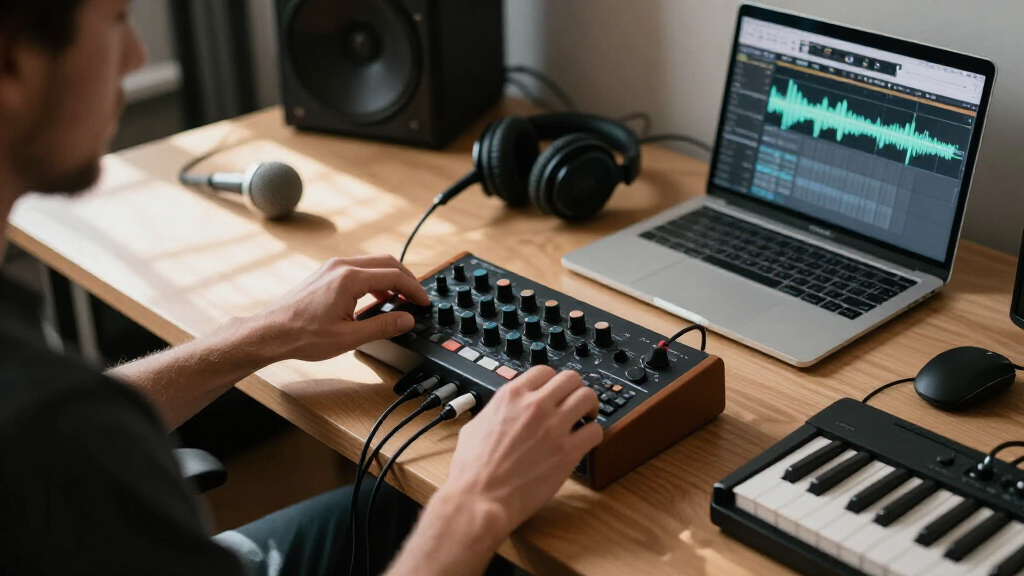
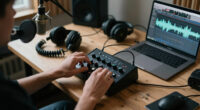
This guide helps beginner home-studio users choose an audio interface that fits their microphones and instruments, connect it to a computer, configure recording software, and test a recording. You will finish with working input and output routing and a short test recording you can play back. Allow 45-90 minutes, including driver installation and troubleshooting.

Get audio and creator gear delivered free — and shop member deals
- Fast, free delivery on millions of items
- Access to Prime Big Deal Days deals on October 6–7
- Prime Video, Amazon Music and more included

YONDRIX 2×2 USB Audio Interface, 24-bit/192 kHz
- ✔ Inputs: 2 XLR/line combo inputs
- ✔ Outputs: Balanced TRS speaker outputs and dedicated headphone output
- ✔ Recording resolution: Up to 24-bit/192 kHz

CIXUN 2-Channel USB-C Audio Interface, 24-bit/192 kHz
- ✔ Inputs and outputs: 2 inputs, 2 outputs
- ✔ Input connections: 2 XLR/TS combo jacks
- ✔ Recording resolution: 24-bit/192 kHz

PIYONE Q28 2-Input USB-C Audio Interface, 24-bit/192kHz
- ✔ Inputs: 2 XLR/TRS combo jacks
- ✔ Recording resolution: Up to 24-bit/192 kHz
- ✔ Connection: USB-C
Difficulty: Beginner | Time: 45-90 minutes
What You’ll Need
Tools & Materials:
- Computer with a USB, USB-C, Thunderbolt, or other port supported by the interface
- Audio interface with a power supply or supported bus-powered connection
- Recording software, also called a DAW
- Headphones with a connector compatible with the interface
- Microphone and suitable cable, or an instrument and suitable cable
- Powered studio monitors and the required audio cables, if you plan to use speakers
- Internet access for downloading compatible drivers and manuals
Knowledge:
- Basic computer skills, including installing software and changing audio settings
- Ability to identify the connection used by your microphone or instrument
- No prior recording experience is required
Allow extra time if your computer needs an operating-system update or the interface requires a driver. Check the interface manufacturer’s compatibility page before buying or connecting it; confirm support for your computer, operating system version, and recording software. Have the microphone or instrument you plan to record on hand so you can test the correct input type.
YONDRIX 2×2 USB Audio Interface, 24-bit/192 kHz
For a home studio that needs to feed both speakers and headphones, the YONDRIX 2×2 makes the most balanced case in this group. It lists balanced TRS speaker outputs alongside a dedicated headphone output with its own level control. That gives us a clearer route to switching between listening on monitors and checking a take privately than the PIYONE’s listed 3.5mm headphone jack alone.Its two combo inputs, preamps, 48V phantom power, and HI-Z switching cover common first-studio sources: condenser microphones, line-level gear, and instruments that need a high-impedance input. The listed Windows, Mac, and iOS compatibility also gives it an advantage over PIYONE, whose supplied compatibility is Mac and PC only. YONDRIX includes USB A-to-C and USB B 2.0-to-A cables, but buyers should still confirm which connection suits their particular computer or mobile device.There are limits to what the listing establishes. It specifies USB connectivity and up to 60 dB of preamp gain, but does not provide a named connector generation or detailed monitoring behavior comparable to PIYONE’s explicit zero-latency claim. We should not assume every iOS setup will work without the right adapter or power arrangement. Compared with CIXUN, YONDRIX is more compelling for a speaker-based desk; CIXUN states a two-year warranty and names a wider software list. Choose YONDRIX for the output layout, not on an assumption that it must sound better.
Pros:
- Balanced TRS speaker outputs and a dedicated headphone output suit a monitor-and-headphone desk.
- Separate headphone level control allows listening volume to be adjusted independently.
- Two combo inputs, HI-Z switching, and 48V phantom power support varied microphone and instrument sources.
- The listing states compatibility with Windows, macOS, and iOS.
Cons:
- The connection is described as USB without a clear host connector-generation specification.
- The listing does not explicitly state zero-latency direct monitoring.
- Mobile compatibility may depend on the device, cable, and any required adapter.
Best for: Home-studio owners who want balanced monitor outputs plus a separate, level-controlled headphone connection, and may record on Windows, Mac, or a compatible iOS device.
Not ideal for: Buyers who need confirmed, detailed iOS connection instructions, a specifically stated USB-C-only host connection, or a clearly documented zero-latency monitoring mode.
Bottom line: We rank the YONDRIX first for its most complete home-studio output arrangement, provided its connection details suit your devices.
“We rank the YONDRIX first for its most complete home-studio output arrangement, provided its connection details suit your devices.”
CIXUN 2-Channel USB-C Audio Interface, 24-bit/192 kHz
The CIXUN 2-Channel is the most explicit about working across a mix of recording environments: its listing names Mac, PC, and compatible mobile devices, and it cites software ranging from GarageBand and Logic Pro to Reaper and Ableton Live. That makes it a sensible option for a home producer who might move between a computer-based session and a supported mobile workflow. By contrast, PIYONE gives us a simpler Mac-and-PC compatibility claim, while YONDRIX lists iOS but fewer named software examples.For the recording basics, CIXUN keeps pace with both rivals: two XLR/TS combo inputs, 48V phantom power, Hi-Z switching, direct monitoring, and 24-bit/192 kHz recording. Its stated two inputs and two outputs are appropriate for recording a couple of sources and routing a basic stereo output. The bus-powered, plug-and-play design also avoids adding a separate power supply to a compact desktop setup. A stated two-year warranty is another concrete point of differentiation, though warranty coverage and regional terms should be checked before purchase.The listing has an important documentation gap: its frequency response is given only as “20,” without a complete unit or range. We should not treat that as a usable performance figure. It also provides less output-specific detail than YONDRIX, which explicitly identifies balanced TRS monitor outputs and an independently controlled headphone output. CIXUN’s listing describes stereo outputs and a headphone jack, but does not establish the same level of control detail. Pick it when its compatibility and warranty claims match your workflow; skip it if you need fully specified audio measurements or especially clear monitor-routing information.
Pros:
- The listing names Mac, PC, and compatible mobile devices.
- Supports two inputs and two outputs, direct monitoring, and a headphone connection.
- Hi-Z switching and 48V phantom power accommodate instruments and condenser microphones.
- A two-year warranty and a broad list of recording software are specified.
Cons:
- The frequency-response entry is incomplete, listed only as “20.”
- Output details are less specific than YONDRIX’s balanced TRS and separate headphone-control description.
- Mobile compatibility is qualified; support for a particular device is not guaranteed by the general listing.
Best for: A home recorder who values a stated range of supported computer and software environments, may use a compatible mobile device, and wants a listed two-year warranty.
Not ideal for: Buyers who need a complete published frequency-response specification or detailed confirmation of balanced monitor-output and headphone-level controls.
Bottom line: We recommend CIXUN when its stated device flexibility and warranty matter more than complete measurement and output documentation.
“We recommend CIXUN when its stated device flexibility and warranty matter more than complete measurement and output documentation.”
PIYONE Q28 2-Input USB-C Audio Interface, 24-bit/192kHz
The PIYONE Q28 is the straightforward choice for a computer-based home setup where USB-C and an uncomplicated start matter most. Its plug-and-play design is listed for Mac and PC, and the illuminated gain controls make the input settings easier to see in a dim recording corner. Unlike CIXUN, it does not claim mobile-device support in the supplied details; unlike YONDRIX, its described output arrangement is more basic, with a 3.5mm headphone jack specified.Its core recording setup is strong on paper for a small interface: two XLR/TRS combo inputs, 48V phantom power, and Hi-Z support cover a condenser microphone and instrument without requiring a separate preamp for those listed source types. The explicit zero-latency direct monitoring claim is particularly useful when listening to a live input while recording, since it helps avoid distracting monitoring delay. It also matches the other two models’ stated maximum of 24-bit/192 kHz, so buyers do not need to give up that headline recording specification for a simpler feature set.PIYONE ranks third not because its shared recording specifications are weaker, but because its stated fit is narrower. The listing confirms Mac and PC support but leaves iOS unconfirmed, and the 3.5mm headphone output is less clearly suited to a desk built around balanced studio monitors than YONDRIX’s TRS outputs. The supplied product information also provides no independent review feedback, so we should keep our judgment tied to the listed features rather than infer reliability. Choose it for a compact USB-C computer setup and direct monitoring; compare the alternatives if mobile use or speaker connections are central.
Pros:
- USB-C, plug-and-play setup is specified for Mac and PC.
- Zero-latency direct monitoring is explicitly listed.
- Two combo inputs, 48V phantom power, and Hi-Z support suit microphones and instruments.
- Illuminated gain controls help make input adjustment visible.
Cons:
- iOS support is not confirmed in the supplied compatibility information.
- The listed 3.5mm headphone jack is less fully specified for a balanced monitor-based setup than YONDRIX’s outputs.
- No independent review feedback is provided in the product details.
Best for: A Mac or PC user building a compact two-source setup who wants USB-C, visible gain controls, and an explicitly stated zero-latency monitoring feature.
Not ideal for: Buyers who require confirmed iOS support, balanced speaker outputs, or more detailed evidence about the product beyond its supplied feature listing.
Bottom line: We would choose the PIYONE for a simple USB-C Mac or PC recording station, but not when mobile compatibility or balanced monitor outputs are priorities.
“We would choose the PIYONE for a simple USB-C Mac or PC recording station, but not when mobile compatibility or balanced monitor outputs are priorities.”
As an Amazon Associate we earn from qualifying purchases.
Before You Start
Decide what you need to record at the same time. Count simultaneous microphone and instrument inputs, not just the number of sockets on the front. A singer recording alone may need one microphone input; a singer accompanying themselves may need two. If you plan to record a full drum kit or several performers together, count every microphone and instrument that must record independently.
Check that the interface has the right connections. Microphones usually use XLR cables and mic preamps. A guitar or bass with a standard instrument cable needs an input that accepts an instrument-level signal, often marked Hi-Z or Instrument. Keyboards and other line-level equipment usually connect to line inputs. Check whether your microphone needs 48 V phantom power; only enable it for compatible microphones and follow both device manuals. Turn monitor speakers off or down before connecting gear.
Step-by-Step Instructions
Step 1: Choose an interface for your recording needs
Write down how many sources you need to record at once and what each source outputs: microphone, instrument, or line level. Choose an interface with enough simultaneous inputs of the correct type, a connection your computer supports, and headphone and monitor outputs if you need them. Check the manufacturer’s specifications for driver or operating-system support, phantom power, and the number of independent preamps; several input sockets do not always mean every source can use a microphone preamp.
For a first home setup, prioritize compatible connections and sufficient inputs over a large feature list. If you expect to record two sources together later, buying a model with those inputs now can prevent an early replacement.
Tip:Do not count a stereo pair of line inputs as two microphone inputs unless the specifications say they have microphone preamps.
Check: You can match every planned source to an available input, and the interface supports your computer and software.
Step 2: Prepare the computer and recording space
Place the interface on a stable surface with ventilation and room for its cables. Close recording projects and save open work. Visit the manufacturer’s official support page, find your exact interface model and operating system, and download the current compatible driver or control-panel software if required. Read the installation instructions before running the installer.
Connect the computer to power if practical, and use a direct computer port rather than an unpowered hub during initial setup. Keep the microphone, instrument, headphones, and appropriate cables within reach.
Tip:Avoid downloading drivers from third-party sites. If the manufacturer says the interface uses a built-in system driver, do not install an unrelated driver package.
Check: You have confirmed operating-system compatibility and have the correct official driver or setup instructions ready.
Step 3: Install the driver and connect the interface
Follow the manufacturer’s installation order. Some devices require installing the driver before connecting the interface; others ask you to connect it first. Restart the computer if prompted. Then connect the interface using the supplied or manufacturer-approved cable, and connect its power supply if the model requires one. Turn the interface on and wait for the computer to recognize it.
Open the manufacturer’s control-panel software, if provided, and confirm that it identifies the interface without an error. Do not connect through adapters or hubs unless the manufacturer supports that arrangement.
Tip:Use a data-capable cable. A cable made only for charging may power a device but fail to carry audio data.
Check: The interface powers on, appears in the manufacturer’s software or computer audio-device list, and shows no connection warning.
Step 4: Connect your headphones and recording source
Turn down the interface’s headphone and monitor levels before plugging anything in. Connect headphones to the interface’s headphone output. If using powered studio monitors, connect the interface’s left and right outputs to the matching monitor inputs while the monitors are off or turned down.
Connect one source to a suitable input. Use an XLR cable for an XLR microphone input, an instrument cable for a Hi-Z input, or the correct cable for a line-level device. For a condenser microphone that requires phantom power, connect the microphone first and check its manual and the interface manual. Enable 48 V only if the microphone requires it and the connected equipment is compatible. Keep output levels low while switching phantom power, and allow the equipment to settle before raising levels.
Tip:Do not plug a guitar into a line-only input and expect the same level as an instrument input; the signal may be quiet or sound different.
Check: Your source is connected to the matching input, headphones are connected, and speakers remain off or at a low level until testing.
Step 5: Select the interface in your computer and DAW
Open the computer’s audio settings and select the interface for input and output if you want system audio to use it. Then open your DAW’s audio preferences and choose the interface as its audio device. On some systems, select a manufacturer-specific driver; on others, choose the device through the operating system’s audio system. Follow the interface and DAW documentation for the available option.
Set the project sample rate to a supported value, such as 44.1 kHz or 48 kHz, and use the same rate in the interface control panel if it has a separate setting. Choose a buffer size appropriate to the task: a smaller buffer can reduce monitoring delay but may tax the computer, while a larger buffer can improve stability during playback and mixing.
Tip:If your DAW cannot open the interface, close other audio applications and check whether the operating system or another program has claimed the device in an exclusive mode.
Check: The DAW displays the interface as its active audio device and offers its available inputs and outputs.
Step 6: Create and route a test track
Create a mono audio track for a single microphone or instrument, then choose the DAW input that matches the physical interface socket you used. Arm the track for recording. If you want to hear the live signal through the DAW, enable software monitoring; if the interface offers direct monitoring, use that instead or follow its manual to avoid hearing the signal twice.
Speak into the microphone or play the instrument while watching the track meter. Raise the input gain until the signal is clear without reaching the meter’s clipping indicator. If the meter stays low, check the selected input, cable, and input mode before turning the gain fully up. If it clips, lower the gain and play or sing at the loudest level you expect to record.
Tip:Input gain and headphone volume do different jobs. Adjust input gain to prevent clipping; adjust headphone level to set comfortable listening volume.
Check: The correct track meter responds to your source, and its loudest peaks stay below clipping.
Step 7: Record, play back, and check the output
Record a short test containing speech, singing, or a few seconds of instrument playing. Stop recording, disarm the track, and play the clip through your headphones at a comfortable level. Listen for a clear signal, the expected left-right placement, and unwanted hum, crackling, or dropouts. If you use speakers, turn them on only after the interface is connected and set to a low level.
Save the project, then close and reopen it if you want to confirm the DAW retains its device and input settings. Keep the test clip until your main recording setup has passed another check.
Tip:If the sound doubles or echoes while recording, turn off either DAW software monitoring or interface direct monitoring, then test again.
Check: The test appears on the track, plays back through the intended output, and has no clipping or distracting interruptions.
Common Mistakes to Avoid
- Buying an interface with too few inputs or the wrong input types. — Count every source you need to record at once, identify its signal type, and compare that list against the specifications for simultaneous preamps and input modes.
- Selecting the computer’s built-in microphone or speakers instead of the interface in the DAW. — Check the DAW’s audio preferences separately from the computer’s system sound settings; the DAW may use its own device selection.
- Turning the input gain up until the recording clips. — Test at the loudest expected performance level and leave headroom below the DAW’s clipping indicator.
- Enabling phantom power without checking the microphone and connected equipment. — Read the manuals, connect the microphone before switching power, and use 48 V only when required and supported.
Troubleshooting
Problem: The computer or DAW does not detect the interface.
Solution:
Check that the interface is powered and the cable carries data. Try a direct computer port and another known-good cable. Confirm that the driver matches the exact model and operating system, restart if prompted, and check the manufacturer’s support instructions. If the operating system sees the interface but the DAW does not, select it in the DAW’s audio preferences.
Problem: The track meter does not move when you speak or play.
Solution:
Confirm that the track is armed and set to the physical input you used. Check the cable and source, raise the input gain gradually, and select the correct microphone, line, or instrument mode. For a microphone that requires phantom power, check its manual and enable 48 V only if compatible.
Problem: The DAW meter moves, but you cannot hear playback.
Solution:
Set the DAW’s output device to the interface, route the track or master bus to an active output, and check the interface headphone or monitor level. Confirm headphones are connected to the headphone jack and test another output or known-good headphones if available.
Problem: You hear crackles, dropouts, or too much monitoring delay.
Solution:
Close unnecessary applications and check the computer’s load. Increase the buffer size to reduce dropouts; for live software monitoring, lower it gradually until delay is manageable without causing glitches. Use direct monitoring when available, and connect the interface directly to a supported computer port.
What Success Looks Like
Your interface appears as the DAW’s audio device, the intended input track responds to a microphone or instrument, and a short recording plays through the headphones or speakers you selected. The recording is audible and clean, its peaks do not clip, and you do not hear unexplained dropouts or doubled monitoring. The saved project reopens with the expected device and routing.
Next Steps
Save a DAW template with your interface, sample rate, common track inputs, and preferred monitoring setup. Label cables and note which interface input each source uses. Before a real session, test the loudest expected performance and check headphone comfort at a safe level. Keep the interface away from liquid, dust, and blocked ventilation; disconnect equipment carefully and turn monitors down before changing signal connections. Check the manufacturer’s support page before updating drivers or firmware, and repeat a brief recording test after any system or routing change.
Frequently Asked Questions
How many inputs should a home studio audio interface have?
Choose enough independent inputs to record all sources at the same time. One input can suit a solo microphone recording; two can suit a microphone and instrument recorded together. Count each drum microphone, performer, and instrument that needs its own track. Check that the inputs have the correct preamps or signal modes for those sources.
Do I need to install an audio interface driver?
It depends on the interface, computer, and operating system. Some devices use built-in system support; others need a manufacturer driver or control panel. Check the official support page for your exact model and follow its installation order rather than installing a generic driver.
Should I use direct monitoring or DAW monitoring?
Direct monitoring sends the input to your headphones through the interface and often has little delay. DAW monitoring lets you hear software effects but can add delay. Use one monitoring path at a time unless you have deliberately configured both; otherwise, the signal can sound doubled or echoed.
What sample rate and buffer size should I start with?
Start with a sample rate supported by your interface and DAW, such as 44.1 kHz or 48 kHz, and keep the settings consistent across them. Use a moderate buffer for initial testing. Lower it if monitoring delay is distracting; raise it if playback crackles or drops out.
Fall Picks
fall essentials
As an affiliate, we earn on qualifying purchases.