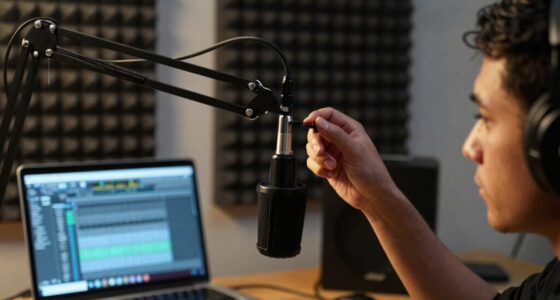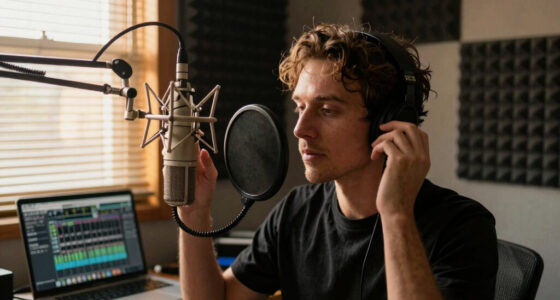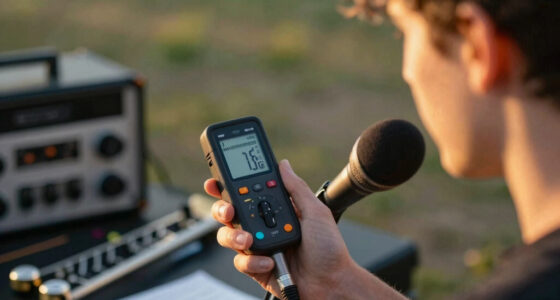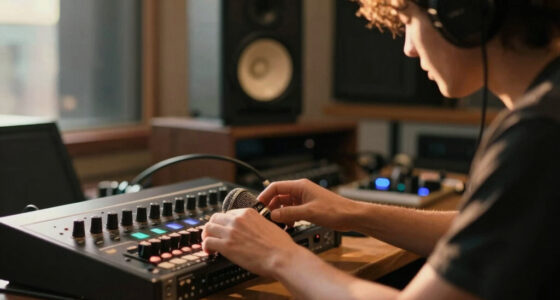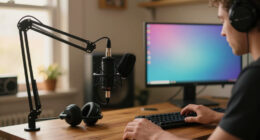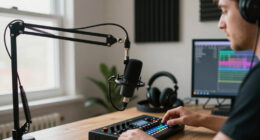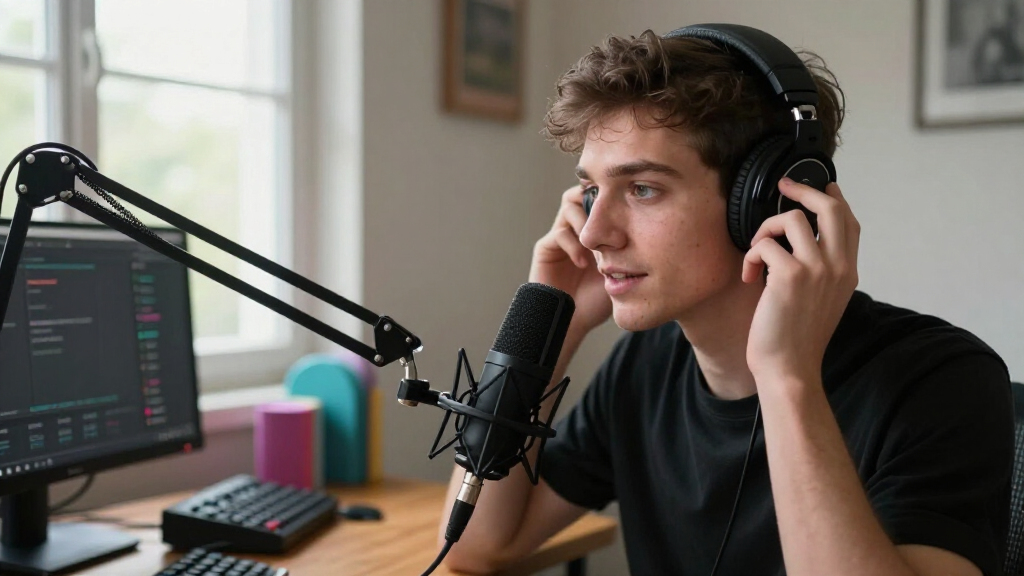
Set up a studio-quality microphone for streaming by choosing a suitable mic, placing it correctly, connecting it to your computer, and adjusting your recording levels. This guide is for beginner streamers who want clear, natural-sounding speech without clipping, excessive background noise, or complicated audio equipment. Allow 45-90 minutes, including time to test your setup and make adjustments.

Get audio and creator gear delivered free — and shop member deals
- Fast, free delivery on millions of items
- Access to Prime Big Deal Days deals on October 6–7
- Prime Video, Amazon Music and more included

Shure SM7B Dynamic Vocal Microphone
- ✔ Microphone type: Dynamic
- ✔ Pickup pattern: Cardioid
- ✔ Connector: XLR

Logitech Blue Yeti USB Microphone with Blue VO!CE, Four Pickup Patterns, and Adjustable Stand
- ✔ Microphone type: USB condenser
- ✔ Pickup patterns: Cardioid, omni, bidirectional, and stereo
- ✔ Compatibility: Mac and PC

FIFINE AmpliGame AM8 USB/XLR Dynamic Microphone
- ✔ Microphone type: Dynamic
- ✔ Connectivity: USB and XLR
- ✔ Polar pattern: Cardioid, unidirectional
“Studio-quality” comes from the whole recording setup—not just the microphone. Microphone type, distance, room reflections, gain, and software settings all affect the result. Follow the steps in order so you can hear which changes improve your voice.
Difficulty: Beginner | Time: 45-90 minutes
What You’ll Need
Tools & Materials:
- A USB microphone, or an XLR microphone with an audio interface
- A stable desk stand, boom arm, or compatible microphone mount
- Headphones for monitoring without speaker feedback
- A computer and streaming or recording software
- A quiet room with curtains, a rug, or other soft furnishings
Knowledge:
- Basic ability to connect a USB device or install an audio interface
- Basic ability to select an audio input in streaming software
Allow about 45-90 minutes for setup and testing. Check that the microphone and mount use compatible connections. For an XLR microphone, the interface needs an XLR input; some condenser microphones also need 48-volt phantom power. Check the microphone manual before turning phantom power on, and do not connect or disconnect an XLR microphone while phantom power is active.
Keep the microphone away from liquids and leave enough room for a safe cable route. If you rent or share your space, use reversible room treatments such as curtains, rugs, or freestanding acoustic panels.
Shure SM7B Dynamic Vocal Microphone
For streamers who are building around an audio interface or mixer, the Shure SM7B is the most purpose-built vocal option here. Its dynamic capsule and cardioid pattern make it a natural fit for close, single-speaker recording, while built-in pop filtering, a detachable windscreen, and air-suspension shock isolation address common annoyances such as breath noise and handling vibration. Electromagnetic shielding is another useful inclusion for a desk crowded with electronic equipment. Together, those features make the SM7B the strongest choice in this group for a controlled, voice-first studio chain.It differs from the Blue Yeti in a consequential way: the Yeti plugs in over USB and offers four pickup patterns, while the SM7B is an XLR microphone with one cardioid pattern and requires an interface or mixer. That makes the Shure less flexible for quick changes in recording setup, but more focused for a streamer who speaks close to the mic and wants dedicated audio hardware. Compared with the AM8, the SM7B has no USB mode or onboard USB controls; it is a more committed XLR choice rather than a hybrid starter mic.The tradeoff is not just an extra cable. Buyers need to plan for the rest of the signal chain and make room for an appropriate mic support arrangement. We also should not treat a professional format or well-known model as a guarantee of better results in every room: placement, gain setup, and acoustic conditions remain important. Choose it when you want the microphone to anchor a studio-oriented voice setup. Skip it if you want a self-contained USB connection or expect the mic itself to provide tap-to-mute and software effects.
Pros:
- Dynamic cardioid design is suited to focused, single-speaker streaming.
- Built-in pop filtering and detachable windscreen help manage plosives and breath noise.
- Air-suspension shock isolation and electromagnetic shielding address handling vibration and electronic interference.
- All-metal construction is appropriate for a permanent studio-style setup.
Cons:
- XLR connection requires a separate audio interface or mixer.
- Offers one pickup pattern and no USB convenience features such as onboard mute controls.
Best for: Streamers with an audio interface or mixer who want a dedicated, close-miked vocal microphone with integrated pop and handling-noise control.
Not ideal for: New creators seeking a direct USB connection, onboard live controls, or a multi-pattern microphone for several recording layouts.
Bottom line: Choose the SM7B for a committed XLR streaming chain where vocal-focused design matters more than plug-and-play simplicity.
“Choose the SM7B for a committed XLR streaming chain where vocal-focused design matters more than plug-and-play simplicity.”
Logitech Blue Yeti USB Microphone with Blue VO!CE, Four Pickup Patterns, and Adjustable Stand
The Logitech Blue Yeti is the easiest fit for streamers who want one USB microphone to cover more than a standard solo broadcast. Its four pickup patterns—cardioid, omni, bidirectional, and stereo—let us adapt the mic to a solo voice, a conversation, or other recording arrangements without changing microphones. Onboard controls for gain, mute, headphone volume, and pattern selection are especially useful during a live session, where adjusting a setting at the mic can be more direct than navigating software.That flexibility is the Yeti’s main advantage over the SM7B and AM8. Both alternatives are cardioid-focused dynamic models; the Yeti gives buyers more ways to capture sound, but its condenser USB design is less specialized for a single close-miked voice. The included adjustable stand, plug-and-play connection, and no-latency headphone monitoring make it a straightforward desk setup. Blue VO!CE adds vocal effects and modulation, although full functionality requires Logitech G HUB, so its software convenience is not entirely automatic.We would choose the Yeti for a creator who moves between streaming, calls, and multi-person recordings, or who wants physical controls without first assembling an XLR chain. Its additional patterns are only an advantage when they match the use case; a solo streamer who never changes positions may get more relevant noise-control features from the dynamic Shure or the cardioid AM8. The supplied details also do not include specific performance measurements, so buyers should judge it on its stated controls and flexibility rather than assume a technical performance lead.
Pros:
- Four pickup patterns accommodate solo voice, group, and other recording arrangements.
- Onboard mute, gain, pattern, and headphone-volume controls support quick session adjustments.
- USB setup, included adjustable stand, and no-latency monitoring suit a direct-to-computer workflow.
- Blue VO!CE provides vocal effects and modulation through Logitech G HUB.
Cons:
- Full Blue VO!CE functionality requires downloading Logitech G HUB.
- Offers less of a dedicated single-pattern dynamic approach than the SM7B or AM8.
- The supplied product details provide no specific technical performance measurements.
Best for: USB-first streamers and creators who want physical controls, headphone monitoring, and the option to record in several pickup patterns.
Not ideal for: A solo streamer seeking an XLR-only studio microphone, or anyone who wants to avoid companion software for the full feature set.
Bottom line: Pick the Blue Yeti when USB simplicity and recording-pattern flexibility matter more than a focused XLR vocal chain.
“Pick the Blue Yeti when USB simplicity and recording-pattern flexibility matter more than a focused XLR vocal chain.”
FIFINE AmpliGame AM8 USB/XLR Dynamic Microphone
The FIFINE AmpliGame AM8 makes the most sense for a streamer who wants a simple USB microphone now but would like the option to move to XLR later. In USB mode, it includes tap-to-mute, headphone monitoring, gain and volume controls, and RGB lighting. Its cardioid dynamic design is focused on the speaker, so it occupies a different lane from the multi-pattern Blue Yeti: rather than covering several recording layouts, the AM8 concentrates on a single-person streaming position and pairs that with useful desk controls.Compared with the Shure SM7B, the AM8 is easier to start with because it can connect over USB, while the Shure requires an interface or mixer. The AM8 can also connect through XLR, giving an upgrade route that the Yeti does not provide. That flexibility has a meaningful limitation: RGB lighting and function controls are USB-only, and the XLR cable is not included. Switching to XLR means relying on the external audio chain rather than carrying the AM8’s USB conveniences into that mode.The stated 50 Hz–16 kHz frequency response and 80 dB signal-to-noise ratio provide technical context, but they do not by themselves establish a recording outcome. We would rank this below the Yeti for varied recording patterns and below the SM7B for a fully dedicated XLR studio build. Its advantage is the transition between a manageable USB desk setup and a more modular system. Choose it if that two-stage path is useful; skip it if you want XLR controls to remain on the mic or need a pattern beyond cardioid.
Pros:
- USB and XLR connectivity offer a route from a direct computer setup to an interface-based chain.
- USB mode includes tap-to-mute, gain and volume controls, and headphone monitoring.
- Cardioid dynamic design is suited to focused streaming around one speaker.
- Built-in 3/8-inch and 5/8-inch threads fit common microphone stands.
Cons:
- XLR cable is not included.
- RGB lighting and onboard function controls work only in USB mode.
- Cardioid is the only listed pickup pattern.
Best for: Streamers who want USB controls and monitoring today, with the option to connect to an XLR interface or mixer later.
Not ideal for: Buyers who need multiple pickup patterns, want RGB and onboard functions in XLR mode, or expect an XLR cable to be included.
Bottom line: The AM8 is the practical bridge pick for streamers who want USB convenience without closing off an eventual XLR setup.
“The AM8 is the practical bridge pick for streamers who want USB convenience without closing off an eventual XLR setup.”
As an Amazon Associate we earn from qualifying purchases.
Before You Start
Pick a consistent place to stream and reduce obvious noise before adjusting software. Turn off or move away from loud fans where practical, close doors and windows, and silence phone alerts. Do not try to fix a noisy room by turning the microphone gain far down; that can make your voice too quiet and encourage the software or interface to amplify noise later.
Choose headphones instead of speakers while recording or testing. Speakers can feed the microphone and create echo or feedback. If your microphone has a headphone jack, connect headphones there for direct monitoring; otherwise, monitor through your computer or streaming software.
Step-by-Step Instructions
Step 1: Choose a microphone that fits your setup
Choose a USB microphone if you want a direct connection and simple setup. Choose an XLR microphone if you already have, or are prepared to add, an audio interface and XLR cable. Both connection types can produce clean streaming audio when properly positioned and set up.
For a typical untreated room, consider a directional microphone such as a cardioid model. It picks up sound most strongly from the front, helping reduce some noise from behind the mic, but it will not block all room noise. Check that the microphone includes a desk stand or has a mount that fits your chosen arm.
Tip: Do not buy a microphone based on a “studio” label alone. Check its connection, mounting options, and intended pickup pattern.
Check: You have a microphone, a compatible connection, and a stable way to position it near your speaking position.
Step 2: Prepare the room and the mounting position
Set up in the quietest practical part of your room. Add soft furnishings near hard, reflective surfaces: draw curtains, place a rug on a bare floor, or put a bookcase or acoustic panel behind the microphone. Keep the setup clear of objects that may vibrate, such as a loose keyboard tray or an unstable desk.
Attach the microphone to its stand or boom arm according to the manufacturer’s instructions. Tighten the mount enough to hold position, but do not force threaded parts. Route the cable so it cannot pull on the microphone or catch on your chair.
Tip: A small change in position can reduce reflections or computer-fan noise. Test the room before spending money on foam or other treatment.
Check: The microphone mount stays in place, the cable hangs without tension, and your speaking area is clear of avoidable noise sources.
Step 3: Connect the microphone to your computer
For USB, connect the microphone directly to a computer port when possible, then wait for the operating system to recognize it. Avoid an unpowered USB hub if the mic disconnects or behaves inconsistently.
For XLR, connect the microphone to the interface with an XLR cable, then connect the interface to the computer. If the microphone requires phantom power, follow the microphone and interface instructions: connect the mic first and enable 48 V only if specified. Select the correct interface input and start with gain low.
Open your computer’s sound settings and choose the microphone or interface as the input device. Confirm that its input meter responds when you speak.
Tip: If the device does not appear, reconnect it and check the operating system’s input list before changing streaming software settings.
Check: Your computer lists the intended microphone or interface, and speaking produces movement on its input meter.
Step 4: Position the microphone for clear speech
Place the microphone about 10-15 cm (4-6 inches) from your mouth to start. Aim its pickup side toward your mouth; check the manual because some microphones pick up sound from the front, while others are designed to capture sound from the side. Angle it slightly off-center so breath does not hit the capsule directly.
Keep the mic close enough that your voice is stronger than room sound, but far enough away to speak comfortably. Put a pop filter or foam windscreen between your mouth and the microphone if plosive sounds such as “p” and “b” produce sharp bursts.
Tip: Do not speak into the rear of a front-address mic. If the sound is dull or distant, check the mic’s intended speaking side and distance before adding software effects.
Check: Your mouth is within a consistent distance, the correct side of the mic faces you, and normal speech is clear without sharp breath blasts.
Step 5: Set input gain and recording level
Open the operating system’s input settings or interface controls. Speak at your normal streaming volume and raise the microphone gain gradually. Watch the input meter while saying a few louder phrases as you would during a stream.
Aim for ordinary speech peaks around -18 to -12 dBFS in software when a meter is available. Keep louder peaks below 0 dBFS; a red or clipped indicator means the signal is too high. If your software shows only a simple level bar, keep peaks out of the red and lower the gain if the sound distorts.
Adjust the microphone’s input level first. Avoid stacking high gain in both the interface and the software, because that can increase noise or cause clipping.
Tip: Gain is not the same as playback volume. If your recording is clean but quiet in headphones, raise monitoring volume rather than pushing the input into clipping.
Check: Your speech is audible on the meter, loud phrases do not clip, and the recording does not sound distorted.
Step 6: Set the microphone in streaming software
Open your streaming software’s audio settings and select the microphone or interface you identified in the computer settings. If the software has a separate microphone source, choose the same device there. Disable unused microphone inputs to prevent duplicate or echoing audio.
Record a short sample or use the software’s monitoring feature. Listen through headphones for a natural voice, steady level, and unwanted noise. If you add a noise gate, noise suppression, compressor, or equalizer, add one effect at a time and test again. Keep processing modest; aggressive suppression can make speech sound watery, while a gate set too high can cut off quiet words.
Tip: Turn off software monitoring if you hear a distracting delay, unless you need it for testing. Direct monitoring through an interface or microphone often has less delay.
Check: The software meter responds only to the intended microphone, and a test recording plays back without echo, clipping, or chopped-off words.
Step 7: Test your setup as you will use it
Record 30-60 seconds while sitting in your normal streaming posture. Speak at typical volume, include a louder phrase, pause briefly, and move naturally. Listen to the recording through headphones. Check for plosives, room echo, keyboard noise, hum, sudden level changes, and words that disappear between phrases.
Fix problems in this order: improve microphone position, reduce the noise source, adjust input gain, and then refine software processing. Change one setting at a time and make another short recording. Save the settings or take a screenshot once the result is clean.
Tip: A meter can show level but cannot tell you whether the voice sounds natural. Listen to the recorded sample before going live.
Check: The sample sounds clear and consistent, louder phrases remain undistorted, and pauses do not contain distracting noise or abrupt gate cuts.
Common Mistakes to Avoid
- Placing the microphone too far away and increasing gain to compensate. — Start about 10-15 cm from your mouth, then adjust position while monitoring. A closer, comfortable position usually gives your voice a stronger level relative to room noise.
- Pointing the wrong side of the microphone toward the speaker. — Check the manual or product markings to find the active pickup side. Front-address and side-address designs differ.
- Turning gain up until the meter enters the red. — Test at normal and louder speaking volumes. Lower the input level if peaks clip; raise headphone volume separately if monitoring is quiet.
- Adding strong noise suppression or a gate before positioning the mic. — Reduce room noise and position the mic first. Add processing in small increments and listen for distorted or cut-off speech.
Troubleshooting
Problem: The computer or streaming software does not detect the microphone.
Solution:
Check the cable connection and try another computer port. Confirm that the device appears in the operating system’s input settings and select it in the streaming software. For an interface, check its power, connection, and input selection. Restart the software after changing devices. If the device still does not appear, install the manufacturer’s current driver or consult its setup instructions.
Problem: The voice sounds distorted, crackly, or harsh.
Solution:
Lower the microphone or interface gain and repeat the loud-phrase test. Check that the input meter stays below clipping and that software effects are not adding excessive level. If the noise continues, reseat or replace the cable and test another port. For an XLR condenser mic, check phantom-power requirements and follow the device instructions.
Problem: The recording sounds distant, echoey, or full of room noise.
Solution:
Move the microphone closer while keeping a comfortable speaking distance, and aim the active side correctly. Move away from reflective walls and noisy equipment, then add soft furnishings if the room still sounds hollow. Recheck the recording before increasing gain or applying suppression.
Problem: The software cuts off the start or end of words.
Solution:
Lower the noise-gate threshold or turn the gate off temporarily. Speak at a consistent distance and record another test. If you use noise suppression, reduce its strength if speech becomes watery or clipped. Keep the processing settings that preserve quiet syllables.
What Success Looks Like
Your setup is ready when the computer and streaming software use the intended microphone, the mic remains stable at a comfortable distance, and a test recording sounds clear and natural through headphones. Normal speech should register consistently; louder phrases should not clip; and pauses should not contain distracting room noise, feedback, or abrupt cuts. Confirm the sound in a private recording or test stream before using it live.
Next Steps
Save your input level and software settings, and keep a copy of the short test recording as a reference. Before each stream, check that the correct input device is selected, the microphone has not shifted, and your meter responds at the expected level. Clean the microphone and pop filter according to the manufacturer’s instructions, and avoid spraying liquids onto the mic.
If you change rooms, move the mic, add a new interface, or update your software, record another test before streaming. If persistent hum or dropouts remain after checking cables, ports, and levels, consult the microphone or interface manufacturer’s support resources.
Frequently Asked Questions
Do I need an XLR microphone for studio-quality streaming?
No. A well-positioned USB microphone can provide clear streaming audio. XLR adds an interface and more control options, but it does not automatically improve sound; microphone position, room noise, and level settings matter just as much.
How far should a streaming microphone be from my mouth?
Start about 10-15 cm (4-6 inches) away. Move it slightly closer or farther while testing, and keep the distance steady as you speak. Use a pop filter or angle the mic off-center if breath creates bursts.
Should I use a cardioid microphone in a noisy room?
A cardioid pattern can reduce sound from parts of the room behind the microphone, but it cannot remove all background noise. Face the mic’s active side, keep it close enough to your mouth, and reduce the noise source where practical.
What input level should I use for streaming?
When your software provides a dBFS meter, aim for normal speech peaks around -18 to -12 dBFS and keep louder peaks below 0 dBFS. Treat this as a starting point; avoid red or clipped indicators and confirm the result by listening.
Do I need a pop filter or a boom arm?
A pop filter helps reduce bursts from plosive sounds, while a boom arm can make it easier to position the microphone near your mouth and keep it off the desk. Neither is required for every setup. Use a stable mount and add accessories only when they solve a specific problem.
Halloween Picks
halloween
As an affiliate, we earn on qualifying purchases.