
TL;DR

Get audio and creator gear delivered free with Prime
- Fast, free delivery on millions of items
- Prime Video, Amazon Music and more included
- Member-only deals all year
Studio monitor speakers deliver flat, accurate sound essential for mixing. Key factors include monitor type, room acoustics, placement, and recent tech trends like DSP and coaxial designs. Proper setup turns your space into a reliable, transparent listening environment.
If you’ve ever been frustrated with your mixes sounding great in the studio but off in the car or on earbuds, you’re not alone. The secret isn’t just the music — it’s your monitoring setup. Studio monitor speakers aren’t about loudness or bass-heavy thump; they’re about honesty. They reveal your mistakes, highlight your strengths, and give you a true picture of your sound.
In this guide, I’ll walk you through what really matters when choosing monitors, recent tech trends, and practical tips to make your setup work for you. Whether you’re in a tiny home studio or a larger control room, understanding these details will keep your mixes clear, balanced, and ready for prime time.
Choose monitor type based on your room size and workflow—nearfield for small spaces, midfield or large for bigger rooms.
Room treatment and proper placement dramatically improve your monitor accuracy — don’t skip acoustic treatment.
DSP and room correction features help fine-tune your sound but aren’t a substitute for good setup and placement.
The design of your monitor—port, sealed, coaxial—affects bass response and imaging; pick what matches your style.
Calibration, listening level, and familiar reference tracks are key to consistent, reliable mixes.
What Are Studio Monitors and Why Do They Matter?
Studio monitors are loudspeakers designed specifically for critical listening. Unlike typical consumer speakers that boost bass or treble to sound exciting, monitors aim for neutrality. They show you what your music truly sounds like, without coloring or exaggerating.
Imagine trying to fix a painting by looking at it through tinted glasses. That’s what listening on consumer speakers can feel like. With studio monitors, you get an honest view — a flat response that shows every detail clearly. This honesty helps producers, engineers, and artists make accurate decisions about EQ, levels, and effects.
For example, a well-chosen monitor reveals whether vocals sit in the mix or get buried by bass. If your monitors are off, your mixes might sound good on your system but terrible elsewhere. That’s why good monitors are the backbone of professional sound.
studio monitor speakers for home studio
As an affiliate, we earn on qualifying purchases.
As an affiliate, we earn on qualifying purchases.
Pick the Right Monitor Type for Your Space and Budget
Choosing the right monitor type is step one. Your space and budget heavily influence this choice.
Most home studios use nearfield monitors. Placed about 1 meter from your ears, they reduce room influence — but don’t eliminate it. For example, a 5-inch Yamaha HS5 or KRK Rokit 7 can work well in small rooms.
Midfield monitors, used at 2-3 meters, suit larger rooms and higher budgets. They deliver more bass and volume, but require more space.
Active monitors, with built-in amps and DSP, are the norm. They simplify setup and often include room correction. Passive monitors need external amps but offer more customization.
Here’s a quick comparison:
| Type | Placement | Power | Pros | Cons |
|---|---|---|---|---|
| Active Nearfield | Close to ears | Built-in | Compact, easy, DSP options | Less customization |
| Passive Nearfield | Close to ears | External amp | More system flexibility | More setup complexity |
| Midfield | 2–3 meters | Active or passive | More bass, larger listening area | Requires bigger room |
Pick what fits your space, budget, and workflow. Remember, bigger isn’t always better if your room can’t handle it.
As an affiliate, we earn on qualifying purchases.
How Room Acoustics Turn Your Monitors from Accurate to Off-Grid
Your room is often the weak link. Even the best monitor can sound off if your space isn’t treated properly.
Reflections bounce off walls, ceilings, and desks, coloring your sound. Bass can echo and create nulls or peaks, making it hard to judge low-end accuracy. For example, a small bedroom might have a huge bass null at your listening position due to room modes.
Effective treatment isn’t about muffling. It’s about controlling reflections and bass. Use broadband absorbers at first reflection points, bass traps in corners, and diffusion on large surfaces. Rearrange your monitors and seat to minimize boundary effects.
Here’s what works:
- Absorb early reflections
- Install bass traps in corners
- Use diffusers where possible
- Place monitors slightly away from walls
Remember, a room with proper treatment can make even modest monitors sound much more accurate.
As an affiliate, we earn on qualifying purchases.
Placement Tips for Perfecting Your Monitor Position
Placement is king. Even the best monitor can sound off if it’s in the wrong spot.
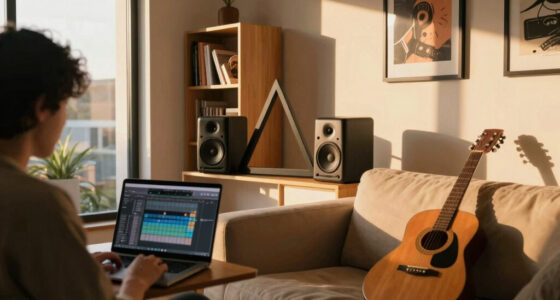
Start by forming an equilateral triangle: your ears and monitors should form roughly the same distance. For example, if your ears are 1 meter from each monitor, set them about 2 meters apart.
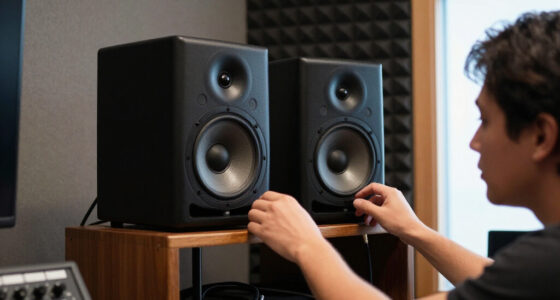
Keep tweeters at ear level for accurate high-frequency perception. Aim your monitors toward your listening position, and avoid placing them directly against the wall — a good rule is at least 30 cm away.
Use stands or isolation pads to prevent vibrations and boundary effects. If placing near a wall, turn down bass controls or use boundary compensation if available.
Test different distances and angles. Small shifts can dramatically improve clarity. And don’t forget, a symmetrical setup ensures balanced stereo imaging.
As an affiliate, we earn on qualifying purchases.
Design Choices That Impact Your Monitor’s Sound
Monitor design isn’t just about looks; it shapes your sound. Common types include ported, sealed, and coaxial cabinets.
Ported monitors, like the Adam A7X, boost bass extension but can introduce port noise and phase issues if not tuned well. Sealed cabinets, such as the Focal Alpha series, deliver tighter, more controlled bass but often have less low-end output.
Coaxial designs, like the Neumann KH 120, place the high and low frequencies on the same axis. This improves imaging and minimizes phase problems, but diffraction can be an issue if not carefully engineered.
Choose based on your style. If you need punchy bass and have space, ported might suit. For accuracy and control, sealed or coaxial could be better.
Remember, how a monitor is built matters more than the category it falls into.
Should You Mix with Two-Way, Three-Way, or Coaxial Monitors?
Two-way monitors are the most common, with a woofer and tweeter. They’re simple, compact, and usually sufficient for most tasks. For example, the Yamaha HS8 is a two-way that covers most needs.
Three-way monitors add a dedicated midrange driver, like the Focal Solo6 Be. They can reveal more detail in vocals and instruments, especially in larger rooms or complex mixes. But they require precise crossover design and are more expensive.
Coaxial monitors, such as the Neumann KH 420, place drivers on the same axis. They offer excellent imaging and a tight point-source sound. However, diffraction and driver interaction need careful engineering.
Pick based on your workflow. For tight spaces, two-way is often enough. If you want more clarity in the midrange or plan immersive setups, consider three-way or coaxial models.
Using Subwoofers to Extend Your Bass and Improve Clarity
A dedicated subwoofer can improve your low-end accuracy, especially if your monitors can’t reach below 40 Hz. It also takes the load off smaller speakers, letting them focus on mids and highs.
For example, a studio might use an Adam Sub8 with the Adam A7X monitors. Proper integration involves setting the crossover around 80 Hz, phase alignment, and level matching. It’s a balancing act — too loud or out of phase, and the bass becomes muddy or exaggerated.
Placement matters. Place the subwoofer near your monitors or in a corner to maximize bass projection. Use measurement tools like Room EQ Wizard to fine-tune your system.
Multiple subs can smooth out bass across the room but require careful calibration. Too many or poorly placed subs can create nulls and peaks, defeating the purpose.
Bottom line: a well-integrated sub improves clarity and translation, but only if you set it up right.
Connections, Gain, and Calibration — Keep It Simple and Accurate
Most monitors connect via balanced XLR or TRS cables, which reduce interference over long runs. Digital inputs and network controls are growing but aren’t mandatory.
Set your gain structure carefully. Keep levels moderate to avoid distortion and noise. For instance, turn down your interface output and watch your monitor’s input gain—too high, and you risk clipping.
Calibration isn’t just about knobs. Use test tones and measurement software to match levels and frequency response. Many monitors include room correction features, but don’t rely solely on them.
Remember, simple, clean wiring and proper gain staging make a huge difference in clarity and reliability.
Listening Levels and Calibration for Consistent Mixes
Mix at moderate levels — around 75-85 dB SPL. Too loud, and your ears get fatigued; too soft, and you miss details. Use a SPL meter or calibration app to keep consistent levels.
Calibrating your monitors involves setting levels so they sound balanced across different listening environments. A common practice is to use pink noise and measure SPL at your listening position.
Also, take breaks. Your ears need rest to maintain accuracy. Switch between high and low volumes to understand how your mix translates across devices.
Remember, the goal isn’t loudness but consistency. Monitor levels should be comfortable enough for long sessions without fatigue.
The Future of Studio Monitors: Trends to Watch
Recent tech advances are shaping the future of studio monitors. DSP is now standard, letting manufacturers fine-tune response and compensate for room issues. For example, the Adam T7V includes built-in room correction, making setup easier.
Coaxial and controlled-directivity designs improve sound consistency across the listening area. Brands like Neumann and Focal focus heavily on waveguide technology to reduce room reflections.
Immersive audio formats like Dolby Atmos are pushing monitor manufacturers to develop multichannel, bass-managed systems that work seamlessly together.
Networked monitors with remote control, auto-identification, and firmware updates are becoming common in professional setups. These features simplify large, complex systems.
Small monitors now deliver deeper bass thanks to advanced drivers and DSP. However, this often comes with trade-offs like increased latency or limited maximum SPL.
Finally, headphone and speaker systems are blending, with virtual room correction and crossfeed. They aim to make mobile and immersive production more accessible and accurate.
Busting Common Myths About Studio Monitors
Many misconceptions cloud the true picture of studio monitors. For example, some believe flat monitors make mixes dull. In reality, neutrality provides a reliable reference, not a boring sound.
Another myth is that big monitors are always better. Larger speakers can overwhelm small rooms or cause placement issues, leading to inaccurate sound.
Some think rear-ported monitors can’t be placed near walls. But with proper boundary controls, this isn’t always true. Check your manufacturer’s guidance.
And don’t assume that more expensive equals better. Skill, room, and calibration matter more than price alone.
Understanding these myths helps you make smarter buying and setup decisions, avoiding costly mistakes.
What to Look For When Buying Your Studio Monitors
Before purchasing, consider your room size, budget, and workflow. Think about bass extension if you work with deep bass-heavy genres like EDM or hip-hop. For example, a small room might struggle with 8-inch woofers, so a 5-inch monitor with a good sub might be enough.
Check specifications like frequency response, maximum SPL, distortion, and directivity. Don’t rely on wattage alone; a 50W monitor can outperform a 200W one if designed well.
Test monitors with familiar tracks in your space. Consider features like room correction, multiple inputs, and calibration options. Budget for a good pair rather than a single speaker.
Finally, plan for future needs: surround sound, immersive formats, or upgrades. Invest in quality gear that can grow with your studio.
Frequently Asked Questions
What is the difference between studio monitors and regular speakers?
Studio monitors deliver a flat, neutral sound that reveals true recordings, unlike consumer speakers which often boost bass and treble. This honesty helps you make accurate mixing decisions, ensuring your music sounds good everywhere.
Do I need a subwoofer with my studio monitors?
If you work with deep bass-heavy genres like EDM or hip-hop, a subwoofer can improve low-end accuracy. Proper integration and calibration are crucial — a sub that’s out of sync can muddy your mix instead of clarifying it.
Can active monitors connect directly to my computer?
Yes, most active monitors have balanced XLR or TRS inputs that connect directly to your audio interface or computer’s output. Just match the connection type and set levels carefully for clean, distortion-free sound.
How far apart should my monitors be?
Place them about the same distance from your ears, forming an equilateral triangle. For instance, if your ears are 1 meter from each monitor, set them about 2 meters apart. Small adjustments can significantly improve stereo imaging.
Is one monitor enough for mixing?
No, always use a matched pair for stereo accuracy. Single monitors lack the stereo imaging and depth needed for balanced mixes. A good pair provides consistent sound from both sides, helping you judge panning and space.
Conclusion
Your monitors are the window into your sound. Get them right, and every decision becomes clearer. Arm yourself with good placement, treatment, and understanding of your gear, and your mixes will translate confidently across systems.
Remember, a well-chosen monitor setup doesn’t just sound better — it makes you a better producer. So, tune your space, pick wisely, and keep your ears sharp. The difference in your next project could be night and day.
Halloween Picks
halloween
As an affiliate, we earn on qualifying purchases.