
TL;DR

Get audio and creator gear delivered free with Prime
- Fast, free delivery on millions of items
- Prime Video, Amazon Music and more included
- Member-only deals all year
Your USB mic picks up keyboard noise because of its sensitivity and proximity. To reduce it, use directional mics, proper placement, physical dampening, and noise suppression software. Combining these approaches dramatically improves your audio quality.
Ever had your voice drowned out by those relentless keystrokes? Or maybe your audience hears every click, ruining the vibe of your recording or stream. It’s a common frustration for creators working on tight budgets, relying on affordable USB mics that are just too sensitive.
In this guide, you’ll learn why your microphone picks up keyboard sounds, what factors make it worse, and how to fix it without splashing cash on fancy gear. By the end, you’ll have real, actionable steps to keep your voice clear and your keyboard noise in the background — where it belongs.
Position your microphone at least 6 inches away from your keyboard to reduce vibration pickup.
Use a directional (cardioid or hypercardioid) microphone for better focus on your voice and less background noise.
Add physical dampening like desk mats, shock mounts, or O-rings to cut down on vibrations and keystroke noise.
Leverage software noise suppression tools to clean up residual keyboard sounds, but don’t rely on them alone.
Switching to quieter keyboards or quieter switches can make a big difference in overall noise levels.
Why Your USB Mic Picks Up Keyboard Noise and How to Stop It
TL;DR: Your USB mic hears keystrokes because it is sensitive, close to the keyboard, and often sitting on the same vibrating desk. The fix is layered: move the mic, use a directional pickup pattern, dampen the desk and keyboard, then clean up the leftovers with noise suppression.
The fastest win is not software. It is geometry.
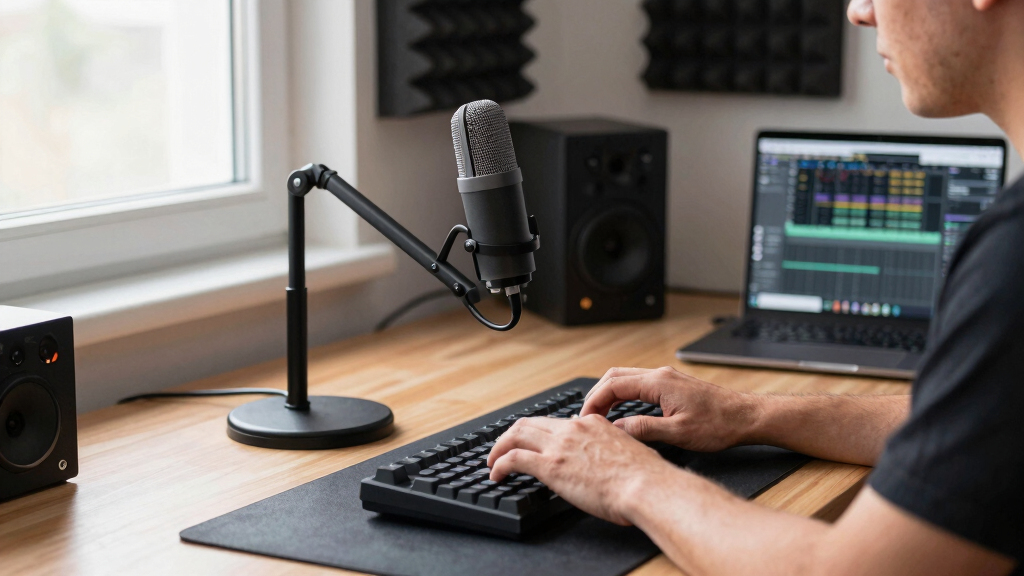
Point the mic at your mouth, move it 6-12 inches away from the keyboard, and keep the keyboard out of the mic’s most sensitive pickup zone.
Most keyboard bleed comes from proximity and desk vibration.
Focuses on your voice while rejecting side and rear noise.
O-rings can reduce loud key impact noise in many setups.
Noise suppression helps most after placement is fixed.
Why Every Click Gets Captured
Budget USB condenser mics are built to be sensitive. That helps your voice sound present, but it also makes the mic hear switch clicks, desk resonance, room reflections, and vibration traveling through the stand.
Condenser mics hear details
High sensitivity captures quiet speech and subtle room sounds. If your keyboard sits nearby, its clicks land inside the same capture zone as your voice.
The keyboard is too close
When the mic sits beside or behind the keyboard, keystrokes may be nearly as loud as speech, especially during pauses or softer speaking.
The desk becomes a bridge
Typing sends vibration through the desktop, mic arm, or stand. A shock mount and thick desk mat reduce the mechanical path to the capsule.
Pickup Patterns Compared
The microphone pattern decides where the mic listens hardest. For solo voice, cardioid or hypercardioid usually gives the best keyboard rejection when placed correctly.
| Pattern | Keyboard Rejection | Best Use | Tradeoff | Verdict |
|---|---|---|---|---|
| Cardioid | ✓ Strong | Solo streaming, podcasting, voice calls | Needs the front of the mic aimed at your mouth | ✓ Best default |
| Hypercardioid | ✓ Very strong | Noisy rooms and tighter voice isolation | Small rear pickup lobe can catch room reflections | ✓ Excellent |
| Omnidirectional | ✗ Weak | Group calls, room ambience, roundtable audio | Captures keyboard noise from every direction | ✗ Avoid |
| Bidirectional | ~ Mixed | Two-person interviews facing each other | Front and rear capture can invite desk noise | ~ Situational |
The Practical Fix Chain
Make changes in this order so each layer reduces the load on the next. The cleanest setups solve the physical problem first and use software only as final cleanup.
Move the mic
Keep it 6-12 inches from the keyboard and closer to your mouth than the keys.
Aim the pattern
Use cardioid or hypercardioid and point the rejection zone toward the keyboard.
Dampen impact
Add a desk mat, keyboard O-rings, quiet switches, or foam to reduce sound at source.
Isolate vibration
Use a shock mount or boom arm to keep desk resonance out of the mic body.
Filter residue
Use Krisp, NVIDIA Broadcast, or app filters to suppress remaining clicks.
Noise Reduction Stack
Different fixes attack different parts of the problem. The strongest result comes from combining source control, isolation, placement, and processing.
Effort vs. Impact
What Cuts the Most Noise?
These are practical, setup-level estimates based on common creator workflows: directional placement first, hardware dampening second, software last.
Trace the Noise Path
Keyboard noise reaches your recording through air, furniture, mic hardware, and signal processing. Break the chain anywhere and the final audio improves.
Why Your USB Mic Is Picking Up Every Keystroke (And Why It Matters)
Your USB mic is a magnet for keyboard clicks because of how sensitive it is and how close it often is to your typing zone. Condenser microphones, especially budget-friendly models, pick up sound in a 180-degree radius, capturing everything in that bubble — including your keyboard.
Imagine sitting at your desk, typing away. Every click, clack, and even the faint ringing of mechanical switches can end up in your recordings. That’s bad if you want your audience to focus on your voice, not the background noise. According to ArtzArtz, the proximity of a mic to the keyboard and its pickup pattern are the biggest culprits.
Understanding why this happens is crucial. The sensitivity of your mic determines how much ambient sound it captures. When placed too close, it amplifies even subtle noises, which can distract listeners and diminish your recording quality. This creates a tradeoff: a mic that’s too sensitive captures your voice well but also background noise, while a less sensitive mic might require you to speak louder or get closer, risking more noise pickup. Recognizing these implications helps you choose the right setup to balance clarity and noise control.
directional USB microphone for streaming
As an affiliate, we earn on qualifying purchases.
As an affiliate, we earn on qualifying purchases.
How Different Microphone Patterns Affect Keyboard Noise — Which Is Best?
| Pickup Pattern | How It Handles Background Noise |
|---|---|
| Cardioid | Focuses on sounds directly in front, reducing side and rear noises, making it ideal for minimizing keyboard sounds. This pattern helps isolate your voice from keyboard clicks, but placement still matters. If the mic is too close or angled poorly, some noise may still bleed through. |
| Omnidirectional | Picks up sound equally from all directions, which can be problematic because it captures everything in the room—including keyboard noise. While good for capturing group conversations or room ambiance, it’s generally unsuitable for focused voice recordings where background noise is undesirable. |
| Bidirectional | Captures sound from front and back, not ideal for solo recordings with noisy keyboards. It’s more suited for interviews or duets where two sources are positioned opposite each other, but for gaming or streaming, it can increase background noise pickup. |
Choosing the right pattern matters because it directly affects how much keyboard noise your mic will pick up. Cardioid and hypercardioid patterns are better suited for recording in noisy environments because they prioritize sound from the front, where your mouth is. However, tradeoffs include potential proximity effects—where getting too close can cause bass boost—and the need for precise placement to maximize noise rejection. Understanding these patterns allows you to make informed decisions that balance ease of use and noise control.
As an affiliate, we earn on qualifying purchases.
Practical Steps to Cut Keyboard Noise Out of Your Recordings
- Move your mic farther away. Keep it at least 6-12 inches from your keyboard to lessen vibration pickup. This reduces the chance of vibrations traveling through the desk or stand, which can be picked up as noise.
- Use a directional microphone. Choose a mic with a cardioid or hypercardioid pattern to focus on your voice and reject sounds from the sides and rear, including keyboard clicks.
- Add physical dampening. Place a desk mat underneath your keyboard and mic stand, or use a shock mount to absorb vibrations. These physical barriers prevent desk vibrations from reaching your mic capsule, which is especially important when typing loudly or on a hard surface.
- Change your keyboard. Consider quieter switches, O-rings, or rubber dampers that soften keystrokes. Quieter switches reduce click sounds at the source, while O-rings dampen the impact, making keystrokes less audible and less likely to be picked up.
- Employ software noise suppression. Use tools like Krisp, NVIDIA Broadcast, or built-in filters in streaming apps to clean up residual noise. These software solutions analyze audio in real-time, filtering out background sounds without overly muffling your voice.
To make a tangible difference, implement these steps one at a time and test your recordings after each change. For example, start by moving your mic back 8 inches, then switch to a cardioid pattern if possible, add a desk mat, and finally enable noise suppression software. This sequential approach helps you identify which adjustments have the biggest impact, ensuring you don’t overdo any one fix and end up with muffled audio or other issues.
As an affiliate, we earn on qualifying purchases.
Hardware Hacks That Make a Big Difference
Sometimes, the best fix is physical. Installing O-rings on your mechanical keyboard’s switches can cut down noise by over 50%, especially for loud typing styles. This simple addition dampens the impact of key presses, reducing the high-frequency clicks that travel into your microphone. Placing a thick desk mat under your keyboard and mic stand absorbs vibrations traveling through the desk, preventing them from reaching your mic capsule.
Investing in a shock mount for your mic can prevent desk vibrations from reaching the capsule, especially if your desk tends to resonate. Upgrading to a microphone with a tighter pickup pattern or built-in noise filtering can also significantly reduce ambient noise and keyboard sounds, making your setup more professional without extra effort.
One creator I know wrapped their keyboard with a foam cover and moved their mic to a stand across the room. The difference? Nearly silent keystrokes and crystal-clear voice — all on a budget. These hardware hacks are often the most immediate and effective way to improve your audio quality, especially when combined with proper placement and dampening.
noise suppression software for microphones
As an affiliate, we earn on qualifying purchases.
As an affiliate, we earn on qualifying purchases.
Can Software Fix Everything? The Truth About Noise Suppression
Software can do a lot, but it’s not magic. Noise gates, filters, and AI-driven suppression can reduce keyboard sounds by up to 80%. These tools analyze your audio in real-time and filter out sounds that fall outside your voice profile. However, if your mic is too close or overly sensitive, some noise will slip through, making it clear that software alone isn’t enough.
Before relying solely on software, take these steps: test your setup with noise suppression enabled and listen carefully. Adjust your mic placement first—move it further from your keyboard and use a directional pattern if possible. Then, tweak the software settings to find a balance where your voice sounds natural but background noises are minimized. Combining these physical and software adjustments guarantees a cleaner sound without sacrificing clarity.
Remember, software is a tool to complement physical fixes—not replace them. Consistently applying both strategies ensures your recordings sound professional and free of distracting keyboard noise.
Frequently Asked Questions
Why does my USB microphone pick up my keyboard sounds?
Your USB mic is highly sensitive and often placed close to your keyboard, so it captures every click and clack. Condenser mics especially have a wide pickup pattern that makes this common.How can I reduce keyboard noise when recording or streaming?
Use a directional microphone, move it farther from your keyboard, add dampening materials, switch to quieter switches, and apply software noise suppression. Combining these steps works best.Are there specific microphones better suited for minimizing keyboard noise?
Yes. Cardioid or hypercardioid mics focus on front sound sources and reject side and rear noise. Dynamic mics are also less sensitive to ambient sounds than condenser types.What are the best placement strategies for my microphone?
Position your mic at least 6-12 inches away from your keyboard, ideally slightly above or to the side, aiming toward your mouth rather than directly over the keyboard.Can software noise reduction completely eliminate keyboard sounds?
Not entirely. Noise suppression can cut most of it out but may make your voice sound unnatural if overused. It’s best to combine software with physical fixes.Conclusion
If you want your voice to shine through without keyboard noise spoiling the moment, the key is a smart mix of physical setup and software tweaks. Moving your mic, choosing the right pattern, adding dampening, and using noise filters will turn your noisy recordings into crystal-clear broadcasts.
Think of your setup like tuning a guitar — small adjustments make all the difference. Now, go give your microphone some room and quiet those keystrokes once and for all.
Halloween Picks
halloween
As an affiliate, we earn on qualifying purchases.