
TL;DR

Get audio and creator gear delivered free with Prime
- Fast, free delivery on millions of items
- Prime Video, Amazon Music and more included
- Member-only deals all year
Timecode gives cameras and recorders a shared label for frames and audio moments, which makes matching many clips faster. You can often skip it for a short, simple shoot; it becomes valuable with multiple devices, long takes, lots of footage, separate audio, or a fast edit. Match settings, test the actual workflow, keep scratch audio, and slate key moments.
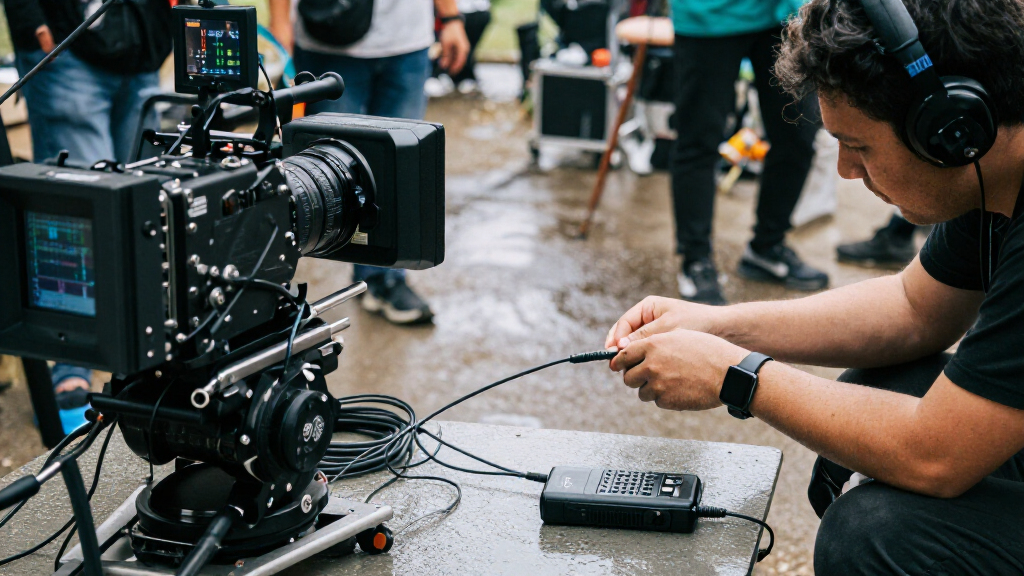
A slate clap can save you ten minutes on a small shoot; on a day with four cameras and a separate sound recorder, that same clap can leave you with hours of clip matching. Timecode sync in the field gives each device a shared clock label for identifying frames and audio moments, so your editor can line up recordings without hunting for every clap.
That label is useful, but it is not magic. It does not start every camera at once, improve the picture or sound, or keep independent clocks perfectly aligned. You’ll learn when the time saved is worth the setup, where timecode stops helping, and how to check that the workflow works before the crew is standing in the rain with the cards full.
Use timecode when several devices, long takes, lots of footage, separate audio, or a fast edit make manual matching expensive.
Remember that timecode labels positions; genlock or another supported method may be needed to synchronize video frame timing.
Match frame rate, timecode mode, device support, and project settings before recording; drop-frame changes numbering, not the frames.
Test the entire recording-to-editing workflow and keep scratch audio plus a slate as practical backups.
For a short, simple one-camera shoot, a slate and waveform syncing may cost less time than dedicated timecode setup.
Timecode Sync in the Field When You Actually Need It
Timecode gives cameras and recorders shared labels for matching media. Use it when setup saves more time than manual syncing.
When timecode earns its setup
The more devices, footage, and editing pressure a shoot has, the more valuable shared labels become.
Several cameras
Shared labels help editors line up multiple angles and separate audio.
Watch for drift
A shared start does not keep independent clocks aligned over time.
Slate may be enough
For a few short clips, a clap and waveform matching may take less effort.
What sync actually does
Timecode identifies a position; it does not make devices record frames at the same instant.
- Labels frames and audio moments
- Helps match clips on a shared timeline
- Does not prevent clock drift
- Matching labels do not guarantee matching exposure timing
- Genlock or another supported method may be needed
- Recording quality comes from the recording chain
Before the crew rolls
Check that the complete recording-to-editing workflow handles the settings and metadata as expected.
Align frame rate, timecode mode, device support, and project settings.
Inspect the files in the editing software you plan to use.
Record scratch audio and slate key moments in case metadata fails.
Drop-frame is a numbering choice
At 29.97 fps, drop-frame timecode skips certain frame numbers to keep displayed time closer to clock time.
- It changes numbering, not the video frames.
- Choose the convention that fits the project requirements.
- Jam sync provides a reference, but a device then runs on its own clock.
Know What Timecode Can Actually Sync
Timecode is a shared clock label that identifies a frame or audio moment in a production; it lets cameras and recorders describe positions on the same timeline. A clip marked 01:12:34:10 points to a particular labeled time, much like an address points to a place. That makes matching media easier, but it does not tell devices when to begin recording or force their sensors to capture at precisely the same instant.
That difference matters on a multicamera job. Two cameras can show matching timecode while exposing frames at slightly different moments. If you need their video signals to follow the same frame timing, you may need genlock or another supported sync method. Timecode answers “which moment is this?” Genlock addresses “when does this frame happen?”
It helps cameras, audio recorders, and editors refer to the same timeline, but picture and sound quality come from the recording chain itself. On a two-camera interview, timecode can line up both angles with a separately recorded lav and boom track. It will not make a soft-focus shot sharp or remove room echo from the boom mic.
Keep the clock and the clock rate in mind, too. A shared starting value does not stop each device’s independent clock from drifting. Jam sync gives a device a reference, then it may run on its own clock; a continuously connected reference works differently. A long interview can expose that difference when a clap lines up at the beginning but sound and picture slowly separate near the end.
Popular right now

Dyson Big Ball Multi Floor Canister Vacuum, Yellow

Bose QuietComfort Wireless Noise-Cancelling Headphones, Cypress Green
Vitamix 5-Speed Immersion Blender 3-Piece Bundle with Whisk and Storage Case
As an affiliate, we earn on qualifying purchases.
Use Timecode When Manual Sync Becomes the Slow Part
Timecode earns its place when the number, length, or turnaround of recordings makes manual syncing a regular drain on your crew. Several cameras, separate production audio, long takes, lots of footage, or a quick multicamera edit all raise the value of reliable labels. A single camera operator shooting a few short clips may spend longer attaching and checking sync gear than they save in post.
Imagine a small documentary crew recording a market vendor from two angles for twenty minutes while a mixer captures a lavalier and a handheld mic. After six setups, the editor faces dozens of files and has to locate a slate or match waveforms by hand. Shared timecode can reduce that search to a few clicks, leaving more time to shape the story instead of nudging clips on a timeline.
Compare that with a short one-camera product demo. You can clap at the start, record camera scratch audio, and match the clean recorder file by waveform. If there are only five clips, that approach is often cheaper and perfectly dependable. A second camera or an hour-long take changes the calculation because one missed clap can turn a quick edit into a careful manual repair.
Timecode also helps when contributors record in different places and cannot share a slate or begin together. A remote interview may include a host, a guest, and a separate recorder; synchronized timestamps give the editor a common reference if all devices followed compatible settings. They still need a tested clock and a useful audio backup, especially across long sessions.
Choose a Slate for a Simple Shoot and Timecode for a Busy One
A slate is usually enough when you have few clips, short takes, and a clear clap or spoken sync point; timecode is more useful when those simple cues become hard to find or maintain. The best choice depends on editing hours as much as equipment cost. A cheap slate and scratch track can be the right tool for a one-person crew, while the same setup can create avoidable labor on a multicamera event.
Take a community concert with three cameras and a sound mixer recording the board feed plus audience microphones. The editor may be sorting through a full card from each camera and continuous audio. Matching every file by waveform takes patience; matching by timecode can make the first assembly much faster. A slate at the start of each set still gives the team a visible fallback if metadata goes missing.
For a two-minute cooking clip, the math flips. One camera, one lav, and a handful of takes might need only a sharp clap before each action. The waveform has a clear peak, like a bright pin on a dark map. Adding boxes, cables, batteries, and a settings check could create more points of failure than the edit can justify.
| Shoot | Practical sync choice | Why |
|---|---|---|
| One camera, a few short takes | Slate and scratch audio | Fast to set up and simple to verify |
| Two cameras and separate audio | Timecode plus slate | Faster matching, with a visible backup |
| Long event with several recorders | Timecode, tested clock workflow, and scratch audio | Many files and long durations make manual matching costly |
Think of the comparison as a budget question: what costs less, a few minutes of sync prep or an hour spent untangling clips? The answer changes with crew size, duration, edit deadline, and how costly a sync mistake would be.
Match Frame Rate and Timecode Settings Before You Roll
Compatible frame rate and timecode settings are the foundation of a reliable field workflow. Common frame rates include 23.976, 24, 25, 29.97, and 30 frames per second; your cameras, recorder, timecode devices, and editing project need settings that make sense together. A mismatch can leave files labeled in ways your software handles unexpectedly, even when the footage itself looks fine.
Drop-frame timecode often trips people up at 29.97 fps. It skips certain frame numbers to keep the displayed time closer to clock time; it does not remove or skip video frames. If a job needs its timeline to track wall-clock duration, that numbering convention can be useful. For another frame rate or delivery format, follow the project requirements rather than choosing a mode by habit.
Before a field interview, write down the project frame rate, timecode rate and mode, and how each recorder receives the reference. Check the camera manual for its actual input or accessory support. Some devices accept timecode at a dedicated port, some require an add-on, and some workflows use an audio channel or software metadata. Support varies by model and firmware, so the familiar connector on one camera does not guarantee another behaves the same way.
Here is a practical setup order for a small crew:
- Set the camera frame rate and confirm the recorder and project match the intended workflow.
- Choose the timecode rate and convention, including drop-frame only where the job calls for it.
- Jam or connect each device using the supported method, then confirm timecode is present.
- Record a short test with a clap, scratch audio, and a few seconds of movement.
- Inspect the files in your editing software to confirm labels and sync behave as expected.
A five-minute check at the location can prevent a long edit-room mystery. Test the entire path, including the camera, recorder, media files, and software that will handle the job.
Protect Long Takes from Clock Drift
Matching timecode at the start does not guarantee perfect alignment at the end of a long recording. Jam sync gives a device a shared reference, but the device may then count time using its own clock. Small differences between device clocks can accumulate, so the longer the take, the more useful it is to understand the gear’s limits and test the actual recording duration.
For example, a ten-minute interview may appear aligned after a clap and remain easy to edit. A two-hour lecture recorded on two cameras and a separate audio recorder gives independent clocks far longer to diverge. If the last section drifts, an editor may need to stretch or reposition audio, split the recording, or find another sync point. A timecode box can save matching work and still leave drift management on the table.
Some workflows keep a continuous reference connected; others jam devices and disconnect them. Which approach fits depends on the equipment, whether cables can stay attached, and how long the shoot runs. Wireless systems and compact boxes can make the setup lighter, including for cameras without built-in timecode inputs, but the exact recording path differs by device. Check whether the camera stores timecode as metadata, records it through an accessory, or uses another supported method.
Do not treat scratch audio as clutter just because you have timecode. Camera scratch audio gives you a waveform to compare and a quick way to catch an obvious offset. At a panel discussion, a clap at the beginning and a second slate after lunch can help reveal whether long-running devices stayed close. The extra cue is a small insurance policy against a clock, cable, or metadata problem.
When a take runs much longer than your usual tests, repeat the test at that length if practical. If it does not fit the schedule, add sync points during recording and tell the editor where they are. It is easier to solve drift with a known reference than to guess from a quiet waveform hours later.
Keep a Slate and Scratch Audio as Your Backup
A slate and camera scratch audio give you a second way to sync when timecode metadata is absent, inconsistent, or misunderstood by the editing software. Timecode can shorten the search for matching clips; a clap produces a visible frame and a sharp waveform peak. Keeping both lets your crew check that the automated match makes sense before you build a whole edit around it.
Picture a location shoot in a concrete stairwell. The slate closes with a sharp clap that appears in the shot and creates a clear spike in the camera’s scratch track. If the recorder missed its jam or a camera wrote an unexpected value, that cue gives the editor something concrete to match. A shouted take number helps too, especially when a crew must describe the problem over a noisy headset.
Use a slate at the beginning of a setup, and repeat it after a lunch break or any time devices reconnect or restart. For interviews, say the scene or take aloud if the slate is off-camera. Do not assume a wireless connection or box indicator proves the final file carries usable timecode; the file in the edit bay is the real test.
A sensible fallback is simple:
- Record scratch audio on each camera when the workflow allows it.
- Slate important takes with a clear, audible clap and readable scene information.
- Check metadata and sync in the target editing software before the crew leaves.
- Keep a note of restarts so post-production knows where a new sync check may be needed.
These backups cost little. On a windy exterior shoot, a slate clap might be partly masked by a gust, so scratch audio and timecode together offer more than one route to the same moment. Redundancy is not fussy; it is how you keep one small equipment hiccup from becoming a full afternoon of manual repair.
Calculate Whether the Setup Pays for Itself
Timecode is worth its cost when the time it saves in editing and the risk it removes outweigh the gear, setup, and checking time. You do not need a large production to benefit, but you do need a reason: many clips, multiple devices, long takes, separate audio, a tight deadline, or recordings that cannot easily be repeated. A slate may be a better investment when the shoot is small and every sync point is obvious.
Say a two-person crew spends twenty minutes setting up and checking timecode before a day with three cameras and a mixer. If it saves the editor an hour of hand matching across many cards, the trade is easy to defend. If the same crew shoots six short one-camera clips, the setup may take longer than waveform syncing. Count the labor on both sides, not just the price of the hardware.
Modern editing software can often sync by timecode or waveform, and multicamera workflows may combine the two. That automation makes compact sync hardware more practical for small crews, but it depends on compatible devices and software correctly reading the recorded information. A promised shortcut that fails during import is no shortcut at all. Test one complete sample job, from recording through the actual edit, before relying on it under a deadline.
Use a quick decision check before booking or packing:
- Count your recording devices: two cameras plus a separate mixer usually need a stronger plan than one camera and one mic.
- Estimate footage volume: many short files can take longer to match than a single planned interview.
- Note take duration: longer independent recordings deserve a clock-drift check.
- Price the deadline: a same-day assembly makes minutes saved in post more valuable.
- Ask what a failure costs: an unrepeatable event needs better sync backups than a rehearsal.
For a small crew, the practical trend is lighter hardware and more automated post, while the fundamentals stay the same: compatible settings, stable clocks, good metadata, and a tested fallback. Start with the simplest setup that meets the job’s needs, then add timecode when repeated editing pain gives you a clear reason.
Frequently Asked Questions
Do I need timecode for a one-camera shoot?
Usually not if you have short takes and can clap or match a clear waveform. It can help when you record separate audio, run long takes, or need a particularly fast edit. A small test will show whether your recorder and camera stay close over your usual duration.
Is timecode the same as genlock?
No. Timecode labels a position in the media timeline, while genlock synchronizes video timing. Matching labels make post-production easier, but cameras can still capture frames at slightly different moments.
Will matching timecode stop audio drift?
Not by itself. A shared start reference helps, but independent clocks can drift during long recordings. Test over the expected duration, use a continuous reference if your workflow supports it, and keep a slate or scratch track for checks.
What frame rate and drop-frame setting should I choose?
Match the cameras, recorder, project, and delivery requirements. Drop-frame timecode at 29.97 fps skips certain frame numbers so displayed time tracks clock time more closely; it does not drop video frames. Check the device manuals and project specification before recording.
Can I sync clips in post if I did not use a slate?
Often, yes, if the files contain consistent timecode or usable audio for waveform matching. A slate and scratch audio still give you a valuable fallback if metadata is missing or software reads it differently than expected. For a one-off shoot, inspect the actual files in your editing application before assuming sync worked.
How do I know timecode sync worked?
Record a short test with every camera and recorder, then inspect the file metadata and alignment in the editing software intended for the job. Compare settings, check a visible clap against the audio, and test the workflow for a representative take length. A device light alone does not prove the recorded media is usable.
Conclusion
Choose timecode when the scale, duration, or deadline of your shoot makes manual sync a real cost. Set compatible formats, check how each device records its reference, and run a short test in the editing software you will actually use. Keep scratch audio and slate important takes so one missing label does not strand a good recording.
Timecode is a map for your media, not a magic hand that makes every camera move together. Pack it when the map saves the crew from getting lost in a mountain of clips.