
TL;DR

Get audio and creator gear delivered free with Prime
- Fast, free delivery on millions of items
- Prime Video, Amazon Music and more included
- Member-only deals all year
Preamp self-noise limits a quiet nature recording when the noise it adds is significant beside microphone self-noise and ambient sound. Compare EIN figures only when their measurement conditions match, then listen for the dominant noise in your own chain. Often, careful placement, wind protection, or a quieter time and location will improve the result more than buying a premium preamp.
A distant bird can sound wonderfully close in your headphones—until you raise the recording and hear a soft hiss behind every call. That hiss may come from the preamp, but it may also come from the microphone, wind, insects, or traffic a kilometer away. On a quiet trail, your recording chain can become audible because the sound you want is so faint.
This guide shows you how to tell when preamp self-noise is the limit, what an EIN specification can and cannot tell you, and how to make a field recording cleaner without chasing a perfect number. You’ll get a practical way to compare noise sources, a short checklist for a dawn recording session, and examples of when an inexpensive recorder is already quiet enough.
Compare preamp EIN only when termination, weighting, gain, bandwidth, and phantom-power conditions match.
A 10 dB quieter independent noise source adds only about 0.4 dB to the louder one, so upgrade the part that actually dominates.
More clean gain raises signal and input-referred preamp noise together; it does not automatically worsen their ratio.
Wind protection, microphone placement, and a quieter recording window can improve quiet nature recordings more than a premium preamp.
Leave digital headroom for sudden outdoor peaks; raising levels later also raises the noise already captured.
Recording Quiet Nature Sound Know the Noise Limit
Preamp hiss matters when it is loud enough to raise the combined noise beside the sound you want. Find the dominant source before changing your gear.
Find what you hear
The noise floor can come from electronics, the microphone, or the outdoor scene.
- Try a silent test with the input appropriately terminated.
- If hiss remains, the preamp or recorder may contribute.
- Wind, insects, leaves, and distant traffic can blend into a noise bed.
- If hiss changes with the microphone connected, the microphone or setting may dominate.
Read EIN in context
A more negative EIN generally means a quieter preamp, but compare figures only under matching conditions.
| Check | Why it matters |
|---|---|
| Input termination | Source impedance affects the measurement |
| Weighting and bandwidth | Change which noise frequencies are counted |
| Gain and phantom power | Must match for a fair comparison |
| Channel measurement | Check whether the figure is for one channel or combined |
Improve the recording at the source
Make controlled changes and listen at a consistent playback level.
Move closer when it suits the natural perspective you want.
Use wind protection when gusts mask quiet details.
Compare the same scene when wind or surrounding noise eases.
Avoid clipping sudden outdoor peaks; raising levels later raises captured noise too.
Find out what is making the hiss before you buy anything
Recording quiet nature sound is limited by the loudest meaningful noise in the whole chain, not automatically by the preamp. The microphone, preamp, recorder, surroundings, and later processing all contribute to what you hear. Start by asking which one is loud enough to matter beside the bird, insect, or stream you want to capture. The answer matters because each source calls for a different fix: a new preamp cannot quiet wind, and a windscreen cannot lower electronic hiss.
Imagine you record a small bird from across a meadow just after sunrise. In headphones, you hear a steady, fine hiss between calls. If it remains in a test recording with the microphone disconnected or replaced by the appropriate input termination, the preamp or recorder may contribute it. If the hiss disappears but a soft shushing remains outdoors, the microphone or environment may be responsible. Don’t mistake distant traffic or leaf movement for electronics; those sounds can blend into a noise bed. A terminated input can help isolate electronic noise, but it does not reproduce the microphone’s electrical behavior or tell you what the complete outdoor chain will sound like.
Noise sources combine by energy rather than by simply adding their decibel numbers. Two independent sources at the same level raise the total by about 3 dB, while a source 10 dB lower adds only about 0.4 dB. This explains why a small improvement to an already quiet component can be hard to hear: if another source dominates, the total barely changes. Conversely, when two sources are close in level, reducing either one can make a useful difference.
A simple comparison helps set priorities. Record the same scene at a fixed position and gain, then listen with headphones at a consistent playback level. Try a second location or move closer to the target sound. Keep changes controlled where possible: changing both gain and microphone position makes it hard to tell what helped. A quieter pause in the wind might make more difference than a new piece of electronics, though moving closer may change the natural perspective you want to preserve.
Popular right now

Sony WH-1000XM4 Wireless Noise-Canceling Headphones, Silver

Roborock Q7 M5+ Robot Vacuum and Mop with Self-Emptying Dock

Bose QuietComfort Headphones (2nd Gen), Wireless Over-Ear Noise-Cancelling Headphones, Eucalyptus Green
As an affiliate, we earn on qualifying purchases.
Know when preamp self-noise becomes the real limit
Preamp self-noise limits a nature recording when its input-referred noise is loud enough to raise the combined noise floor beside the microphone’s output and the desired outdoor sound. That becomes more likely when your sound source is faint or far away, your microphone has low output, or you plan to lift the recording substantially in editing. In practical terms, the preamp matters when its hiss is audible in the finished recording and reducing other sources would not address it.
Low sensitivity by itself does not prove that a microphone will make a noisy recording. It means the microphone produces a smaller voltage for a given sound pressure, so you may need more gain. What matters is how its output compares with the preamp’s input noise, the microphone’s own self-noise, and the ambient sound. A low-output microphone can work well with a quiet preamp that supplies enough clean gain; a sensitive microphone can still pick up plenty of wind and traffic. Sensitivity affects how hard the input stage must work, while self-noise describes noise generated by the microphone itself. Those are related parts of the decision, but they are not interchangeable specifications.
Try a practical example: you set up to capture insects in a meadow, but your headphones reveal hiss only when you turn the preamp high enough to hear the insects clearly. If the hiss also appears in a silent test with the same gain, preamp noise deserves attention. If the hiss is much louder with the microphone connected, the microphone or environment may be dominating. A windscreen can help when low-frequency gusts mask those fine insect sounds, but it cannot lower electronic hiss. You may need to choose between a larger wind protection setup, which can reduce gust noise but add bulk, and a more compact setup that is easier to carry but offers less protection.
Post-production can expose noise that seemed hidden during the session. Raising a quiet passage by 12 dB raises the recorded noise by the same amount. The edit makes both easier to hear; it does not restore a signal-to-noise ratio that the recording never captured. This is why recording a stronger target signal at the source—by choosing a closer position when appropriate—can be more effective than relying on later gain, although distance may be part of the sound’s character.
Read EIN specs without getting fooled by a headline number
Recording quiet nature sound calls for an apples-to-apples look at EIN, or equivalent input noise: an estimate of preamp noise referred back to its input. A more negative EIN value generally indicates a quieter preamp, but the number only helps when you know how the maker measured it. Referring noise back to the input makes preamps easier to compare despite different gain settings, but it does not describe the noise of your microphone or recording location.
Check the input termination, such as a 150-ohm source, and note whether the number is A-weighted or unweighted. Also check gain, measurement bandwidth, phantom-power status, and whether the result describes one channel or a combined measurement. Those details change the result. A-weighting reduces the contribution of very low and high frequencies, so an A-weighted figure can look quieter than an unweighted one. That may suit a comparison focused on perceived noise, but low-frequency noise can still matter in a recording where wind rumble or deep natural ambience is important.
Suppose two product specifications seem to show that one preamp is 3 dB quieter. If one number used A-weighting and the other did not, or if they used different input terminations, the comparison may say more about the tests than the equipment. Even a valid 3 dB difference is a modest change in total noise when other sources contribute: if the preamp is already well below microphone self-noise, you may hear little improvement. Treat manufacturer figures as useful clues, then look for independent measurements made under comparable conditions. A consistent listening test with your own microphone and recorder can also show whether the difference matters in your setup.
Read microphone specifications alongside EIN. Microphone self-noise is commonly stated in dB(A), while sensitivity describes how much output the microphone produces for a known sound pressure. A low-self-noise, sensitive microphone may improve a quiet ambience recording more than a preamp upgrade when the microphone is the main noise source. There is no single EIN cutoff that suits every bird, shoreline, and insect recording because the target level, microphone, and ambient conditions differ. A specification narrows your choices; a field comparison tells you whether the difference is useful for the sound you need.
Use more gain without making a noisy recording worse
Clean gain raises the microphone signal and the preamp’s input-referred noise together; turning up a good preamp does not automatically worsen their relationship. Gain still matters because the preamp’s own noise becomes louder in the output, and a noisy input stage can become obvious when you need a lot of amplification. The practical question is whether the preamp remains clean at the gain you need, not whether the gain knob is set high in isolation.
For example, say you are recording a distant owl at dusk with a low-output microphone. You raise the gain until the calls sit clearly above the recorder’s playback noise, while leaving room for an unexpectedly loud call. If your preamp remains clean at that setting, the gain itself is not a problem. If a steady hiss becomes prominent in the quiet gaps, compare the microphone’s self-noise and the preamp’s input noise before deciding which part to change. More gain can make monitoring easier, but it cannot improve the captured ratio between the owl and noise already present at the input.
Digital peaks do not need to approach 0 dBFS. Modern digital recorders generally provide enough resolution to leave headroom, and outdoor sounds can jump suddenly: a nearby crow, a splash, or a gust against the windscreen. Set a level that captures quiet detail while leaving space for louder peaks. A conservative level protects you from clipping; later digital gain raises the recorded noise too, so don’t expect it to create a cleaner capture. The tradeoff is straightforward: more headroom reduces the risk of a ruined peak, while setting levels too low may make monitoring and editing less convenient.
Keep the chain straightforward. Use a sound cable and reliable connections, turn on phantom power only when needed, and avoid adding extra devices without a clear reason. A loose adapter or a cable running beside a source of electrical interference can add hum or crackle that no EIN figure predicts. Each added device can also introduce another connection or power source to troubleshoot, so keep only what serves the recording.
Make these five field changes before replacing your preamp
Recording quiet nature sound often improves most when you reduce noise at the microphone, in the location, or through better placement. Before buying a new preamp, work through the parts of the setup that can raise the wanted sound relative to the noise around it. These changes improve the recording in different ways, so choose based on what you hear rather than treating the list as a fixed upgrade order.
- Choose a suitable microphone. A sensitive microphone with low self-noise can help capture quiet ambience without demanding as much gain. Check both its sensitivity and self-noise; one number alone does not tell the full story. A more sensitive microphone may make the target signal stronger at the recorder, but it also captures the surrounding sound, so it will not solve a noisy location.
- Move closer when the recording allows it. If a songbird is safe to approach and your recording goal permits, moving nearer can strengthen its call relative to distant traffic and equipment noise. The tradeoff is perspective: the bird may sound more direct and less integrated with its habitat. Respect wildlife and keep the distance appropriate to the species and setting.
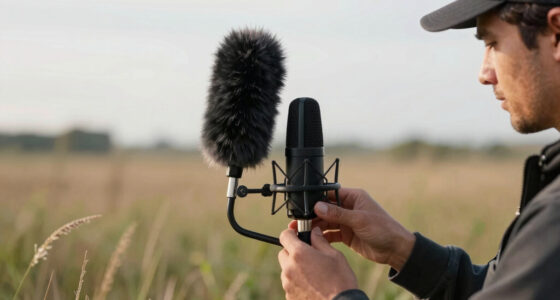
- Block wind and handling noise. Use a suitable windscreen, shock mount, and stable stand. A sudden gust can swamp the soft rustle of wind in leaves, especially at low frequencies. Better protection can reduce rumble before it reaches the microphone, where editing may struggle to separate it from wanted low-frequency sound. Larger protection may be less convenient to carry, so match it to expected conditions.
- Choose a quieter window. Arriving before traffic begins or waiting through a gusty spell can matter more than a slightly lower EIN. Listen for aircraft, insects, people, and nearby water before committing to a long take. A quiet interval can improve the whole recording, though waiting costs time and cannot always be planned around changing wildlife behavior.
- Use enough clean gain and leave headroom. Set the level to capture the quiet sound without clipping louder events, then avoid unnecessary processing that lifts the noise bed. Leave room for unpredictable peaks; a level that is too aggressive risks clipping, while a very low setting may require more gain later without improving the signal-to-noise ratio.
Picture a dawn session beside a pond. You hear frogs, but the microphone stand vibrates whenever a gust hits the reeds, and a road is audible behind the calls. A steadier mount and better wind protection can make the frogs clearer; moving the microphone toward the pond may help further. A quieter preamp only becomes the next step if hiss from the electronics still competes with the recording. Each change has a cost: moving the microphone changes perspective, and stronger wind protection takes space, so keep the sound you want as well as the noise reduction in mind.
Every field situation has tradeoffs. Moving closer changes perspective, a larger windscreen takes up space, and waiting for a quieter window costs time. Choose the change that improves the sound you actually need to deliver. If no field adjustment addresses the hiss and a controlled comparison points to the preamp, then a quieter input stage is a targeted upgrade rather than a guess.
Decide whether your current recorder is quiet enough
Your current recorder is quiet enough when its preamp does not materially raise the total noise beside your microphone, surroundings, and intended sound. Modern digital recorders and interfaces often have low enough preamp noise that wind, microphone self-noise, placement, or distant activity becomes the bigger limit. “Quiet enough” is therefore a result for a particular recording setup, not a universal property of a device.
That broad pattern does not mean every recorder performs the same way. Compact devices, high-gain settings, battery-powered equipment, and limited input stages can behave differently from a larger interface. The result can also depend on the microphone and the level you need. Treat a promising specification as a starting point, not a guarantee for a windy hillside or a very quiet woodland. Equipment choices also involve practical tradeoffs: a larger recorder may provide useful inputs or controls but add weight, while a compact unit may be easier to carry but offer less flexibility.
Try a repeatable field check. Record a quiet passage with your usual microphone and settings, then record a brief test with the input terminated according to the recorder’s instructions. Don’t connect an improvised termination or short a microphone input; use a suitable test method and follow the equipment maker’s guidance. Compare the files at the same playback level. The terminated test gives you evidence about the electronics, while the microphone recording includes the microphone and the place. Keep gain and playback level consistent, or a louder comparison can seem noisier simply because it is louder.
For instance, a recorder may sound clean in a room but reveal more hiss with a low-output microphone in a distant bird setup. That does not make the recorder useless; it tells you that the particular combination asks more of its input stage. If the difference is small beside the wind and birds, a premium preamp may not improve the finished recording much. If the preamp noise is clearly audible after other sources are controlled, a quieter recorder or external preamp may help, with extra cost, weight, and connections to manage. Spend first where you can hear a real change.
Frequently Asked Questions
What does EIN mean on a preamp specification?
EIN means equivalent input noise: an estimate of a preamp’s noise referred back to its input. A more negative number generally means less noise, but compare the test conditions too, including weighting, input termination, gain, and bandwidth.
How quiet should a preamp be for nature recording?
There is no single EIN value that works as a cutoff for every recording. The preamp is quiet enough when it does not materially raise the combined noise beside your microphone, surroundings, and target sound. A distant owl recorded with a low-output microphone may need a different setup from a nearby stream.
Will more gain make my recording noisier?
Clean gain raises the signal and the preamp’s input-referred noise together, so gain alone does not automatically worsen their relationship. It can make an existing noise floor easier to hear, particularly when you need a lot of gain or lift the recording further in editing.
Should I upgrade my microphone or preamp first?
Find out which source dominates the noise in your chain. If microphone self-noise is louder than preamp noise, a quieter preamp may change very little. With a low-output microphone that needs substantial gain, a quiet preamp with enough clean gain may help more.
Why does my recording hiss after I raise it in editing?
The recording already contains some noise, whether from the microphone, preamp, recorder, or surroundings. Raising the level makes that noise louder along with the sound you want. Editing cannot restore detail that the noise already masks.
Does recording at 24-bit reduce microphone or preamp noise?
No. A higher bit depth offers more digital dynamic range and more room to record conservatively without sacrificing as much digital resolution. It does not reduce acoustic noise, microphone self-noise, or analog noise from the preamp.
Can noise reduction clean up a quiet outdoor recording?
Noise reduction can lower steady hiss or hum, though strong processing may create audible artifacts. It cannot reliably restore detail that wind, hiss, or traffic has already masked. Good placement and careful capture give you more useful material to work with.
Conclusion
Before replacing your preamp, find out what you hear between the bird calls: microphone self-noise, electronic hiss, wind, or distant traffic. Compare the whole chain, then change the part that dominates. A quiet dawn recording is built one practical choice at a time—good placement, steady support, clean gain, and a patient ear.