
TL;DR

Get audio and creator gear delivered free with Prime
- Fast, free delivery on millions of items
- Prime Video, Amazon Music and more included
- Member-only deals all year
Door gaps and window leaks often respond to simple fixes: replace worn weatherstripping, add a door sweep, use removable rope caulk or window film seasonally, and caulk small stationary cracks. Find the leak first, keep drainage paths and vents clear, and treat persistent condensation or damaged frames as separate problems. The biggest gain is often a room that feels less drafty; energy savings vary with the leak, climate, and home.
On a windy evening, a thin draft can make the chair beside your window feel like the coldest seat in the house. You might reach for a roll of sealant, but the gap could be at the sash, around the frame, or beneath the door—and each spot needs a different fix.
This guide shows you how to find the leak before you spend money, then match it with an affordable repair: weatherstripping, a door sweep, removable rope caulk, window film, or caulk for a stationary crack. You’ll also learn what not to seal, why condensation deserves attention, and what kind of comfort and energy savings to expect.
The goal is simple: make rooms feel steadier without making a window hard to open or sending water toward a place it can’t drain. A few inches of the right material can help. A misaligned door or damaged frame may need more than a quick patch.
Use a tissue strip and check the sash, frame, and wall joint separately before buying material.
Replace worn weatherstripping on moving edges and use a door sweep for a draft beneath an exterior door.
Reserve caulk for stationary cracks; use removable rope caulk or window film for suitable seasonal leaks.
Keep weep holes, drainage channels, vents, and moving parts clear, and check that doors and windows still latch.
Expect comfort gains first; energy savings vary, and persistent condensation or damaged frames need separate attention.
Door Gaps and Windows: Cheap Isolation Fixes That Help
Find the draft before buying a seal. Match the fix to the gap, keep openings working safely, and set realistic expectations: comfort often improves before the energy bill does.
Follow the moving air
On a cool or windy day, close and latch the opening. Slowly check the edges and threshold with your hand or a strip of tissue. A flutter shows moving air, but you still need to identify which boundary is leaking.
Fans and exhausts can pull air through cracks. Turn them off for a second check. If a door rubs or a window will not latch, adjustment may be needed before adding material.
One gap, one suitable fix
Use seals on edges that open and close. Save caulk for fixed joints. Product thickness, surface, exposure, and instructions all matter.
| Leak location | Common fix | What to watch for |
|---|---|---|
| Movable sash or door edge | Replace worn weatherstripping | Choose a thickness that lets the latch close normally. |
| Bottom of exterior door | Add a door sweep or threshold seal | Keep the door moving smoothly across the floor. |
| Small seasonal window gap | Removable rope caulk or window film | Follow directions; keep drainage and safe operation in mind. |
| Fixed crack between frame and wall | Apply suitable caulk | Use a product made for the surface and indoor or outdoor exposure. |
Weatherstripping
Replace cracked, flattened, or missing material. Remove loose pieces, prepare the surface as directed, then test the latch. A seal that forces the door shut is too thick.
Caulk
Seal small stationary cracks between compatible surfaces. Never caulk a moving sash, weep hole, drainage channel, vent, or part that needs to move.
Keep the repair small and functional
Work in order: a little checking can prevent a seal that blocks a latch, catches a rug, or hides a larger repair.
- 01
Find
Use touch or tissue to locate the draft.
- 02
Separate
Check sash, frame, wall joint, and threshold.
- 03
Choose
Pick a product suited to that exact gap.
- 04
Apply
Follow preparation and temperature directions.
- 05
Retest
Open, close, latch, and check airflow again.
Do not cover weep holes, drainage channels, vents, or moving parts. If seasonal film or rope caulk is used, follow its instructions and preserve safe operation and any required escape route.
Draft reduction is the first signal
Air sealing can make a seat near a window or a room by an exterior door feel less chilly. Energy savings depend on the leak size, climate, home, and heating or cooling use; a dramatic bill reduction is not guaranteed.
Feel the difference
Less moving air can make temperatures feel steadier, especially near the leak.
Watch condensation
Persistent condensation can point to humidity, cold surfaces, or ventilation issues. Sealing alone may not solve it.
Know when to stop
Damaged frames, major leaks, or openings that will not latch need separate attention; a patch cannot straighten a warped frame.
Keep appropriate ventilation available and do not block vents. Infrared cameras or professional blower-door tests can locate less obvious leaks, though visible gaps often need only a careful basic check.
Find the draft before you buy a seal
Door gaps and windows are easiest to fix when you first identify where air moves and where the opening starts. On a cool or windy day, close and latch the door or window, then slowly feel around its edges and threshold for a cold stream. A strip of tissue can flutter where your fingers feel nothing, making a small leak easier to locate.
Check each boundary separately: where the movable sash meets the frame, where the frame meets the wall, and where the door meets its threshold. If you only feel air at one corner of a window, the sash may not be closing evenly; if the whole frame edge feels cold, the crack may sit between frame and wall. This distinction matters because caulk on a moving sash can glue the window shut, while new weatherstripping won’t repair a loose frame.
Try the same check around a studio or spare room door while someone holds a tissue strip near the bottom. If it lifts as a hallway fan runs, the gap may be letting conditioned air escape. Turn off fans and exhausts for another check, since they can pull air through cracks that otherwise feel quiet.
Before buying anything, look at the latch, hinges, and frame alignment. A door that rubs at the top or a window that won’t latch may need adjustment. Sealing material can cover a symptom for a while, but it won’t make a warped frame straight.
Popular right now

Samsung 42-Inch Class OLED S90F 4K Smart TV (2025)

Ninja CREAMi 7-in-1 Ice Cream Maker, NC301

Vitamix Propel Series 750 Professional-Grade Blender, 4 Programs, Black
As an affiliate, we earn on qualifying purchases.
Match the fix to the gap you found
The cheapest useful fix depends on whether the leak sits on a moving edge, at a threshold, or in a stationary crack. Use weatherstripping where a door or window opens and closes, a sweep below an exterior door, and caulk only where two fixed surfaces meet. Removable rope caulk and window film can help with seasonal leaks when you want a winter seal you can later remove.
| Leak location | Common fix | What to watch for |
|---|---|---|
| Movable sash or door edge | Replace worn weatherstripping | Choose a thickness that still lets the latch close |
| Bottom of exterior door | Add a door sweep or threshold seal | Keep the door opening smoothly across the floor |
| Small seasonal window gap | Use removable rope caulk or window film | Follow product directions and leave an escape route if needed |
| Fixed crack between frame and wall | Apply suitable caulk | Pick a product for the surface and exposure |
For example, a rented room with a drafty sash may suit removable rope caulk, while a permanent crack between a wood frame and interior trim calls for a compatible caulk. A stiff foam strip that stops a door from latching is the wrong size, even if it fills the gap.
Check the package instructions for surface prep, temperature range, and whether the material is intended for indoor or outdoor use. Materials differ, and the right product is the one that seals the specific joint while letting the opening work as intended.
Replace weatherstripping without jamming the latch
Weatherstripping seals the edges that meet when a door or window closes, and it works best when the material fills the gap without forcing the hardware. Measure the opening and inspect the existing strip before you buy: cracked, flattened, or missing material often points to the problem. If the door has to be shoved hard to latch, a thicker strip may make that worse.
Remove loose pieces and clean the surface as the product directions advise. Apply the new strip along the contact edge, then close the door and test the latch. A studio entrance that whistles during a winter session may need a small section replaced along the hinge side, not a thick cushion wrapped around the entire frame.
Weatherstripping comes in different shapes and materials, so the gap width, surface, and frequency of use matter. A frequently opened door needs a durable seal that won’t peel away under repeated contact. A rarely opened window may tolerate a softer strip, provided it still opens safely when needed.
Test the result with the tissue again. If the latch clicks normally and the tissue stops fluttering, you’ve likely improved the seal. If the door binds or the draft continues at one corner, check alignment and the frame rather than layering more material over the first strip.
Stop the cold stream under an exterior door
A door sweep or threshold seal is often the simplest fix for a draft at the bottom of an exterior door. It closes the open strip where cold air can move across the floor, which is why your ankles may feel chilly even when the room’s thermostat reads comfortably. Small gaps can make rooms feel drafty long before they cause an obvious change on an energy bill.
Check the gap across the full width of the door, since a sloped floor or sagging door can leave one corner wider than the other. Choose a sweep that touches the floor or threshold lightly enough for the door to swing without scraping. For instance, if a recording room door drags over a rug after you install the seal, it may be too low or the rug may be crowding the opening.
Install the sweep according to its directions, then open and close the door several times. Make sure the latch catches and the seal stays in contact when the door is shut. A loose sweep can rattle or catch on the threshold, turning a quiet studio entrance into an irritating scrape between takes.
If a wide or uneven gap remains, inspect the hinges and frame. A sweep can’t compensate for a door that has dropped substantially or a damaged threshold. When the door is badly out of square, fixing the alignment will usually produce a more lasting result than adding a larger flap.
Seal seasonal window leaks and frame cracks safely
Removable rope caulk or window film can help with seasonal leaks, while regular caulk suits small, stationary cracks between a frame and wall. The key difference is whether the joint needs to move: a sash slides or swings, but the crack between trim and wall usually stays fixed. Choosing by location lets you seal the draft without making the window unusable.
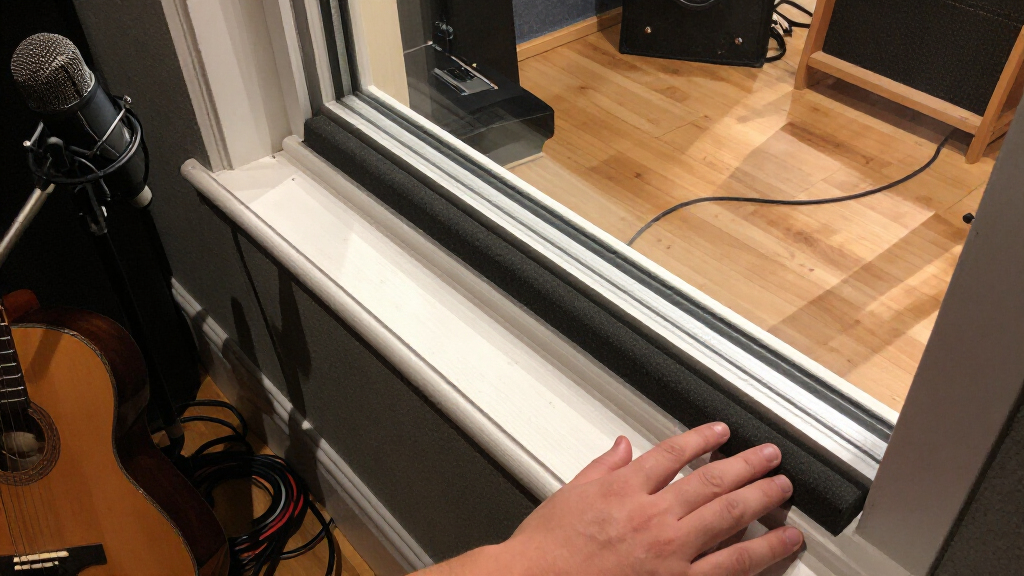
Rope caulk presses into a narrow gap and can be removed later, which is handy for a cold season in a rental or workroom. Window film creates a temporary layer over the interior window area; install it as the manufacturer directs, and leave the window accessible if it serves as an exit. If you only see a fine crack at the interior trim, use caulk suited to the material and exposure instead.
Air leaks around a frame may come from the joint between the frame and wall, but look for signs of moisture or damage before covering it. Exterior cracks face rain and temperature swings, so an interior-only product may not be suitable there. If a window frame feels soft, the paint is bubbling, or water stains recur, investigate the cause before sealing the surface.
Keep weep holes, drainage channels, and moving hardware clear. Those openings let water escape from parts of many window systems; plugging them can trap moisture. Follow the product label and local building guidance, and test that the window still opens, closes, and latches safely after any work.
Treat condensation as a moisture clue, not a draft
Sealing a draft can make a room more comfortable, but persistent condensation usually calls for a closer look at humidity, cold surfaces, and ventilation. Water beading on the inside of a window is not proof that the window leaks air; it can form when warm, moist indoor air touches cold glass. A seal may reduce incoming air while leaving that moisture pattern unchanged.
For example, after a long music session with several people in a small room, the windows may fog because warm breath raises indoor humidity. Running a bathroom fan elsewhere, drying laundry indoors, or cooking without an extractor can also add moisture. If the glass stays wet day after day, look for the moisture source and consider whether the room has enough ventilation.
Do not block vents or assume sealing alone will solve a mold or damp problem. Ventilation and air sealing work together: reducing unwanted leaks can help control comfort, but planned ventilation still needs to function. Wipe occasional condensation and monitor the area; recurring wet patches, musty smells, or damaged surfaces deserve investigation.
A draft and a moisture problem can share a window, but they are not the same problem. Seal the air leak you can identify, and track persistent damp separately.
If you seal a window for winter, follow the product instructions and avoid covering required vents or emergency exits. A warmer room is useful; a room that can’t exchange air appropriately or open when needed creates a different problem.
Expect a warmer corner, not a guaranteed smaller bill
Low-cost sealing can cut an uncomfortable draft and reduce wasted heating or cooling, but it cannot promise a fixed bill reduction. Savings depend on the size and number of leaks, local climate, energy prices, and how the rest of the home performs. The first result you notice may be that the chair by the window feels less like a bus stop in January.
That difference still matters in a working room. If cold air no longer slides under the door and across your feet, you may be able to work comfortably at a lower thermostat setting. But if the main heat loss comes from an uninsulated wall or an inefficient window, a new sweep won’t transform the room’s energy use.
Simple checks often find visible door and window leaks. For less obvious paths, an infrared camera can reveal cooler surfaces, while a professional blower-door test measures how air moves through a building under pressure. Those tools can help when drafts persist or you’re planning larger repairs, but they may be unnecessary for an obvious gap you can feel and see.
Make one repair at a time and check the same spot afterward. If the tissue no longer moves but the room still feels cold, the surface itself may be cold or another leak may remain. These fixes are sensible comfort improvements, not substitutes for repairing damaged frames or upgrading a failing window.
Use this five-step check before you start
A short, ordered check helps you choose a small fix that actually matches the leak. Spend a few minutes with the door or window closed, and note where air moves, where water could drain, and whether the hardware works. That gives you a clearer plan than buying a multipack of seals and trying them everywhere.
- Check on a cool or windy day. Feel around the sash, frame, door edges, and threshold.
- Use a tissue strip. Watch for movement at one boundary at a time.
- Test the latch and alignment. A misaligned opening may need adjustment before sealing.
- Choose by location. Use weatherstripping on moving edges, a sweep at the door bottom, removable material for seasonal window gaps, and caulk on fixed cracks.
- Retest and inspect. Confirm the opening still works, the leak is reduced, and drainage paths remain open.
Imagine a draft at the lower corner of a kitchen window. The tissue flutters only where the sash meets the frame, and the latch closes firmly; weatherstripping is a reasonable first try. If instead the whole frame-to-wall seam is cracked, the right repair is for that fixed joint.
Keep notes on what changed, especially if you’re sealing more than one room. A simple before-and-after check helps you avoid stacking materials and gives you a useful record if the problem returns when the weather changes.
Frequently Asked Questions
How can I tell whether a draft comes from the window, frame, or wall?
Close and latch the window, then check the sash edge, frame perimeter, and trim-to-wall joint separately with your hand or a tissue strip. Air at the sash points toward the movable seal; air at the frame edge may point to a fixed joint. A single check can locate moving air, but it may not reveal the underlying cause if the frame is misaligned.
Should I use caulk, weatherstripping, rope caulk, or window film?
Use weatherstripping where a door or window moves against its frame, and caulk for a small stationary crack. Rope caulk and window film can suit seasonal window leaks when installed as directed. Keep drainage openings clear and choose material for the surface and exposure.
What is the cheapest fix for a drafty exterior door?
If air comes under the door, a suitable door sweep or threshold seal is often a low-cost first fix. If the leak runs along the sides or top, inspect the weatherstripping instead. Check that the door latches and swings freely after installation.
Can I seal windows for winter without making them unusable?
Removable rope caulk or window film can provide a seasonal seal, but follow the product directions and keep any required exit window accessible. Weatherstripping can reduce drafts around an operable sash while still allowing it to open. Test the window’s latch and movement after fitting a seal.
Will sealing gaps noticeably lower my energy bills?
It can reduce wasted heating or cooling, but the amount depends on how large the leaks are, your climate, and the rest of the home. Many people notice less draft and more even comfort before they can identify a clear bill change. Sealing small gaps won’t repair a damaged frame or replace an inefficient window.
Could sealing windows cause condensation or mold?
Condensation can come from indoor humidity meeting cold glass, so sealing a draft may not stop it. Keep vents and drainage paths clear, and don’t treat sealing as a fix for persistent damp or mold. Recurring moisture, stains, or musty smells call for investigating humidity, ventilation, and the window condition.
Conclusion
Start with the moving air, not the shopping aisle. Find the exact gap, match the seal to that joint, and test the opening afterward; a modest repair can make a cold corner feel like part of the room again.
If damp keeps returning or a frame is damaged, investigate beyond the seal. Your best cheap fix is the one that stops the draft and still lets the window drain, open, and do its job.