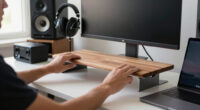
TL;DR

Get audio and creator gear delivered free — and shop member deals
- Fast, free delivery on millions of items
- Access to Prime Big Deal Days deals on October 6–7
- Prime Video, Amazon Music and more included
A well-designed studio desk enhances your workflow by balancing depth for equipment placement, adequate rack space, and smart cable routing. It’s not about size but how well the layout supports your gear and space.
Ever tried working on a cramped desk with wires tangled like spaghetti? Or struggled to reach your gear without stretching into awkward positions? Your studio desk isn’t just furniture; it shapes your sound, comfort, and workflow. The right design can make or break your mix.
This guide cuts through the hype to show you what matters—depth, rack space, and cable routing—so you build or choose a desk that truly supports your studio, no matter your budget. Let’s get practical and make your workspace work for you.
Studio Desks for Audio Work
A desk is part of the signal chain. Its depth affects reach and reflections, its rack bays shape equipment access, and its cable paths determine whether maintenance takes minutes or hours.
Choose reach, not maximum surface area
Depth must support the display, controller, keyboard and monitors while keeping frequently used controls inside a comfortable reach zone. Room dimensions and speaker clearance matter more than a bigger number.
The depth spectrum
Use this as a planning range, then validate it with your actual gear.
Test the reach envelope
Controls used every session should be accessible without leaning, raised shoulders or extended wrists. Build a cardboard mock-up before committing.
Protect the listening geometry
Keep monitors and the listening position in an approximately equilateral triangle, with tweeters near ear height.
Control desktop reflections
Large flat surfaces can create early reflections and comb filtering. Stands, angled surfaces and smaller work areas can reduce the effect.
Capacity is only useful when gear stays accessible
Plan around usable depth, rail position, heat, weight and rear access—not just the number of available units. Leave expansion space so the desk can evolve with the studio.
A balanced 10U bay
An illustrative project-studio layout with ventilation and future capacity built in.
| Decision | Integrated bay | Rolling rack | Check before buying |
|---|---|---|---|
| Immediate access | ✓Excellent | ~Position-dependent | Can you reach every control? |
| Heat isolation | ~Needs airflow | ✓Easier to separate | Are vents and fans unobstructed? |
| Rear access | ~Desk-dependent | ✓Usually easier | Can cables be changed in place? |
| Flexibility | ~Fixed position | ✓Repositionable | Will the room layout change? |
| Acoustic impact | ~May add reflections | ✓Can move off-axis | Do bays block speakers or screens? |
Measure the chassis
Standard rack width does not guarantee enough depth for long converters, computers or rear connectors.
Plan for the weight
A populated rack can exceed 100 pounds. Confirm the structure, fasteners, rails and floor can support it.
Keep spare units
Unused space supports upgrades, ventilation and easier maintenance without forcing an immediate furniture change.
Give every cable a deliberate path
Smart routing reduces clutter, protects connectors and makes faults easier to find. Separate cable families, preserve bend radius and leave service loops for maintenance.
Build in access
Rear trays, open-backed rack bays, removable panels and well-placed grommets keep connections reachable without moving the desk.
Respect bend radius
Leave clearance for large connectors and use modest service loops. Tight bends and compressed cables increase wear and failure risk.
Make faults visible
Labels at both ends and grouped cable paths make troubleshooting, upgrades and equipment swaps substantially faster.
Design for the whole system
The best studio desk is not necessarily the largest. It is the one that keeps your body neutral, your monitors correctly placed, your equipment cool and your connections easy to maintain.
How to Pick the Perfect Desk Depth for Your Studio
Studio desks need to strike a balance. About 30–36 inches deep suits most setups, giving enough room for monitors, screens, and controllers without feeling cramped. If your desk is too shallow—say under 28 inches—you’ll struggle to fit a large monitor or reach comfortably across your workspace.
Imagine a producer with a 32-inch ultra-wide monitor and a control surface. A 36-inch depth keeps everything within arm’s reach, reducing neck strain and keeping your eyes aligned. Too deep, and you risk placing screens beyond comfortable viewing distance, causing fatigue.
The depth of your desk directly influences your workflow efficiency and physical comfort. A shallow desk forces you to lean forward or stretch, which can lead to neck and back strain over time. Conversely, an overly deep desk might cause you to lean back or crane your neck to see monitors clearly, also leading to discomfort. The key is to find a depth that allows you to see and reach all essential controls without sacrificing ergonomics. The right depth also impacts your acoustic environment; a deeper desktop can reflect sound waves, creating early reflections that muddy your mix or cause comb filtering, which can distort audio clarity. Therefore, selecting a depth involves considering both ergonomic comfort and acoustic implications, ensuring your workspace supports both physical health and sound quality.
Monitor placement is key. Speakers should form an equilateral triangle with your listening position, with tweeters at ear level. A large reflective desktop can bounce sound, creating early reflections that muddy your mix. Small angles, monitor stands, or acoustic treatment help tame this.
Remember: Room size matters. A deep desk in a tiny room might block sound flow or feel overwhelming. Measure your space, sketch your layout, and test with cardboard templates for the best fit.
As an affiliate, we earn on qualifying purchases.
Maximize Your Space with the Right Rack Capacity
Studio desks with integrated racks keep gear accessible, but not all racks are created equal. Rack space is measured in units—each 1U is 1.75 inches tall. Think about what gear you currently own and what you might add—leave room to grow.
For example, a typical project studio might need 8–12U of rack space. But if you’re running a lot of analog gear, consider deeper racks and more units. Also, check if your desk can handle the weight—full racks can tip the scales at over 100 pounds.
Recessed rails protect knobs but make reaching controls trickier. Angled bays improve visibility but can reflect sound or block views of your screens. Ventilation is crucial for power amps and computers—overheating can kill your gear fast.
Some desks limit rack depth or have fixed bays, so measure your equipment before buying. Sometimes, separate rolling racks are smarter—they keep noise and heat away, and you can reposition them easily.
Understanding rack capacity isn’t just about fitting gear; it’s about balancing accessibility, airflow, and future expansion. Overloading racks can make maintenance difficult and increase the risk of accidental damage. Conversely, too much unused space might lead to inefficient use of your studio footprint. Think about the type and size of your gear, and plan for some extra room to accommodate upgrades or new equipment, ensuring your workflow remains smooth and your gear stays protected.
Choosing the right rack capacity is crucial because it affects not only physical organization but also your workflow efficiency and equipment longevity. A rack that’s too tight can make maintenance a chore and increase the risk of accidental damage or overheating. On the other hand, excessive unused space can lead to clutter, making your studio feel disorganized and reducing accessibility. Therefore, assess your current and future gear needs carefully, and opt for a rack size that offers a balance—ample space for expansion, good airflow, and ease of access—so your studio remains functional, safe, and adaptable over time.
audio workstation desk with rack space
As an affiliate, we earn on qualifying purchases.
As an affiliate, we earn on qualifying purchases.
Master Cable Routing for a Clutter-Free Studio
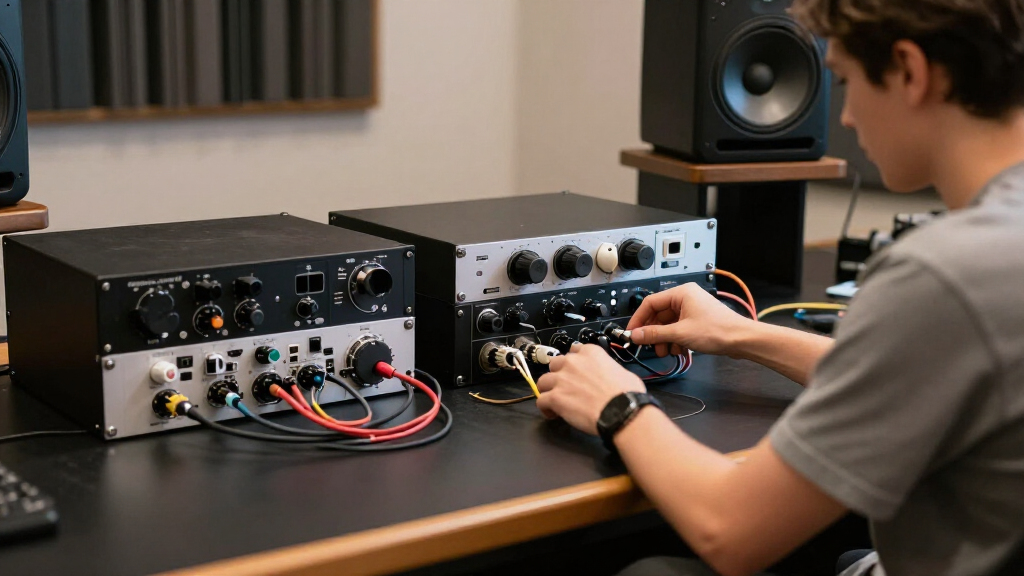
Good cable management isn’t just tidy—it’s essential. Messy cables can cause noise, trip hazards, and make troubleshooting a nightmare. Features like rear trays, grommet holes, and channels keep wires organized.
For example, run power and audio cables separately. Crossing cables at 90 degrees reduces electromagnetic interference, improving your sound clarity. Use labels at both ends—when you’re troubleshooting or expanding, they save hours.
Reel excess cable into modest loops—tight coils cause wear and tear. Reusable ties and tie-down points keep things neat. Make sure your desk has enough clearance for large connectors and bend radii—cramped cables cause damage over time.
Think about accessibility. You want to reach your connections easily for maintenance or upgrades without moving everything. And keep heavy power cords away from sensitive audio lines to prevent hum and noise issues.
Effective cable routing impacts your studio’s reliability and safety. Properly organized cables reduce electromagnetic interference, which can introduce unwanted noise into your audio signal. It also minimizes accidental disconnections or damage from pulling or tripping over loose wires. Planning your cable pathways, using cable sleeves or channels, and labeling connections can significantly streamline your workflow, saving you time and frustration during setup or troubleshooting.
music production desk with depth adjustable
As an affiliate, we earn on qualifying purchases.
As an affiliate, we earn on qualifying purchases.
Conclusion
Your studio desk isn’t just a surface—it’s the foundation of your creative workspace. Focus on the right depth, enough rack space, and smart cable routing. These details make a real difference in your comfort, workflow, and sound.
Remember: Measure twice, think about future needs, and pick materials that last. A well-planned desk turns your studio into a powerhouse of productivity and inspiration.
studio monitor desk with cable routing
As an affiliate, we earn on qualifying purchases.
As an affiliate, we earn on qualifying purchases.
Fall Picks
fall essentials
As an affiliate, we earn on qualifying purchases.