
TL;DR

Get audio and creator gear delivered free with Prime
- Fast, free delivery on millions of items
- Prime Video, Amazon Music and more included
- Member-only deals all year
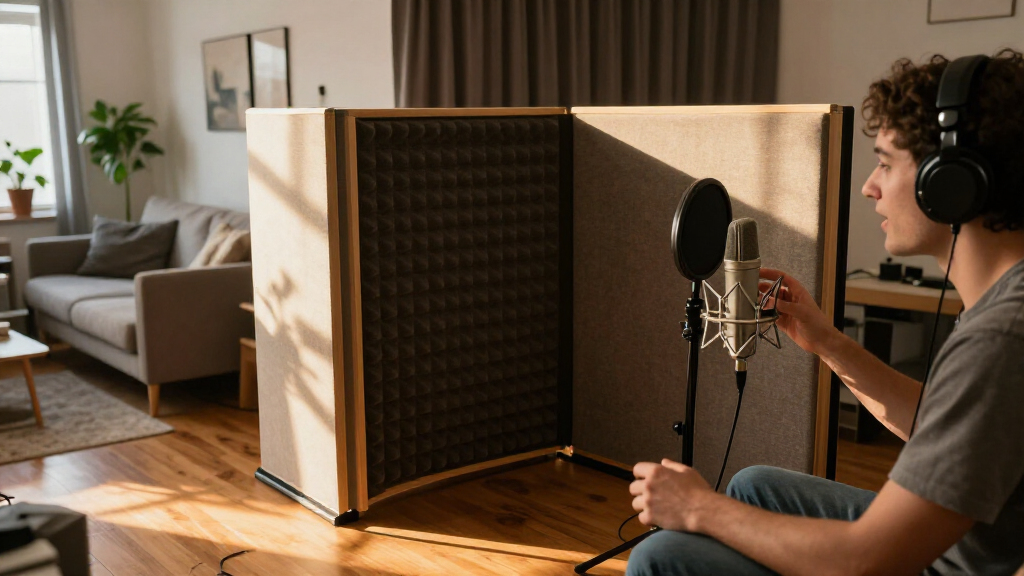
A vocal booth encloses the microphone and performer to reduce room reflections, while a treated corner improves a recording position without closing it off. Neither automatically blocks neighbors or traffic, since acoustic treatment absorbs reflections and sound isolation requires substantial airtight construction, mass, and separation. Start by recording and listening for the problem; for many apartments, a carefully placed microphone and thick, movable absorption solve more for less than a compact booth.
A vocal booth can make your apartment voiceover sound more controlled, but it will not necessarily make it quieter. That distinction can save you money: absorbing room reflections and blocking outside noise are different jobs, and many compact booths handle the first better than the second.
This guide compares a vocal booth with a treated corner for everyday apartment recording. You’ll learn how to spot room echo versus background noise, what you can improve with movable treatment, when an enclosure may be worth the space, and how to compare both setups before committing. The goal is a natural, repeatable recording that fits your room and your budget.
For example, if your takes sound hollow but the apartment is quiet, a better recording position and thick absorption may help more than an enclosure. If delivery trucks rumble through your window, foam around the microphone won’t stop them. Start with what the microphone actually hears.
A booth can reduce reflections but does not automatically block traffic, neighbors, plumbing, or other building noise.
Start with a short recording of silence and speech to tell steady background noise from room echo.
Treat the reflection paths around your microphone with thick, movable absorption; don’t assume a room corner is the best position.
Move or schedule around noise sources before buying more treatment or replacing a usable microphone.
Compare a booth and treated corner with the same microphone, speaking distance, passage, and playback level.
Apartment voiceover • Recording guide
Vocal Booth vs Treated Corner for Apartment Voiceover
A booth encloses the performer and microphone to control nearby reflections. A treated corner improves a recording position while staying open to the room. Start with what the microphone actually hears, then choose the setup that fits your space, comfort, and budget.
At a glance
Choose for the problem you hear
For many apartments, a carefully placed microphone and thick, movable absorption are the practical first move. A booth can make a position more consistent, but it will not necessarily make the recording quieter.
A booth can reduce reflections; it does not automatically block traffic, neighbors, plumbing, or other building noise.
Record silence and speech to distinguish steady background noise from an echo after words.
Use thick, movable absorption along reflection paths. A room corner is not always the best spot.
Move or schedule around noise sources before buying more treatment or replacing a usable microphone.
Test both setups with the same mic, distance, passage, and playback level.
The practical comparison
What each setup can—and cannot—do
Neither option guarantees a better recording. Results depend on the room, voice, microphone, placement, and build quality.
| Need | Vocal booth | Treated corner |
|---|---|---|
| Reduce nearby reflections | Can work well when sized and treated appropriately. | Can work well with thoughtful placement and thick absorption. |
| Block neighbors or traffic | Limited unless built for real sound isolation. | Usually limited; porous materials do little to stop outside sound. |
| Fit a rental | Portable models avoid permanent changes but may be bulky. | Freestanding panels and removable fixtures are flexible. |
| Comfort and ventilation | Compact enclosures can trap heat; ventilation may add noise. | Usually easier to ventilate and use the space for other tasks. |
| Keep the voice natural | Small, poorly treated interiors can sound boxy or overly dead. | Easy to adjust, though room reflections and bass buildup can remain. |
| Repeatable position | Can provide a consistent enclosed recording spot. | Can be repeatable if the mic and movable treatment stay marked in place. |
First, identify what you hear
Room echo and background noise need different fixes
A steady sound during silence points toward a noise source. A hollow tail, flutter, or coloration after speech points toward reflections in the room.
Hollow, papery, or fluttering voice
Nearby walls, ceilings, desks, and floors send early reflections back to the microphone. Try a different position and add thick absorption where the reflection reaches. Foam, blankets, curtains, and panels can soften reflections, but thin materials may have little effect.
Hiss, hum, traffic, or plumbing
Find what reaches the mic: a computer fan, window, shared wall, ventilation, or household activity. Turn off or move devices where possible, record at a quieter time, and use microphone direction and distance thoughtfully.
Treatment is not soundproofing
Reliable isolation generally needs airtight construction, mass, and separation from the building structure. A lightweight portable booth is unlikely to deliver the isolation many people expect from “soundproof.”
A simple listening test
Build a baseline before you buy
Use your usual microphone and speaking distance. Listen on headphones, and keep each comparison at a similar playback level.
Record
Capture about 20 seconds of silence, then read a short passage in your normal voice.
Listen
Hear a steady hiss or hum? Note the source. Hear a hollow tail after words? Note the reflection.
Move
Try a practical position away from windows, hard corners, shared walls, and large reflective surfaces.
Adjust
Add one thick movable panel near the performer or behind the mic, then record the same passage again.
Flexible treatment
Make a recording position, not a foam cave
A treated corner works best when you choose a quiet spot and tame the strong reflections around it. Thick broadband absorption near the mic and behind the performer can make the voice more direct without enclosing it in a tiny space.
Movable, adjustable, rental friendly
Freestanding panels, heavy curtains, and removable fixtures can help you test reflection paths without permanent construction. Move the mic and performer together, keep their distance consistent, and listen after every change.
Natural and clear beats simply “dead”
Thin foam may leave low frequencies and strong reflections untreated. A corner can build up bass, and a desk can throw a sharp reflection into the mic. Place treatment by listening rather than covering every wall.
When a booth may be worth it
Consistency can justify the space
Consider an enclosure if you need the same controlled position session after session and room reflections remain difficult to manage. Check its interior size, treatment, ventilation noise, comfort, and how it performs with your own voice before committing.
Repeatable takes in a busy home
A properly designed booth may help keep nearby reflections consistent and can shield the mic from some nearby household sound, depending on its construction.
“Soundproof” means no traffic
Foam around a microphone will not stop a bus rumble through the window. A booth may reduce some reflections while leaving low-frequency noise in the recording.
Compare before committing
Make the same passage in both setups with the same microphone, distance, and playback level. Choose the take with the clearest, most natural voice—not merely the one that sounds darker or quieter.
Know what each setup can fix before you spend
A vocal booth is an enclosed space designed to reduce room sound around a microphone, while a treated corner is a recording area improved with acoustic materials that stays open to the room. Both can reduce reflections when they’re set up well; neither automatically makes your apartment quiet. That difference matters when you’re choosing what to buy.
| What you need | Vocal booth | Treated corner |
|---|---|---|
| Reduce nearby reflections | Can work well if it has enough space and suitable treatment | Can work well with thoughtful placement and thick absorption |
| Block neighbors or traffic | Limited unless built for real sound isolation | Usually limited |
| Fit a rental apartment | Portable models avoid permanent changes but can be bulky | Freestanding panels and removable fixtures are flexible |
| Manage comfort | Heat and ventilation can be a challenge | Usually easier to ventilate and use for other tasks |
| Keep the voice natural | Risk of boxy sound in a small, poorly treated enclosure | Room reflections and bass buildup remain possible, but the space is easier to adjust |
Imagine you record in a living room where your voice bounces off a bare wall behind you. Thick absorption at the reflection points could calm the sound without surrounding your whole body. If you instead need the same controlled position every morning while other household activity moves around, an enclosure may be more convenient, provided it is comfortable and designed well.
The vocal booth vs treated corner choice is a tradeoff between enclosure and flexibility. A booth can give you a consistent spot; a treated corner often costs less and can do several jobs. Match the setup to the problem you hear, not to the image of a professional studio.
Popular right now

KitchenAid Classic Series 4.5 Quart Tilt-Head Stand Mixer K45SS, Onyx Black

LG C2 Series 65-Inch OLED evo 4K Smart TV (OLED65C2PUA, 2022)

iRobot Roomba Max 715 Pet Robot Vacuum with AutoEmpty Dock
As an affiliate, we earn on qualifying purchases.
Separate room echo from noise you can hear outside
Acoustic treatment reduces reflections inside a space; sound isolation aims to stop sound passing between spaces. Porous materials such as foam, blankets, curtains, and acoustic panels can soften a voice bouncing off nearby surfaces. They do little to stop plumbing, traffic, a neighbor’s TV, or a computer fan from reaching the microphone.
Sound isolation generally needs airtight construction, mass, and separation from the building structure. A lightweight portable booth is unlikely to provide the kind of isolation people expect from the word “soundproof.” If a bus growls outside your window, adding foam inside the room may make your voice less reflective while leaving that low rumble in the recording.
Here’s a quick way to tell the problems apart: record 20 seconds of silence in your usual position, then speak the same short passage. A steady hiss or hum during the silence points to background noise; a hollow tail after words points to room reflections. For instance, if the end of “stop” seems to flutter between two bare walls, you hear an echo pattern, not traffic.
Treatment changes what happens to sound inside the room. Isolation changes how much sound gets through the structure.
This distinction changes your next step. For room echo, adjust your position and add suitable absorption; for noise, look for the source, timing, and microphone direction. If your neighbor’s washing machine runs through your recording window, a smaller booth might muffle some nearby sound depending on its construction, but it is not a substitute for a truly isolated room.
Build a treated corner that sounds clear without swallowing your voice
A treated corner for apartment voiceover works best when you choose a quiet recording position and tame the strong reflections around it, rather than covering every wall in thin foam. Thick broadband absorption near the microphone and behind the performer can make the voice sound more direct. Keep listening as you adjust; the room will tell you where the next panel helps.
For instance, if your desk sits against a bare wall and your voice sounds papery, try moving the microphone and performer away from that surface. A freestanding panel or heavy curtain placed to soften the reflection can help. Don’t assume the room’s corner is automatically best: corners can build up bass, while a desktop can throw a sharp reflection back into the mic.
- Record a baseline. Use your normal microphone, speaking distance, and a quiet time. Save a short voice passage and a few seconds of silence.
- Move the recording position. Try a spot away from windows, hard corners, shared walls, and large reflective surfaces when practical. Keep the microphone angle and distance consistent.
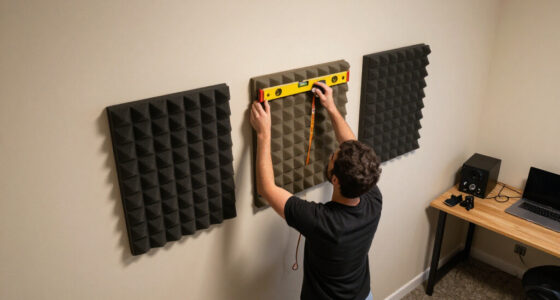
- Add absorption where you hear a reflection. Try a thick, movable panel near the performer or behind the microphone, then record the same passage again.
- Compare at similar playback levels. Listen for a cleaner, more natural voice, not simply a quieter or darker recording.
Freestanding panels, heavy curtains, and removable fixtures usually suit rentals better than permanent construction. They still won’t soundproof the apartment, and a curtain that looks heavy may be too thin to do much acoustically. Test one change at a time; a panel placed where the reflection hits can beat a room full of decoration.
Know when a booth helps—and when it makes your voice boxy
A booth can help when you need a repeatable enclosed recording position and the room reflections around your microphone are hard to control. It surrounds the recording area, so a properly sized, well-treated enclosure may keep nearby reflections more consistent from session to session. That convenience can matter if you record daily in a shared apartment.
But a small enclosure can work against you. If the walls sit close to your face and the interior relies mostly on thin foam, the sound may lose openness and take on a hollow, boxy quality. A booth can also trap body heat during a long narration session. Add a fan for comfort and it may introduce the very noise you were trying to avoid.
Picture a creator recording a 30-minute audiobook chapter inside a cramped booth on a warm afternoon. The first few minutes sound controlled; soon the space feels stuffy, the fan starts humming, and the voice becomes less comfortable. A roomier booth with effective treatment and quiet ventilation may suit that creator better, but it also needs more floor space and budget.
Think of a booth as a specialized tool, not a shortcut to silence. Check its internal dimensions, materials, ventilation noise, and placement in your apartment. If possible, hear a real voice recording made inside the exact model or design. A booth can reduce reflections and shield the mic from some nearby household sounds, but performance depends on its construction, seals, airflow, and room position.
Compact reflection filters and foldable screens may make setup more convenient, but a small screen around the microphone cannot isolate an entire room. The enclosure has to be large and treated well enough for your voice to sound natural, and comfortable enough that you’ll use it for the length of a real session.
Fix the noise source before buying more panels or a new mic
Apartment voiceover gets quieter when you identify the noise reaching the microphone and deal with its source. A new microphone or booth may not help much if a loud computer fan sits beside the mic or a window faces busy traffic. First, listen to an unprocessed recording through headphones during the hours you normally work.
Try this short check when the apartment seems quiet:
- Capture the room tone. Record 20 to 30 seconds without speaking. Note steady hums, intermittent pipes, footsteps, or street noise.
- Locate the loudest source. Turn off or move a noisy device if you can, close a window, and compare another position farther from the source.
- Choose a quieter recording time. A temporary schedule change can beat a costly enclosure when traffic or building noise follows a predictable pattern.
- Set mic direction and distance. A directional microphone can reject some sounds arriving from certain directions, but it cannot erase every reflection or noise source.
- Speak close enough for a strong direct voice. Close technique can improve the ratio of voice to room sound, but manage plosives and proximity effect with suitable mic placement.
Suppose the computer’s fan becomes audible only when the narration gets quiet. Moving the tower under a desk or farther from the microphone may help more than surrounding the mic with foam. Or record after the apartment’s ventilation system cycles off, if your schedule allows it.
Software can reduce steady background noise or adjust tone, but strong echo, clipping, and changing household noise are harder to repair cleanly. Use editing to finish a good recording, not to rescue a problem the microphone captured on every word.
Choose the setup that fits your room, routine, and recording budget
A treated corner is a sensible first setup for many apartment voiceovers because it stays flexible and can cost less than a dedicated enclosure. A booth makes more sense when you need a consistent enclosed position, have space for it, and can handle the tradeoffs in price, heat, and ventilation. Your room, voice, microphone, and routine all affect the result.
Consider two common situations. Maya records short training clips at a desk in a quiet apartment, but her bare walls make the voice echo. A movable panel and a better mic position may solve that without claiming another corner of the room. Sam records long sessions while household activity changes around him; a properly sized booth may give him a repeatable setup if it fits his apartment and remains comfortable.
Recent home-recording options include modular booths, foldable absorption screens, compact reflection filters, and accessible measurement tools. They make it easier to experiment, but they don’t change the underlying acoustics. A screen can reduce some nearby reflections; it cannot seal the apartment against traffic.
Repeatability matters as much as a perfect room. Marking your microphone position, keeping the speaking distance steady, and recording at a similar time can make takes easier to edit. For a small voiceover project, that stable routine may be more useful than chasing a perfectly silent room that a rental apartment cannot provide.
Before buying, compare like with like. Record the same passage in the untreated room, your treated position, and a booth you can borrow or audition. Use the same mic, distance, and spoken level, then compare the files at similar playback volume. The better setup is the one that gives you a natural voice, manageable noise, and a routine you can keep using.
Remember the three checks that keep apartment voiceover practical
Choose by problem, test by recording, and judge by comfort. That three-part check keeps you from spending on an enclosure when the real culprit is a desk reflection, or covering a wall when street noise dominates. It also gives you a way to make a decision based on your own room, rather than a product description.
First, name the problem you can hear. A hollow tail on your words suggests reflections; a steady rumble during silence suggests background noise. Second, change one thing at a time: turn off a fan, move away from the window, shift the mic, or add a thick panel. Third, listen to the recordings at a similar level. A take that sounds quieter only because it’s lower in volume can fool you.
For example, if your treated corner removes the flutter between two hard walls but leaves a distant traffic hum, you have made progress on room sound. You still need to address the hum through timing, distance, or the noise source. If a booth reduces the echo but leaves you hot and tense after ten minutes, it may not be the right daily setup.
The best result is controlled, natural, and repeatable. A little room sound is not automatically a failure; an over-damped, boxy voice can be harder to listen to than a lightly reflective one. The practical win is a clean enough recording that suits your delivery and can be edited without fighting every word.
Frequently Asked Questions
Is a vocal booth actually soundproof?
Usually, a portable booth is not soundproof. It may reduce some nearby reflections or household sounds, depending on its materials and construction, but real isolation usually requires airtight construction, mass, and separation from the building structure.
Will acoustic foam block traffic or noisy neighbors?
Foam mainly absorbs some reflections inside the room; it does little to stop traffic or neighbors passing through walls. Try quieter recording times, move farther from the noise source, and check whether a directional microphone can reject sound coming from a particular direction.
Why does my booth recording sound boxy or muffled?
A small enclosure with nearby walls and mostly thin foam can create an uneven, unnatural sound. Try a roomier recording position, check the booth’s interior treatment, and compare a take outside it at the same mic distance and level.
Should I record in a corner of the room?
Not automatically. Corners can build up bass, and nearby walls may send strong reflections back to the microphone. Try more than one position and listen to the same passage before settling on a spot.
Can noise-reduction software fix room echo?
Software can help with some steady background noise, but strong room echo is difficult to remove without audible side effects. You’ll usually get a more natural voice by improving the position and treatment before recording.
How can I compare a booth and treated corner fairly?
Record the same short passage in each setup with the same microphone, speaking distance, and room conditions. Match playback levels before judging; a louder take can seem better even when it is not clearer or more natural.
Conclusion
Start with a recording, not a purchase. If you hear room echo, choose a thoughtful mic position and add movable absorption; if you hear traffic or a fan, tackle the noise source, distance, or timing. A booth earns its footprint when you need an enclosed, repeatable spot and can keep it spacious, quiet, and comfortable.
For many apartment voiceovers, the smartest studio is a small, well-tested corner where your voice stays natural and the rest of the room can still breathe.