TL;DR

Get audio and creator gear delivered free with Prime
- Fast, free delivery on millions of items
- Prime Video, Amazon Music and more included
- Member-only deals all year
Loudness matching ensures fair comparisons between headphones and monitors. Because louder almost always wins, matching levels within ±0.1 dB using pink noise and SPL measurements is crucial for unbiased listening tests.
Ever try comparing headphones and monitors and felt something was off? That’s because loudness influences perception more than you think. When audio sounds louder, it often seems better—even if it’s not. This guide cuts through the confusion, showing you how to match loudness accurately to get real, fair comparisons.
Whether you’re mixing, mastering, or just curious, understanding how to level-match properly is your best tool. It’s all about controlling that bias so your ears tell the truth. Ready to stop guessing and start hearing the real differences?
Always aim to match loudness within ±0.1 dB for honest comparisons.
Use pink noise and a SPL meter or in-ear probe to verify levels at your eardrum.
Remember that loudness biases perception—louder almost always sounds better.
Digital loudness normalization helps content comparison but doesn’t replace real-world SPL matching.
Room effects and headphone spectral response can distort perceived loudness; measure it physically.
Psychoacoustics · Listening Tests · Calibration
Loudness Matching: Comparing Headphones & Monitors Fairly
Louder almost always wins. Because listeners reliably prefer louder playback — even at differences of just 0.2–0.5 dB — matching levels within ±0.1 dB using pink noise and SPL measurement is the foundation of every honest comparison.
Key Insight
“Any comparison that isn’t level-matched is effectively measuring loudness, not quality.”
— Decades of listening-test research · Harman International (Olive, Toole, Welti)±0.1 dB
Target match tolerance for blind tests
0.2–0.5 dB
Level gap that already sways preference
83 dB
Reference SPL per speaker (C-weighted, slow)
~10 dB
≈ Doubling of perceived loudness
−14 LUFS
Streaming normalization target (approx.)
01 — The Perception Problem
Why Loudness Bias Skews Your Listening Tests
When one device plays louder, your brain naturally perceives it as better or more detailed. Without careful level-matching, comparisons become a game of “which sounds louder” — not “which sounds better.”
The Bias
Louder = “Better”
Even tiny differences of 0.2–0.5 dB can sway preference. It’s like hearing a whisper versus a shout — your ears and brain interpret loudness as quality, clarity, and detail.
The Threshold
The JND of Level
The just-noticeable difference for level is roughly 0.5–1 dB for broadband material — which is exactly why rigorous protocols match to within ±0.1 dB.
The Curve
Equal-Loudness Contours
Fletcher–Munson (ISO 226) means loudness is frequency-dependent. A device matched at 1 kHz can still sound louder from extra bass or treble — so broadband pink noise, not sine tones, is the standard signal.
02 — The Workflow
Match Loudness in 3 Clear Steps
The practical workflow most guides converge on — calibrate the speakers first, match the headphones by ear, then verify physically at the eardrum.
Calibrate Monitors
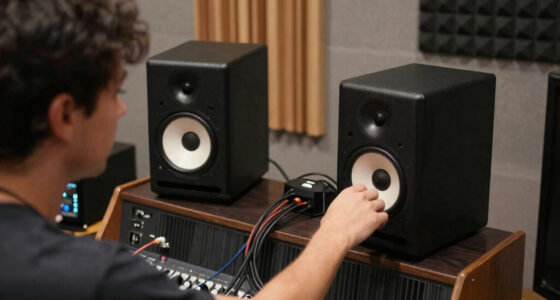
Play pink noise at the listening position. Use an SPL meter set to slow, C-weighted. Aim for 83 dB SPL per speaker (−20 dBFS RMS band-limited pink) — the classic studio reference.
Match Headphones by Ear
Play the same pink noise through both. Adjust headphone volume until it sounds equally loud — use quick switching, not prolonged listening, to compare.
Verify with Measurement
Use an in-ear probe mic or coupler to measure actual SPL at the eardrum, ensuring your perceived match aligns with real physical levels.
Remember: digital matching (LUFS normalization) equalizes the material — it does not replace physical level-matching on your gear. Combining both methods gives the most reliable results.
03 — The Fundamental Problem
How Headphones & Monitors Respond Differently
You can’t measure them the same way. Raw numbers from a free-field mic and an ear simulator are not directly comparable — matching is about understanding how each responds to loudness and environment.
| Feature | Studio Monitors | Headphones |
|---|---|---|
| Measurement Method | Free-field mic at the listening position | Artificial ear / coupler (IEC 60318) or in-ear probe mic |
| Room Influence | Significant — room modes can boost or cut bass | Minimal — fixed response direct at the eardrum |
| Perceived Loudness Bias | Includes room effects, reflections, head movement | Bypasses room — no spatial or bodily cues |
| Typical Matching Level | −20 dBFS pink noise ≈ 83 dB SPL per speaker | Adjusted until perceived loudness matches, then verified |
Why it matters: room reflections can artificially boost the perceived loudness of monitors, while headphones deliver a direct — but cue-free — signal. Rely on numerical levels alone and your conclusions about which gear is “better” will mislead you.
04 — Digital vs Physical
Why Matching in the DAW Isn’t Enough
LUFS or RMS matching in your DAW is a good start — but it doesn’t guarantee your headphones and monitors play at the same actual SPL. You need both domains under control.
Digital Domain
LUFS — Signal Loudness
ITU-R BS.1770 measures the digital signal’s perceived loudness. Use it to normalize the material before A/B tests.
Streaming platforms now normalize too — Spotify, YouTube, and Apple Music target roughly −14 LUFS integrated (EBU R128 broadcast: −23 LUFS).
Physical Domain
dB SPL — Acoustic Pressure
SPL measures real acoustic pressure at your ears. Headphones can still crank bass or treble, making everything seem louder or duller at identical digital levels.
An SPL meter or in-ear measurement anchors your judgment, preventing spectral coloration and spatial cues from fooling your ears.
Digital levels are your target setting — physical SPL is the actual temperature in the room. If acoustics or spectral response alter perceived loudness, decisions about EQ, compression, and gain staging rest on a false balance.
05 — The Numbers That Matter
Reference Points for Fair Comparisons
Keep these figures in mind — even tiny deviations bias perception, so precise measurement and consistent practice are key.
Level Differences vs Perceptual Effect
Studio Reference Level Range
Equal-loudness contours flatten at moderate levels — another reason matching near 78–85 dB SPL matters. Sustained listening above 85 dBA risks hearing damage.
±0.1 dB
Match tolerance for reliable blind tests — small deviations create false preferences.
C / Slow
SPL-meter weighting that best reflects human hearing sensitivity and reduces noise.
83 dB SPL
Typical studio reference per speaker — balances loudness and ear health.
~1 dB
Just-noticeable loudness difference — stay within it for perceptual neutrality.
±0.1 dB
Measurement accuracy now achievable with a miniDSP UMIK-1 + free Room EQ Wizard.
AutoEq
Databases like Oratory1990 & crinacle enable level-matched cross-device EQ comparison.
06 — The Fair-Test Chain
From Signal to Verdict
Every honest comparison follows the same chain — break any link and the loudest device wins by default.
The biggest mistake? Assuming equal digital levels mean equal loudness. Even a 1 dB difference can make one device sound significantly better — control the bias, and your ears finally tell the truth.
Why Loudness Bias Skews Your Listening Tests
When one device plays louder, your brain naturally perceives it as better or more detailed. Decades of listening research confirms that even tiny level differences—just 0.2 to 0.5 dB—can sway your preference. That’s like hearing a whisper versus a shout—your ears and brain interpret loudness as quality.
Imagine comparing a pair of headphones. If one sounds slightly louder, you might think it’s clearer or more accurate—even if it’s not. That’s why level-matching isn’t just a technical step; it’s the foundation of honest listening.
In practice, if you don’t match levels carefully, your comparisons become a game of “which sounds louder,” not “which sounds better.”
pink noise SPL meter for audio calibration
As an affiliate, we earn on qualifying purchases.
As an affiliate, we earn on qualifying purchases.
How to Match Loudness Between Headphones and Monitors in 3 Clear Steps
- Calibrate your monitors with pink noise at the listening position using a SPL meter set to slow, C-weighted response. Aim for around 83 dB SPL per speaker—your standard mixing reference.
- Match headphones by ear: Play the same pink noise through both headphones and monitors. Adjust the headphone volume until it sounds equally loud as the monitors—use quick switching to compare, not prolonged listening.
- Verify with measurement: If possible, use a small in-ear mic or coupler to measure the actual SPL at your eardrum, ensuring your perceived match aligns with real levels.
Remember, digital matching like LUFS normalization helps with the content but doesn’t replace physical level-matching on your gear. Combining both methods gives the most reliable results.
As an affiliate, we earn on qualifying purchases.
Compare How Headphones and Monitors Respond to Loudness Differences
| Feature | Studio Monitors | Headphones |
|---|---|---|
| Measurement method | Free-field mic at listening position | Artificial ear or in-ear probe mic |
| Room influence | Significant; room modes can boost or cut bass | Minimal; direct at eardrum |
| Perceived loudness bias | Includes room effects, head movement | Bypasses room, no spatial cues |
| Typical matching level | -20 dBFS ≈ 83 dB SPL | Adjusted until perceived loudness matches |
This table highlights that matching headphones and monitors is not just about numbers—it’s about understanding how each responds to loudness and environment. Without proper measurement and a consistent reference, comparisons fall apart. For example, room reflections can artificially boost the perceived loudness of monitors, making them seem louder than they actually are in an open environment. Conversely, headphones bypass room effects, providing a more direct measurement of the audio signal at the eardrum, but also requiring careful level adjustments to ensure perceived loudness matches. Recognizing these differences is crucial because it affects how you interpret sound quality and balance. If you rely solely on numerical levels without understanding these contextual factors, your comparisons can be misleading, leading to incorrect conclusions about which gear is better or more accurate.
studio monitor calibration microphone
As an affiliate, we earn on qualifying purchases.
As an affiliate, we earn on qualifying purchases.
Why Matching in Digital Isn’t Enough — You Need Real-World Level Control
Matching loudness in your DAW using LUFS or RMS is a good start. But it doesn’t guarantee that your headphones and monitors are playing at the same actual SPL. You could have a perfectly balanced mix digitally, yet the headphones could be cranking the bass or treble, making everything seem louder or duller.
Think of it like setting a thermostat—digital levels are your target, but physical SPL is the actual temperature. If the room’s acoustics or the headphones’ spectral response alter perceived loudness, your critical decisions—like EQ, compression, or gain staging—may be based on a false sense of balance. Ignoring this can lead to mixes that sound good on one device but translate poorly elsewhere. Using an SPL meter or in-ear measurement ensures your ears are not fooled by spectral coloration or spatial cues, helping you make more accurate judgments. This physical measurement acts as an anchor, preventing you from being misled by the digital levels alone, which can be deceptive due to spectral boosts or cuts that influence perceived loudness without changing the true SPL at your eardrum.
digital loudness normalization software
As an affiliate, we earn on qualifying purchases.
As an affiliate, we earn on qualifying purchases.
Recent Tech and Tips Make Loudness Matching Easier Than Ever
Thanks to affordable gear and software, matching loudness is now within reach for most creators. Devices like the miniDSP UMIK-1 or free tools like Room EQ Wizard let you measure SPL with accuracy down to ±0.1 dB. A simple in-ear probe mic can give you real-time feedback on what’s happening at your eardrum.
Plus, streaming platforms now normalize loudness—Spotify, YouTube, and Apple Music often target around -14 LUFS. This shift emphasizes the importance of consistent loudness levels for a seamless listening experience, but it doesn’t replace the need for actual SPL measurements because digital normalization doesn’t account for spectral differences or individual hearing sensitivities. By combining these tools, you can accurately match levels physically and digitally, ensuring your mixes translate well across platforms and devices. Additionally, newer measurement databases like Oratory1990 or crinacle provide EQ corrections that approximate how headphones and monitors respond after level matching, making it easier to compare gear objectively and refine your listening environment effectively.
Key Numbers to Remember for Fair Comparisons
- Match to ±0.1 dB for reliable blind tests, as even small deviations can bias perception and lead to false preferences.
- Use C-weighted, slow SPL-meter settings for calibration because these settings better reflect human hearing sensitivity and reduce measurement noise.
- Typical reference level in a studio: 83 dB SPL per speaker, which balances loudness and ear health considerations.
- The just-noticeable difference in loudness is about 1 dB; being within this range ensures perceptual neutrality.
- Listening above 85 dBA for extended periods increases risk of hearing damage, so always monitor levels for safety.
Keeping these numbers in mind helps you stay objective. Remember: even tiny deviations can bias your perception, so precise measurement and consistent practices are key to fair evaluation.
Your Biggest Mistake? Ignoring Loudness When Comparing Gear
The most common trap is assuming equal digital levels mean equal loudness. In reality, even a 1 dB difference can make one device sound significantly better or worse. That’s why level-matching with a SPL meter or in-ear probe isn’t optional—it’s the secret to fairness. Overlooking this step means your comparisons are inherently biased, favoring louder gear and misleading your perception of accuracy or quality. This bias can cause you to favor equipment that simply sounds louder rather than better, which defeats the purpose of a fair evaluation. Recognizing and controlling loudness bias ensures that your judgments are based on true sound quality, not just volume. Ultimately, this practice allows you to make informed decisions, whether for critical listening, mixing, or purchasing, based on objective, level-matched comparisons rather than subjective impressions influenced by loudness differences.
Frequently Asked Questions
How do I match my headphones to my monitors without lab gear?
Use pink noise played through both and a SPL meter at your listening position. Adjust your headphones until they sound equally loud as your monitors. For best results, measure SPL at your eardrum with an in-ear mic or coupler.
What SPL level should I mix at?
Most studios aim for around 73–85 dB SPL. The key is consistency. Choose a level you can listen to comfortably for hours and stick to it for all your critical work.
Do I need an SPL meter, and which one?
A basic Class 2 SPL meter is enough for most hobbyist purposes. For more accuracy, a calibrated USB mic combined with free software like Room EQ Wizard offers precise, real-time SPL readings at your eardrum.
Why does the louder device sound better, even if I know it’s louder?
Because our ears interpret loudness as a cue for quality—louder tends to seem clearer, more detailed, or more lively. This is a natural bias, not trickery. Level-matching is the only way to see past it.
Is matching LUFS enough for fair comparison?
No. LUFS measures perceived loudness digitally but doesn’t account for physical SPL at your ears. Always verify with a SPL measurement for honest, level-matched listening.
Conclusion
Fair comparison starts with controlling loudness. Without it, your ears are tricked, and your judgments are skewed. Get a reliable SPL meter, match quickly and accurately, and trust your ears to reveal the true qualities of your gear.
Because in the end, hearing is believing—if you don’t level the playing field, you’re just guessing.
Halloween Picks
halloween
As an affiliate, we earn on qualifying purchases.