
TL;DR
Your XLR mic sounds quiet mainly because of low preamp gain or insufficient boosting. Using the right gain settings and inline preamps can dramatically improve volume and clarity without noise. This guide shows you how to get loud, clean audio every time.
Ever plugged in your microphone and felt like it’s whispering instead of speaking loud and clear? That’s a common frustration—your XLR mic isn’t loud enough. But the fix isn’t just cranking up the volume knob. It’s about understanding what’s happening under the hood: the relationship between your mic, its output level, and your preamp’s gain.
In this guide, I’ll show you why your mic might sound quiet, how preamp gain and inline boosters work together, and simple steps to make your voice cut through the mix. Whether you’re podcasting on a budget or setting up a pro studio, these tips will get your sound loud and clear—without the unwanted noise.
Always start with your gain at the lowest setting and increase gradually.
Inline preamps like Cloudlifter or FetHead can add 10-25 dB of clean gain without noise.
Cable quality and mic placement have a bigger impact than you think—use balanced XLRs and get close to your mic.
Built-in preamps are limited; inline boosters are a game-changer for low-output mics.
Avoid boosting gain excessively—watch for distortion and background noise.
Why Your XLR Microphone Is Too Quiet—The Real Reasons
First off, the most common culprit is your gain settings. If your preamp’s gain knob is turned down, your mic’s signal stays weak—like talking into a fan and wondering why no one hears you. Microphones, especially condensers, produce very low signals—sometimes just a few millivolts—so they need a boost to be usable. Neglecting proper gain staging can lead to a weak, thin sound that lacks presence, making it hard for your voice to cut through the mix. It’s crucial to understand that gain isn’t just volume; it’s about amplifying the tiny electrical signal from your mic to a usable level, which directly impacts clarity and noise floor.
Another reason? The cable or connection might be causing signal loss. Imagine a garden hose with a kink—less water gets through. Poor quality or damaged cables can introduce resistance, capacitance, or interference, which weakens your signal. Using unbalanced or cheap cables can also increase noise, especially over longer runs. Plus, microphone placement matters. If your mic is too far from your mouth, or if there’s background noise, your voice won’t sound as loud or clear. Proper placement ensures a stronger, cleaner signal that requires less gain to achieve desired levels.
Finally, some microphones just have lower output levels. For example, a typical dynamic mic like a SM58 needs less boosting than a condenser mic like the Audio-Technica AT2035, which outputs a weaker signal that demands more gain. Recognizing your mic’s output level helps you choose the right gear and settings to prevent underwhelming sound. If you don’t boost adequately, your recordings may sound muffled or distant, forcing you to crank the gain excessively. However, increasing gain too much can introduce noise or distortion, which is why understanding your mic’s characteristics and the entire signal chain is essential. This knowledge allows you to balance gain and quality, ensuring your sound remains clear and professional without unnecessary noise or artifacts.
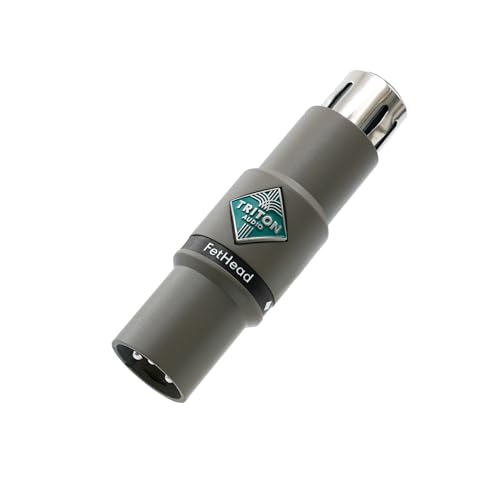
Triton Audio FetHead in-Line Microphone Preamp
Low-Noise Class-A JEFT Amplifier
As an affiliate, we earn on qualifying purchases.
As an affiliate, we earn on qualifying purchases.
How to Boost Your Mic Signal Without Adding Noise
- Start with your gain knob. Turn it all the way down, then slowly increase until your voice peaks around 0dB on your meters. This step is crucial because it ensures your signal is strong enough for clarity without risking distortion. Proper gain staging prevents your system from amplifying background noise or causing clipping, maintaining a clean sound. The goal is to find the sweet spot where your voice is loud enough but not distorted, which requires understanding how your gain interacts with your microphone’s output and your recording environment.
- If the signal remains weak, add a dedicated inline preamp like a Cloudlifter or FetHead. These devices provide 10-25 dB of clean, transparent gain—meaning they amplify your signal without introducing hiss or distortion. The significance here is that inline preamps act before your audio interface, so you’re not pushing your interface’s preamp to its limits. This preserves audio quality, especially with sensitive or low-output microphones, and helps avoid the noise floor becoming audible. Choosing a high-quality inline booster can make the difference between a dull, quiet recording and a vibrant, professional sound.
- Check your cables and connections. Use high-quality, balanced XLR cables with good shielding to prevent electromagnetic interference and signal degradation. Poor cables can introduce noise and weaken your signal, forcing you to turn up gain excessively, which amplifies unwanted noise. Investing in reliable cables ensures that your boosted signal stays pristine from source to interface, enabling you to achieve maximum volume without sacrificing clarity.
- Position your mic close—about 6 inches from your mouth—and use a pop filter. Proper placement reduces the need for excessive gain, which can introduce noise, and ensures your voice is captured with clarity and presence. This proximity effect makes your voice naturally louder and fuller, decreasing the reliance on gain to compensate for distance or background noise. Combining good placement with proper gain staging results in a cleaner, more professional sound.
For example, I once used a dynamic mic in a noisy room, and even with the gain maxed out, it sounded dull. Adding a FetHead inline preamp instantly boosted the volume—clear and noise-free, even at lower gain levels. This demonstrates how inline boosters can provide the necessary headroom for a professional sound without sacrificing audio quality. Proper setup and understanding signal flow are critical for achieving optimal results, especially in challenging environments where background noise or low output levels threaten to compromise your audio quality.

StudioMan DPM1 XLR Dynamic Microphones Preamp, 29dB Gain & Low-Noise Signal Boost, Plug-and-Play Metal Adapter,48V Phantom Power Required(not Included,Only for Dynamic Mics-for Studio/Stage
【Essential for Dynamic Mics & Ribbons】 Designed specifically for low-output dynamic microphones (like SM7B, SM58) and ribbon mics….
As an affiliate, we earn on qualifying purchases.
As an affiliate, we earn on qualifying purchases.
Frequently Asked Questions
Why does my microphone sound quiet even when I turn up the gain?
Your gain might be set too low, or your microphone could have a very low output level. Double-check your gain knob, mic placement, and cable connections to ensure everything is optimized.What’s the best way to boost a quiet microphone signal without introducing noise?
Use a dedicated inline preamp like a Cloudlifter or FetHead for clean gain. Also, ensure your cables are high quality and keep your mic close to your mouth to maximize signal strength.Can I use a regular headphone amplifier to boost my mic?
No, headphone amps are designed for line-level signals, not microphone levels. Use a microphone preamp or inline booster tailored for mic signals.Do all microphones need inline boosters?
No, dynamic microphones like the SM58 usually don’t require extra boosting. Condenser and ribbon mics often do, especially if their output is weak or if you want a louder, cleaner signal. Understanding your mic’s output and environment helps determine whether inline boosting is necessary and how it impacts your overall sound quality.How can I avoid adding noise when boosting my mic signal?
Choose high-quality preamps and inline boosters with low noise specs. Proper gain staging and using good cables also help keep your sound clean, ensuring you get the maximum volume without sacrificing clarity.
Cloud Microphones – Cloudlifter CL-1 Mic Activator – Ultra-Clean Microphone Preamp Gain – USA Made
FOR HOME STUDIOS & PROFESSIONAL RECORDING: In the studio, boost the signal of quiet audio sources like vocals,…
As an affiliate, we earn on qualifying purchases.
As an affiliate, we earn on qualifying purchases.
Conclusion
Getting your XLR mic to sound loud and clear isn’t magic. It’s about smart gain staging, choosing the right gear, and proper placement. When in doubt, a simple inline booster can make a world of difference—turning whispers into broadcast-ready sound.
Remember, the goal isn’t just loudness. It’s clarity, presence, and a natural tone that draws your listeners in. So, tune your gain, check your cables, and consider inline boosting whenever your voice sounds faint. Your audience will thank you for it.
Triton Audio FetHead in-Line Microphone Preamp
Low-Noise Class-A JEFT Amplifier
As an affiliate, we earn on qualifying purchases.
As an affiliate, we earn on qualifying purchases.