TL;DR
Listen free for 30 days with Audible
Thousands of audiobooks and originals — cancel anytime.
Start your free trialAs an affiliate, we earn on qualifying purchases.
Recording remote podcasts with clean audio is achievable using local recording platforms, good microphones, stable internet, and post-production editing. Prioritize environment and preparation to make your audio stand out.
Nothing kills the vibe of a great interview faster than muddy, echoey audio. You’ve got a compelling guest lined up, but the sound quality? It can make or break the listener experience. The good news: you don’t need a Hollywood budget or fancy studio to get crisp, professional audio from a remote setup.
This guide breaks down practical steps—using real-world examples and current tech—to help you capture clean, clear sound, no matter where your guest is. Whether you’re recording your first remote episode or want to upgrade your current setup, you’ll find actionable tips to make every word shine.
Recording locally on each guest’s device preserves audio quality and avoids internet-related glitches.
Environment matters—quiet, echo-free spaces and good mic placement make a huge difference.
Use headphones during recording to prevent feedback and background noise.
Post-production editing is essential—even simple tweaks can make your audio sound professional.
Choose a reliable platform with high-quality local recording features to simplify the process.
Why Clean Audio Matters More Than Fancy Gear
Clear audio isn’t just about sounding professional; it directly impacts listener engagement and retention. When audio quality dips, listeners often become distracted or frustrated, leading to drop-offs. This means that even if your content is valuable, poor sound can undermine your message. Moreover, high-quality audio fosters trust—listeners perceive it as a sign of professionalism and dedication.
Investing in the best gear isn’t always feasible, but understanding why quality matters helps you prioritize techniques that deliver the biggest impact. For example, controlling your environment and microphone placement can compensate for less expensive equipment, ensuring your voice remains clear and dominant. The tradeoff often lies in time and effort—better sound quality demands careful setup and consistent practice, but the payoff is a more polished, engaging podcast.

Amazon Basics Condenser Microphone for PC, Cardioid Pickup, USB Mic for Streaming, Recording, and Podcasting, 360° Adjustable Stand, Plug and Play, 5.8" x 3.4", Black
- High Sensitivity Condenser: Low noise and distortion with 14mm diaphragm
- Adjustable 360° Stand: Flexible positioning for streaming and recording
- Cardioid Pickup Pattern: Reduces background noise for clear sound
As an affiliate, we earn on qualifying purchases.
As an affiliate, we earn on qualifying purchases.
Pick a Platform That Supports High-Quality Local Recordings
Platforms like Riverside.fm, Zencastr, and SquadCast record each participant locally—saving high-quality audio files on their devices before uploading. This approach is crucial because internet-based live streams are susceptible to latency, packet loss, and compression artifacts, which degrade sound quality. By capturing audio locally, you preserve the original fidelity, ensuring a cleaner, more professional sound.
For instance, Riverside.fm records in 48kHz/24-bit quality, which is the standard for professional audio production. This higher sample rate and bit depth mean richer sound and more headroom for editing. Choosing the right platform isn’t just about quality; it involves considering reliability, ease of use, and how well it integrates into your workflow. Reliable local recording platforms reduce the need for extensive post-production fixes, saving you time and frustration. However, they might require a bit more setup and familiarity, so weigh your comfort level and the technical support offered.
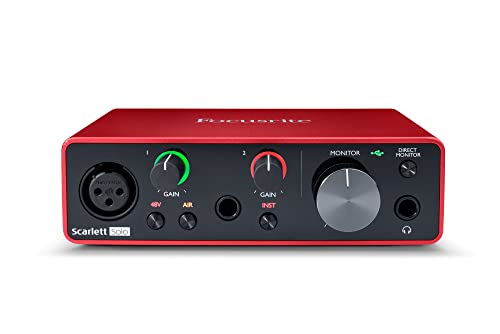
Focusrite Scarlett Solo 3rd Gen USB Audio Interface for Guitarists, Vocalists, Podcasters or Producers to record and playback studio quality sound
- High-Performance Mic Preamps: Brighter recordings with Air mode
- High-Headroom Instrument Inputs: Plug in guitars and basses easily
- Studio-Quality Conversion: Record at 24-bit/192kHz for clarity
As an affiliate, we earn on qualifying purchases.
As an affiliate, we earn on qualifying purchases.
How to Set Up Your Microphone and Environment for Success
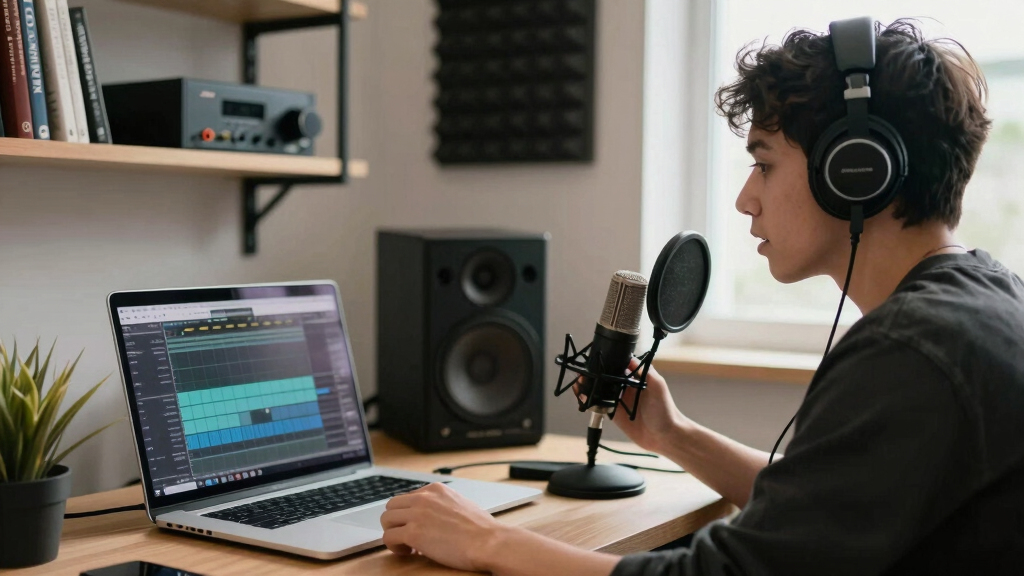
- Choose a cardioid microphone—USB or XLR—that focuses on your voice and minimizes pickup of ambient noise. Cardioid patterns are designed to reject sounds from the sides and rear, which helps isolate your voice in noisy environments.
- Record in a quiet room with soft surfaces—such as blankets, curtains, or foam panels—that absorb sound reflections. This reduces echo and reverberation, which can muddy your audio and distract listeners.
- Use a pop filter to prevent plosive sounds—those harsh ‘p’ and ‘b’ sounds—that can cause distortion. Position the mic about 6 inches from your mouth, slightly off to the side to avoid direct airflow that causes pops.
Creating this environment isn’t just about reducing noise; it’s about controlling sound reflections and ensuring your voice is captured cleanly. The tradeoff involves balancing convenience with acoustic treatment—sometimes, a makeshift setup with blankets can dramatically improve sound, but for consistent quality, investing in proper panels or a dedicated recording space is ideal.
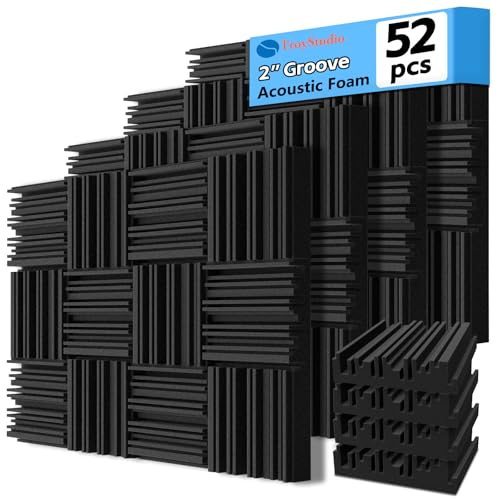
TroyStudio Thick Acoustic Foam Panels, 12 X 12 X 2 Inch 52 Pcs Broadband Sound Absorbing Foam, Dense Soundproof Padding Tile, Recording Studio Foam Absorber, Groove Decorative 3D Wall Ceiling Panel
- Size and Pack: 12x12x2 inches, 52 panels
- Coverage Area: 52 square feet
- Material: High-density polyurethane foam
As an affiliate, we earn on qualifying purchases.
As an affiliate, we earn on qualifying purchases.
How to Prepare Your Guest for Clear Sound
Provide simple instructions that emphasize the importance of environment and equipment. For example, ask your guest to use headphones—preferably wired—to prevent echo and feedback. Encourage them to record in a quiet space, ideally with soft furnishings that absorb sound reflections. Sending a checklist or a sample recording helps set expectations and demonstrates what good audio quality looks like.
For example, I once had a guest record in a noisy kitchen, but after a quick prep call, they moved to a closet lined with blankets. The difference was night and day—clean, crisp audio that required minimal editing. This highlights how small preparations can significantly improve your final product, especially when you’re working remotely and can’t control the environment directly.

OneOdio A71 Hi-Res Wired Over-Ear Studio Headphones for DJ, Mixing – Black
- High-Resolution Sound: 40mm drivers deliver clear, detailed audio
- Comfortable Fit: Soft ear cushions and adjustable headband
- Versatile Connectivity: Includes 3.5mm and 6.35mm plugs with long coiled cord
As an affiliate, we earn on qualifying purchases.
As an affiliate, we earn on qualifying purchases.
How to Troubleshoot Common Audio Problems in Remote Recordings
If your audio sounds fuzzy, distant, or inconsistent, understanding the root causes is crucial. Internet stability is a major factor—using a wired Ethernet connection instead of Wi-Fi can drastically reduce dropouts and latency, which in turn preserves audio clarity. Microphone placement matters: ensure it’s close to your mouth and not touching noisy surfaces like desks or chairs, as vibrations can introduce unwanted noise.
Background noise is another common issue. Ask your guest to turn off fans, close windows, and silence notifications. Additionally, testing the setup beforehand helps identify issues early—if the microphone isn’t capturing clear sound or there’s interference, you can address it before recording begins. Small adjustments—like repositioning the mic or improving room acoustics—can make a significant difference in the final quality, avoiding the need for extensive post-production fixes.
Post-Production Tips to Make Everything Sound Perfect
Even with high-quality recordings, some editing is usually necessary to achieve a polished sound. Using tools like Audacity (free) or Adobe Audition (paid), you can remove background noise, equalize frequencies for clarity, and normalize volume levels across your track. These steps ensure consistent sound quality, making your podcast more professional and easier to listen to.
For example, boosting mid-range frequencies enhances vocal intelligibility, while noise reduction filters eliminate hums, room echoes, or ambient sounds captured during recording. Applying subtle compression can also help maintain a steady volume, preventing listener fatigue. Investing time in post-production isn’t just about fixing mistakes; it’s about shaping your audio into a compelling listening experience that sounds as good as your content deserves.
Compare the Best Platforms for Remote, High-Quality Recordings
| Platform | Local Recording | Audio Quality | Ease of Use |
|---|---|---|---|
| Riverside.fm | Yes | 48kHz/24-bit | High |
| Zencastr | Yes | 16-bit/44.1kHz | Moderate |
| SquadCast | Yes | High | High |
| Cleanfeed | No | Depends on setup | Moderate |
Frequently Asked Questions
What equipment do I need to get started?
A decent USB microphone, headphones, and a computer with a stable internet connection are enough to begin. You don’t need pricey gear—just focus on clear sound and environment.
What platform should I use for remote recording?
Riverside.fm, Zencastr, and SquadCast are popular options. They support local recordings and high-quality audio, making your post-production smoother.
How do I reduce background noise during recording?
Use noise-canceling microphones, record in quiet spaces, and ask your guest to turn off fans or TVs. Post-processing noise reduction tools can also help clean up the sound.
Is editing necessary for good audio?
While not mandatory, editing can significantly improve clarity. Basic adjustments in free tools like Audacity can remove background noise and balance levels.
How can I ensure my guest’s audio matches mine?
Provide clear instructions: use headphones, find a quiet spot, and do a quick test recording beforehand. Preparation prevents surprises and guarantees better quality.
Conclusion
High-quality remote podcast audio isn’t about spending a fortune—it’s about smart choices. Focus on environment, setup, and reliable tech, and your recordings will sound professional every time. Remember: a clear voice, combined with good prep, turns good content into great listening.
So, next time you hit record, think about what your audience hears. That’s the real magic—making sure your message comes through loud and clear.
Back to school Picks
back to school
As an affiliate, we earn on qualifying purchases.