TL;DR
Listen free for 30 days with Audible
Thousands of audiobooks and originals — cancel anytime.
Start your free trialAs an affiliate, we earn on qualifying purchases.
Outdoor interviews are noisy and unpredictable, but focusing on close, well-protected microphones and smart location choices dramatically improves audio. Good recording is about capturing clean sound at the source, not fixing it later.
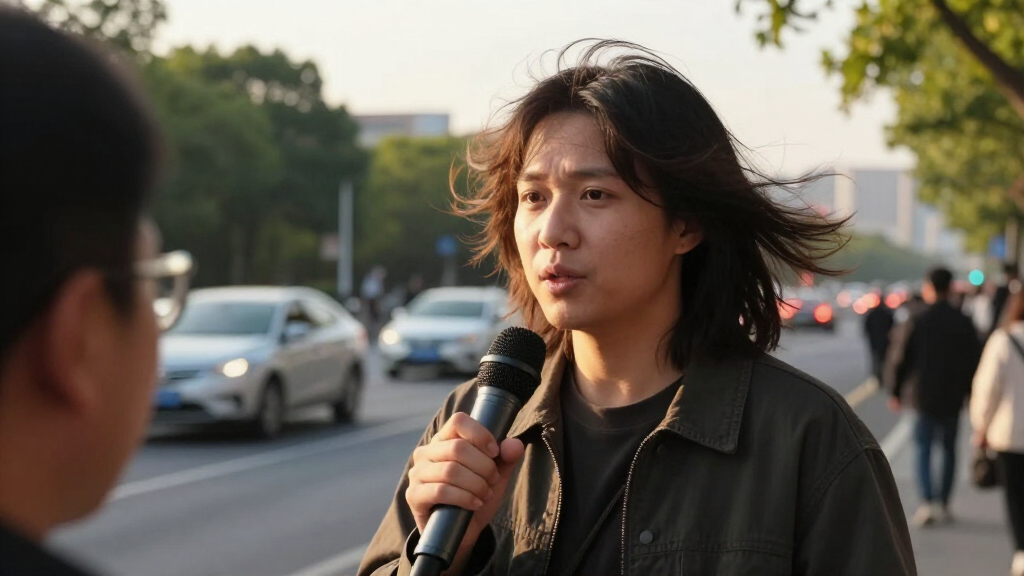
Imagine standing on a busy city street, trying to record a conversation. Traffic roars past, wind whips your microphone, and distant chatter threatens to drown out your interviewee’s voice. Sounds familiar? Recording outdoors isn’t just about having a good mic; it’s about controlling what you can and accepting what you can’t.
In this guide, I’ll show you how to tackle traffic, wind, and crowds head-on. You’ll learn why proximity beats gear alone, how to shield your mic from nature’s chaos, and what location tricks make a difference. Whether you’re filming a documentary, podcast, or a quick interview, these practical tips will help you get clearer sound—no matter how loud the world gets.
Place the microphone as close as possible—15–20 cm from the mouth—to drown out background noise.
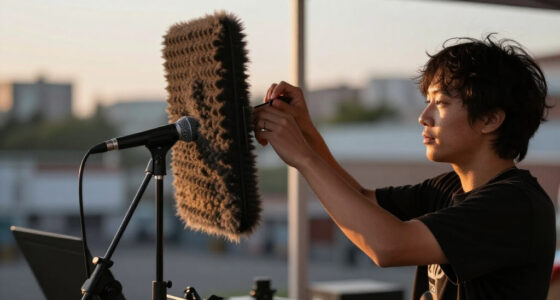
Use physical wind protection like furry windscreens or blimps, and position your mic in sheltered spots.
Scout the location at the same time of day to find spots that naturally block or reduce noise reflections.
Recognize that traffic, wind, and crowd noise each require different handling strategies; tailor your approach accordingly.
Monitor audio in real time with headphones, listening for wind, rustling, and interference—don’t rely solely on meters.
Recording Interviews Outdoors: Traffic, Wind and Crowd Noise
Traffic roars past, wind whips your microphone, and distant chatter threatens to drown out your interviewee. Outdoor recording isn’t about expensive gear — it’s about capturing clean sound at the source, not fixing it later.
Why Microphone Placement Often Outweighs the Price Tag
The biggest difference in outdoor sound quality isn’t cost — it’s distance. Close-miking maximises the signal-to-noise ratio, so the voice masks the surrounding chaos instead of drowning in it.
Practical Placement Rules
- Tuck a lavalier about 15–20 cm below the speaker’s mouth.
- Position a shotgun just above, aimed toward the chest or mouth.
- Keep a boom within one metre of the subject, aimed at the chest.
- Keep a handheld just outside frame or close to the chin.
- Avoid camera-mounted mics unless the camera is very close.
Scout
Visit at the same time of day — traffic, deliveries and crowds change by the hour.
Position
Put buildings, walls or parked vehicles between the mic and the noise source.
Get Close
Move the mic to 15–20 cm — proximity raises the speech-to-noise ratio instantly.
Monitor
Listen on closed-back headphones throughout — never trust meters alone.
Shield the Capsule Without Ruining the Sound
Wind noise is low-frequency rumble that can overload the capsule and cause distortion. Physical protection at the source is always more effective than filtering afterwards.
| Protection Type | Wind Level | How It Works | Recommendation |
|---|---|---|---|
| Foam cover | ~ Light air | Blocks gentle breeze and speech plosives only. | Indoors or calm days; insufficient outdoors. |
| Furry windscreen (“dead cat”) | ✓ Moderate–strong | Breaks up airflow before it hits the lavalier capsule. | Standard choice for lavaliers outdoors. |
| Blimp / basket + furry | ✓ Strong | Suspends the mic in still air inside a mesh shell. | Best option for shotgun mics in open wind. |
| DIY — scarf wrap | ~ Emergency | Blocks wind hitting the capsule in a pinch — risks muffle. | Last resort; combine with sheltered placement. |
| Software filtering alone | ✗ Unreliable | Overloaded rumble can’t be fully removed after recording. | Use low-cut as backup, never as the plan. |
Treat Traffic, Wind and Crowds as Different Problems
Each noise type has a distinct frequency character. Recognising the difference is what saves you hours of post-processing — or a re-shoot.
Traffic Noise
Engines, tyres, horns and sirens overlap much of the vocal range. Complete removal is unrealistic.
Wind Noise
Rumble can overload the capsule and cause distortion before you even hear the problem.
Crowd Noise
Chatter shares the same frequency range as your interviewee — aggressive filtering damages the voice.
Listen the Whole Time — and Build in Backup
A signal can show healthy levels while containing unusable wind or handling noise. Meters don’t hear what headphones hear.
Listen for These on Closed-Back Headphones
- Wind hitting the capsule
- Clothing rustle against a lavalier
- Radio-frequency interference
- Cable movement and handling noise
- Distortion and sudden background shifts
- A lavalier shifting as the subject moves
Target Recording Levels
- Record isolated tracks for each speaker.
- Send a backup feed to the camera.
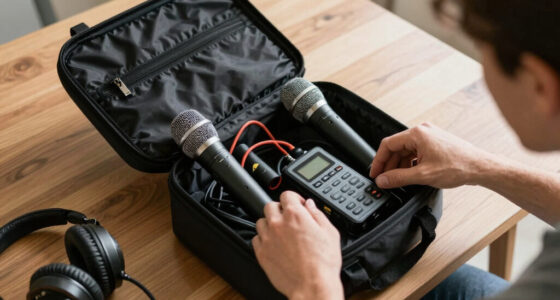
- Use a second mic positioned differently.
- Capture ambient sound for editing continuity.
Why Microphone Placement Often Outweighs Price Tag
The biggest difference in outdoor sound quality isn’t how much your mic costs. It’s where you put it. Get your microphone close, and you drown out most background noise. Step back, and suddenly all the traffic, wind, and chatter flood in.
For example, a lavalier tucked about 15–20 cm below the speaker’s mouth often beats a high-end shotgun mounted far away. It’s all about the proximity effect—bring the mic close, and the voice blares out, masking most of the surrounding chaos.
Understanding why proximity matters is crucial. When the mic is close to the source, it captures the direct sound with minimal interference from the environment. This isn’t just about volume; it’s about the signal-to-noise ratio. A better ratio means clearer, more intelligible speech. Conversely, a distant mic picks up more ambient noise, requiring heavy post-processing that can introduce artifacts or unnatural sound. The tradeoff is simplicity versus potential complexity in editing. In real-world terms, close-miking often saves time and effort, making it the most reliable approach for unpredictable outdoor conditions.
Here are some practical tips:
- Use a lavalier or handheld mic close to the mouth.
- Position a shotgun just above and aimed toward the chest or mouth.
- Place a boom mic within a meter of the subject, aiming directly at their chest.
- Avoid relying on camera-mounted mics unless they’re very close.
As an affiliate, we earn on qualifying purchases.
How to Protect Against Wind Without Ruining Sound
Wind noise is a low-frequency rumble that can turn your crisp voice into a muddy mess. The solution? Physical wind protection. Foam covers are only good for light air. Outdoors, you need something more serious.
Use a furry windscreen (often called a dead cat) on lavalier mics or a blimp with a furry cover for shotgun mics. Even a simple DIY solution—like wrapping a mic in a scarf—can help in a pinch. Just remember, the goal is to block wind from hitting the capsule, not muffling the sound entirely.
Why does this matter? Wind creates low-frequency noise that can overload your mic’s capsule, causing distortion and making speech hard to understand. If untreated, wind noise can dominate the audio, forcing you into heavy post-processing or re-shoots. Investing in proper wind protection reduces this risk significantly. For instance, I once shot a documentary on a windy hillside. The furry windscreen cut wind noise by 80%, but the key was also positioning the mic in a sheltered spot and directing it into the wind’s face. This combination of physical barrier and strategic placement makes a huge difference. Keep in mind, even the best windscreen won’t eliminate all noise—sometimes, choosing a sheltered location is just as important as the gear.
Pro tip: Keep cable runs short and steady. Wind hits loose cables and can cause handling noise or static, which can be just as disruptive as wind itself. Proper cable management and minimal movement during recording help ensure clean audio.
As an affiliate, we earn on qualifying purchases.
Choosing a Location and Angle That Quiets the Chaos
Location is everything. A few meters can make a world of difference. When scouting, look for spots that naturally block noise: behind walls, parked vehicles, or under awnings. Avoid narrow streets with hard surfaces that reflect sound, and steer clear of intersections or busy loading zones.
Why does this matter? Sound reflections and ambient noise can severely degrade audio quality. Reflections from hard surfaces like concrete or metal can cause echo and muddiness, making speech less intelligible. Choosing a location with natural barriers reduces these reflections, resulting in clearer recordings. For example, I once did an interview on a street corner. Moving just 3 meters away from the curb behind a parked van cut the traffic noise in half. It’s often about finding that sweet spot where sound bounces less and your mic can do its job better. Additionally, positioning your gear behind objects like walls or vehicles can shield the microphone from direct noise sources, effectively reducing unwanted sound pickup. Remember, the goal is to minimize the noise reaching the mic without creating new reflections or echoes. Sometimes, a small move or an unobtrusive barrier can turn a muddy recording into something clear and intelligible.
When positioning your gear:
- Place the microphone behind objects that block direct traffic or crowd noise.
- Avoid pointing the mic toward noisy sources.
- Use natural barriers—buildings, trees, or parked cars—to reduce reflections.
- Pick sheltered spots, but be aware they might amplify some reflections if not chosen carefully.
lapel microphone for outdoor recording
As an affiliate, we earn on qualifying purchases.
As an affiliate, we earn on qualifying purchases.
Treat Traffic, Wind, and Crowd Noise Differently
Traffic, wind, and crowds each create unique challenges. Recognizing these differences helps you plan better.
Traffic noise is broadband and variable. It overlaps with speech frequencies, making it difficult to eliminate completely. Instead, focus on reducing its impact through close-miking and strategic positioning, which increases the ratio of speech to background noise. This way, even if some traffic sounds remain, they’re less intrusive and easier to manage during editing. Why does this matter? Because understanding the nature of traffic noise guides you to choose the right mic placement and environment, saving you hours of post-processing and frustration.
Wind noise is predominantly low-frequency and can overload your mic’s capsule, causing distortion. Proper physical barriers like furry windscreens and positioning your mic in sheltered spots are essential. Recognizing wind’s characteristics helps you anticipate when additional measures, like low-cut filters, are necessary. Why does this matter? Because effective wind management prevents the need for complex post-processing and ensures speech remains natural and clear.
Crowd noise is tricky because it shares the same frequency range as voices, often overlapping with speech sounds. This makes aggressive filtering risky, as it can distort the voice or leave residual noise. The best approach is to use close, directional mics and carefully select your location to minimize crowd interference. For example, during a festival interview, I used a shotgun aimed at the speaker’s chest behind a barrier. It helped reject distant chatter but couldn’t eliminate nearby crowd shouts. Recognizing the specific characteristics of each noise source allows you to tailor your equipment and positioning strategies, balancing practical limitations with achievable results. Remember, no single fix works for all noise types—each requires its own approach and understanding of the environment’s dynamics.
portable wind muff for microphones
As an affiliate, we earn on qualifying purchases.
As an affiliate, we earn on qualifying purchases.
Monitoring and Recording: Your Best Friends Outdoors
Never trust your ears only. Use closed-back headphones to monitor in real time. Listen for wind hitting the capsule, clothing rustle, RF interference, or sudden background noise spikes.
For example, I once recorded a political interview. I thought it was fine until I listened back and heard wind buffeting that wasn’t obvious on the meters. Catching it on the spot let me reposition the mic or put on an extra windscreen. Recognizing these issues early allows you to make adjustments that can salvage the recording, saving time and effort in post-production. Monitoring also helps catch problems caused by handling noise, cable movement, or clothing rustles that might not be apparent visually or through meters. For instance, during a shoot, I noticed a slight rustle from clothing that was causing subtle noise. Addressing it immediately prevented it from becoming a dominant artifact later. Don’t rely solely on level meters; your ears and headphones are vital tools. Check cables, mic placement, and clothing shifts throughout the shoot. Small issues can ruin otherwise good audio, so ongoing vigilance is key.
Why it matters: Real-time monitoring catches problems when they happen, allowing for immediate correction. This proactive approach ensures higher quality recordings and reduces the need for extensive post-processing fixes.
Recording Redundancy and Backup Strategies That Save the Day
Always record more than once. Use separate tracks for each mic, send a backup feed to the camera, or use a dual-system setup. It’s like having a spare tire—crucial when the unexpected hits.
For instance, during outdoor reporting, I set up a secondary recorder on the subject’s bodypack. When the main mic got blown away by a gust, I still had a clean backup. It saved hours of re-shoots.
Other tips include:
- Recording room tone or ambient outdoor sound for seamless editing.
- Double-check all gear before starting—nothing worse than a dead recorder during the take.
- Use batteries, media, and wind protection spares.
Redundancy isn’t just smart; it’s essential for unpredictable outdoor environments. Having multiple backups ensures that even if one system fails due to wind, technical glitch, or human error, you still have a reliable recording to work with. This proactive approach minimizes the risk of losing crucial audio, saving you time and frustration when conditions change unexpectedly. In the end, investing in redundancy means you’re prepared for the chaos of outdoor environments, allowing you to focus on capturing the story without worry.
New Tech Tools That Make Outdoor Recording Easier
Modern gear offers new ways to tame outdoor noise. 32-bit float recorders let you fix level issues after the fact. They won’t remove wind or traffic, but they prevent clipping and allow more flexible post-editing.
AI tools now help isolate dialogue and reduce steady background noise. They’re handy but not magic—heavy wind or overlapping voices still challenge them. Understanding these tools’ capabilities and limitations helps you choose the right approach and avoid overreliance on technology that can’t solve all problems. For example, I used a 32-bit float recorder in a noisy street interview. When a siren blared, I simply adjusted gain in post without clipping. It saved me hours of reworking the audio. These advances empower you to correct issues that were previously difficult or impossible to fix, but they are not substitutes for good technique. Combining new technology with solid mic placement and environment awareness yields the best results. Bottom line: tech can help, but good mic technique and location still matter most.
Post-Production Tricks to Salvage Noisy Outdoor Recordings
Post-processing can save a bad outdoor recording—if you start with decent audio. First, pick the cleanest mic track or combine sources carefully to avoid phase issues.
Use high-pass filters to cut rumble, but don’t overdo it—voice needs some low-end. Apply gentle noise reduction for steady background sounds, but beware of artifacts that make speech sound unnatural. Spectral repair tools can target specific noises like horns or sirens, but they’re not magic bullets. Sometimes, just replacing a noisy section with ambient sound from the same environment works best. For example, I once removed a loud honking car behind an interview by spectral editing, then filled gaps with ambient outdoor sound. It made the clip much more listenable. Remember: the goal is to preserve clarity, not to make the audio sterile or unnatural. Carefully balancing noise reduction with preserving the natural tone of your recording is key. Over-processing can lead to unnatural artifacts, making the audio less authentic. Also, consider re-recording if critical sections are too compromised. Being strategic in post ensures that your final product remains clear, natural, and engaging, despite initial challenges.
Guiding principles include always starting with the best possible source, then using targeted tools to clean up residual noise without sacrificing speech intelligibility. When in doubt, re-shoot if conditions allow, but rely on post-processing as a last resort.
Frequently Asked Questions
What is the best microphone for outdoor interviews?
The best microphone depends on your environment. A close lavalier is discreet and consistent, a shotgun can provide natural sound with good positioning, and a handheld dynamic mic works well in loud conditions. Focus on placement and wind protection first.
Are shotgun microphones good for traffic noise?
They can reduce off-axis traffic sounds, especially when aimed directly at the speaker. However, if traffic is behind the subject or mounted far away, rejection drops significantly. Always test your setup in the environment beforehand.
How do I stop wind noise?
Use proper physical wind protection—furry windscreens or blimps—and position your mic in sheltered spots. Moving into cover or behind barriers helps, and monitor with headphones to catch issues early. A low-cut filter can help with mild rumble but isn’t enough for heavy wind.
Should I hide a lavalier under clothing?
Only if necessary. Concealing can protect against wind or visual distractions, but it risks clothing rustle and muffling. Use dedicated mounts, keep the capsule clear of fabric, and test normal movements beforehand.
Can AI remove traffic or crowd noise completely?
Not entirely. AI helps with steady background noise and dialogue isolation, but loud, overlapping sounds and transient noises often leave artifacts. It’s best to capture clean sound at the source whenever possible.
Conclusion
Getting clean outdoor interview audio isn’t about expensive gear; it’s about smart placement, physical protection, and location choice. Your best sound often comes from controlling what you can see and touch, not fixing it later.
Next time you’re out, remember: a few meters and a furry windscreen can turn chaos into clarity. The real skill is knowing when to move, protect, and listen. That’s how you get stories worth hearing—loud and clear.
NFL season / tailgating Picks
team gear
As an affiliate, we earn on qualifying purchases.