TL;DR

Get audio and creator gear delivered free with Prime
- Fast, free delivery on millions of items
- Prime Video, Amazon Music and more included
- Member-only deals all year
Using an SPL meter to calibrate your studio monitors ensures consistent sound levels, preventing fatigue and improving mix accuracy. Regular calibration is essential, especially when equipment or environment change.
If your mixes sound different from one day to the next, or if your speakers seem to be ‘off’ even after dialing in, it’s time for a simple check. Calibrating your studio monitors with an SPL meter isn’t fancy tech—it’s a practical step to make your listening environment reliable. Think of it as tuning your speakers like a musician tunes their instrument—small adjustments that make a big difference.
The goal? Achieve a steady, true sound level that you can trust. Whether you’re mixing vocals or crafting beats, consistent monitor levels help you hear the real details without guesswork. In this guide, I’ll walk you through the straightforward process, recent trends making calibration easier, and what you need to know to keep your studio accurate and your ears happy.
Calibrating your monitors with an SPL meter ensures consistent, accurate sound levels—crucial for reliable mixing.
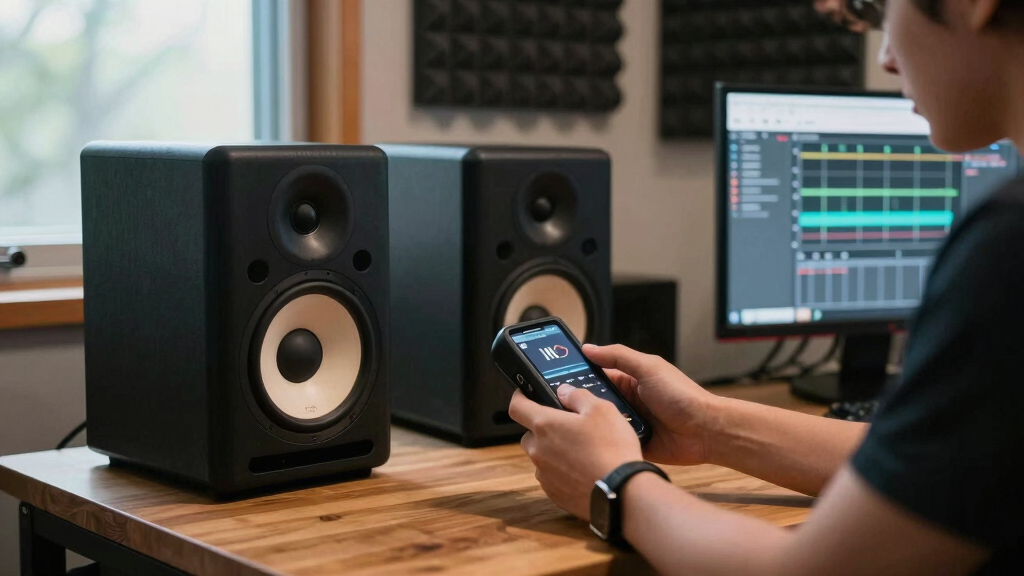
Position the SPL meter at ear level, about 1 meter from each monitor, and point it directly at the speaker for best readings.
Set your target SPL level at around 75 dB, but stay consistent and recheck regularly—especially after changes in your setup.
Use modern tools like Bluetooth SPL meters or calibration apps to simplify and improve accuracy.
Always calibrate each monitor individually if they have different sensitivities to keep your sound balanced.
How to Calibrate Studio Monitor Levels With an SPL Meter
TL;DR: An SPL meter gives your studio monitors a repeatable loudness reference, so yesterday’s mix decisions still make sense today. Calibrate each speaker at the listening position, aim for a steady target such as 75 dB SPL, and recheck whenever your room, gear, or monitor placement changes.
Small level shifts create big mix translation problems.
A difference of just 1-3 dB between monitors can skew balance, hide details, and push you into over-correcting a mix that was never the real problem.Calibration turns loudness into a trusted reference.
When the left and right monitors are not matched, your ears adapt to the wrong picture. You may chase phantom vocal harshness, underplay bass, or miss quiet details. A calibrated SPL reference keeps your listening level consistent, reduces fatigue, and makes your room a more reliable place to judge balance.
Hear the actual balance
Matched monitor levels keep center images stable and help panning, vocal level, kick-bass balance, and reverbs translate outside your studio.
Avoid loudness creep
A fixed SPL target prevents slowly turning up the monitors during long sessions, which can dull judgment and push aggressive EQ choices.
Document your baseline
Once you record your interface, monitor, and meter settings, you can return to the same listening reference after moving gear or updating a room.
The SPL meter workflow, step by step.
Use pink noise or a 1 kHz reference tone from your DAW or audio interface. Calibrate one monitor at a time, with the SPL meter at ear height in the listening position, and adjust until both monitors hit the same target level.
Set the meter
Place it at ear level where your head normally sits, about 1 meter from the monitor being measured.
Play reference audio
Send pink noise or a 1 kHz tone through one speaker at a controlled output level.
Dial the speaker
Adjust monitor gain until the meter reads your chosen target, commonly 75 dB SPL.
Match the pair
Repeat for the other monitor, correcting any mismatch until both read the same level.
Record settings
Write down interface output, monitor knobs, meter mode, and target SPL for fast recalibration.
Choose a level you can trust for hours.
For many small rooms, 75 dB SPL is loud enough to reveal detail without punishing your ears. Larger rooms or film-oriented workflows may use 85 dB SPL, but the winning move is consistency: same level, same position, same method.
Monitor mismatch example
If the left speaker reads 78 dB and the right reads 73 dB, the stereo image will pull left even when the mix is centered.
Reference level spectrum
Lower levels can hide detail. Higher levels can speed up fatigue. The practical studio sweet spot often sits around 75 dB SPL.
Pick the calibration setup that fits your room.
A dedicated SPL meter is still the cleanest starting point, but Bluetooth meters, calibration apps, measurement mics, and automated room systems can make the process quicker and more repeatable.
| Method | Best For | Level Matching | Room Insight | Setup Friction |
|---|---|---|---|---|
| Handheld SPL Meter | Fast monitor level checks | ✓ Strong | ~ Limited | ✓ Low |
| Bluetooth SPL Meter | Remote readings from the listening chair | ✓ Strong | ~ Moderate | ✓ Low |
| Phone App Only | Quick approximate checks | ~ Variable | ✗ Weak | ✓ Very Low |
| Measurement Mic + Software | Detailed room and speaker analysis | ✓ Strong | ✓ Strong | ~ Medium |
| Automated Calibration System | Advanced studio correction workflows | ✓ Strong | ✓ Strong | ~ Medium |
Recalibrate whenever the reference may have moved.
Studio accuracy is not a one-time achievement. Monitor sensitivity, knob positions, room reflections, furniture, seasonal acoustics, and interface settings can shift your reference over time.
After moving monitors, stands, desk, acoustic treatment, or the listening chair.
After replacing an audio interface, monitor controller, subwoofer, or speaker cable path.
When mixes suddenly feel brighter, darker, louder, or less centered than usual.
Every 3-6 months as a simple maintenance habit for consistent monitoring.
Trace the calibration chain.
Why Calibrating Your Monitors Matters More Than You Think
Calibrating your monitors isn’t just about loudness—it’s about accuracy. When your speakers are out of sync, your mixes might sound perfect in your room but flop elsewhere. Researchers show that even a 1-2 dB difference in monitor levels can cause poor translation to other listening systems.
Imagine mixing a vocal track with your monitors set too hot. Your ears get used to the aggressive sound, and you might boost frequencies that aren’t a problem on other systems. Conversely, if your levels are too low, you could miss critical details. Regular calibration ensures that what you hear is a true reflection of your audio, making your mixes more reliable across platforms.
Beyond translation, inconsistent levels can lead to ear fatigue, where your perception becomes less accurate over time. This fatigue can cause you to make less precise decisions, such as over-boosting or cutting frequencies, which affects the overall quality of your mix. Proper calibration helps prevent this by providing a stable listening environment, ultimately saving you time and reducing frustration during critical listening sessions. It’s a small investment with big implications for your mixing confidence and the consistency of your results.
As an affiliate, we earn on qualifying purchases.
Step-by-Step: How to Use an SPL Meter to Calibrate Your Monitors
- Position your SPL meter at ear level, about 1 meter from each monitor, pointed directly at the speaker grille or driver.
- Play a test tone or pink noise at a known level through your audio interface, set to a standard frequency (like 1 kHz).
- Adjust the monitor volume controls until the SPL meter reads your target level, typically 75 dB SPL.
- Repeat for each monitor to ensure they’re balanced at the same SPL.
- Record your settings for future reference, so you can quickly recalibrate if needed.
For example, if your left monitor hits 78 dB and your right hits 73 dB, turn down the left or up the right until both are at 75 dB. It’s all about consistency—your ears—and a simple number on the SPL meter.
Achieving this balance is crucial because our ears are more sensitive to certain frequencies and levels. Small discrepancies can lead to a skewed perception of your mix, making it sound good in your studio but off on other systems. By precisely matching SPL levels, you create a more reliable reference point, which helps you make better mixing decisions and reduces the need for frequent adjustments later.
As an affiliate, we earn on qualifying purchases.
Where and How to Place Your SPL Meter for Best Results
Your SPL meter placement affects accuracy. Position it at ear level, roughly where your head would be during mixing. Keep the microphone capsule pointed directly at the speaker grille, not angled or off to the side.
Maintain a steady distance—usually about 1 meter—so the readings are comparable across both monitors. If your room has reflective surfaces, consider placing the meter a few inches away from walls to avoid false readings caused by echoes.
For example, in my studio, I set up the SPL meter on a small stand, at my usual mixing chair position, making sure it faced directly at the monitor in front of me. This way, the measurements truly reflect what I hear.
Proper placement is critical because reflections, angles, and distances can significantly alter SPL readings. Placing the meter too close to a wall or angled away from the speaker can cause exaggerated or diminished readings, leading you to calibrate incorrectly. Consistent placement ensures that your calibration reflects your actual listening environment, which is essential for achieving reliable, repeatable results and maintaining your mix’s integrity across different listening scenarios.
digital SPL meter for audio mixing
As an affiliate, we earn on qualifying purchases.
As an affiliate, we earn on qualifying purchases.
Choosing the Right Calibration Level and Why It Matters
Most studios aim for a calibration level of around 75 dB SPL at the listening position. This level is loud enough to hear details without causing ear fatigue. It’s also a standard that many professional engineers use.
If you prefer a slightly louder mix environment, go for 85 dB SPL—but be aware it can tire your ears faster. The key is consistency: pick a level, stick with it, and calibrate every time you set up or change your environment.
Choosing the right SPL level is not just about comfort; it influences your perception of the mix. Too low, and you might miss subtle details; too high, and ear fatigue can diminish your ability to make precise judgments. Consistent calibration at the same SPL level ensures your ears adapt to a stable reference, which improves your ability to detect issues and make accurate adjustments over long sessions. Ultimately, selecting a standard level like 75 dB SPL balances detail and comfort, fostering better mixing decisions and reducing the risk of overcompensation or fatigue-induced mistakes.
As an affiliate, we earn on qualifying purchases.
Recent Tech That Makes Calibration Easier and More Accurate
Today, digital tools and smart SPL meters are changing the game. Bluetooth-enabled meters let you monitor levels remotely, while apps can guide you through calibration with visual cues. Some systems even analyze your room acoustics and suggest adjustments automatically.
For example, I use a Bluetooth SPL meter connected to my phone, which I place at ear level. The app shows real-time readings and helps me dial in the levels precisely. These tools reduce guesswork and make calibration faster and more accurate.
Microphone technology has also advanced, offering higher accuracy at lower costs. This means even budget-friendly measurement mics can deliver reliable readings for home studios.
Investing in these modern tools can dramatically improve your calibration process. They provide immediate feedback, help identify problematic frequencies or room issues, and allow for quick adjustments. As a result, you spend less time guessing and more time focusing on your mix, knowing your monitoring environment is calibrated to a high standard.
How Often Should You Re-Calibrate? Don’t Skip This Step
Regular re-calibration keeps your monitoring accurate, especially after moving gear, changing room setup, or even seasonal changes affecting acoustics. Most experts suggest checking every 3-6 months, or whenever you notice your mixes sounding off.
For example, after rearranging my studio furniture, I remeasured my monitor levels. The new setup introduced slight reflections, changing the SPL readings. A quick calibration fixed that, saving me hours of guesswork later. Over time, environmental changes, even minor ones like adding a new rug or changing speaker placement, can subtly alter your SPL levels. Regular recalibration ensures these small shifts don’t impact your mix translation.
This ongoing maintenance acts like tuning a musical instrument—keeping your monitoring system precise and your ears sharp for the best possible results.
What to Do if Your Monitors Have Different Sensitivities
If your monitors are different brands or models, they might produce different SPLs at the same volume setting. Use your SPL meter to set each monitor to the same SPL level—say, 75 dB—by adjusting their volume controls individually.
For example, my older Yamaha monitors needed a bit more volume than my newer KRK speakers to hit 75 dB SPL. Balancing them this way ensures your mix translates well, no matter which speaker you listen on. This is especially important because different monitors can have varying frequency responses and sensitivities, which can lead to unbalanced mixes if not calibrated properly.
By calibrating each monitor separately to the same SPL, you’re effectively normalizing their output levels. This approach helps maintain a balanced stereo image and prevents one speaker from dominating or being underrepresented, ensuring your mix remains consistent across different playback systems and environments.
Frequently Asked Questions
Why is calibrating studio monitors important?
It makes sure your mixes sound consistent across different systems. Without calibration, you risk over- or under-representing certain frequencies, leading to mixes that don’t translate well.
How often should I recalibrate my monitors?
Ideally, every 3-6 months, or whenever you change your setup. Regular checks keep your monitoring accurate and your ears fresh.
Can I calibrate without an SPL meter?
While software tools can help, an SPL meter gives the most objective and reliable measurement. It’s worth investing in one for precise calibration.
What is a good SPL level for calibration?
Most pros aim for about 75 dB SPL at the listening position. This level balances detail with comfort, preventing ear fatigue during long sessions.
How do I position the SPL meter correctly?
Place it at ear height, about 1 meter from each monitor, pointed directly at the speaker grille. Keep the setup consistent for best results.
Conclusion
Calibrating your studio monitors with an SPL meter is the simplest way to make your mixes more predictable. It’s like giving your ears a clear, steady baseline—so you’re always hearing the real deal, not just your room’s quirks.
Don’t skip this step. Regular calibration keeps your studio honest and your ears sharp. Think of it as tuning your studio like a pro—small effort for big results.
Halloween Picks
halloween
As an affiliate, we earn on qualifying purchases.